Category: 셀프 지압 루틴

  • 5-Minute Self-Acupressure Routine for Stress Relief

    5-Minute Self-Acupressure Routine for Stress Relief

    Quick Summary: A 5-minute self-acupressure routine for stress relief. Learn how to stimulate 5 acupoints — Hegu (LI4), Taichong (LR3), Shenmen (HT7), Baihui (GV20), and Neiguan (PC6) — step by step. An easy acupressure guide anyone can follow.
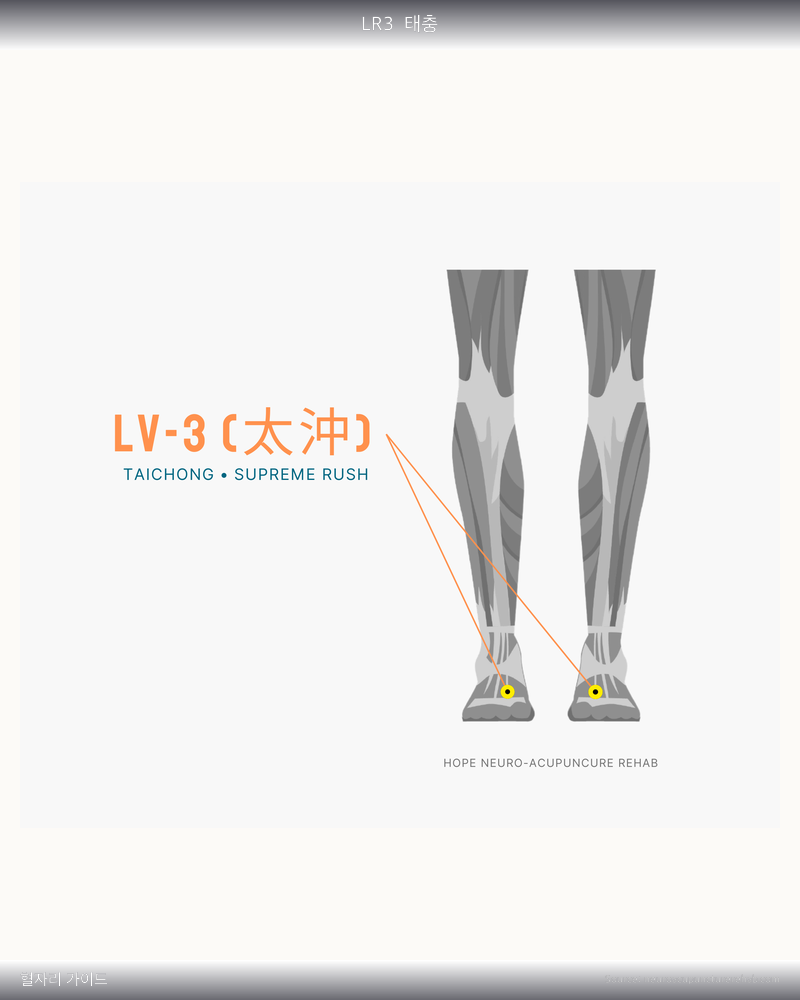
    LR3 혈자리 위치 그림

    5-Minute Self-Acupressure Routine for Stress Relief

    Who Is This For?

    • When work or study gives you a throbbing headache
    • When you feel irritable and can’t let go of frustration
    • When your shoulders and neck feel stiff and tense
    • When you can’t stop racing thoughts at bedtime
    • When you want to calm your nerves before an exam or interview

    Before You Start

    1. Find a comfortable position. Sit in a chair or on the floor.
    2. Rub your hands together to warm them up. Warm hands stimulate acupoints more effectively.
    3. Take 3 deep breaths. Inhale through your nose and exhale slowly through your mouth.

    Ready? Let’s get started!

    5-Minute Routine — Let’s Go!

    Spend 1 minute on each acupoint — 5 minutes total. Follow along slowly!

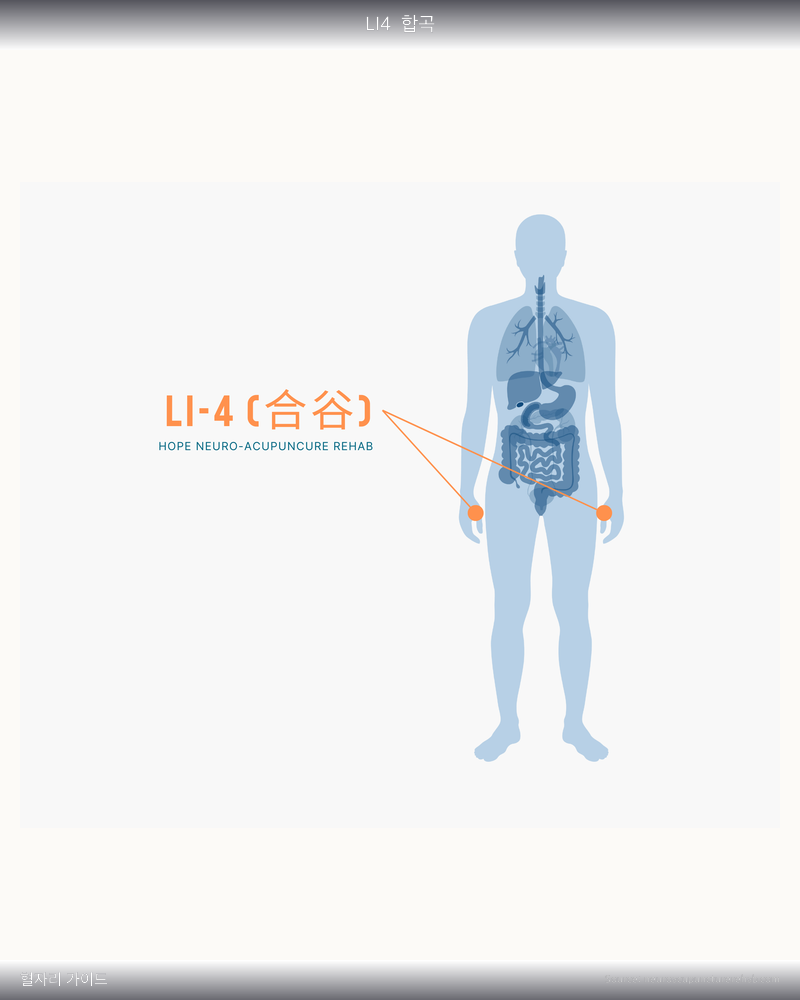
    Step 1 — Press Hegu (LI4) [0:00~1:00]

    LI4 acupuncture point

    Location: The webbing between your thumb and index finger

    Method: Press the webbing firmly with the opposite thumb. You’ve found the right spot when you feel a dull ache.

    Timing: Press firmly for 3-5 seconds → rest 3 seconds → repeat 5 times (about 1 minute)

    Effect: Releases tension and clears your mind.

    Step 2 — Press Taichong (LR3) [1:00~2:00]

    Location: Between the big toe and second toe, where the bones meet on top of the foot

    Method: Use your thumb to press between the bones, sliding toward the top of the foot.

    Timing: Press firmly for 3-5 seconds → rest 3 seconds → repeat 5 times (about 1 minute)

    Effect: Soothes liver energy to relieve anger and stress.

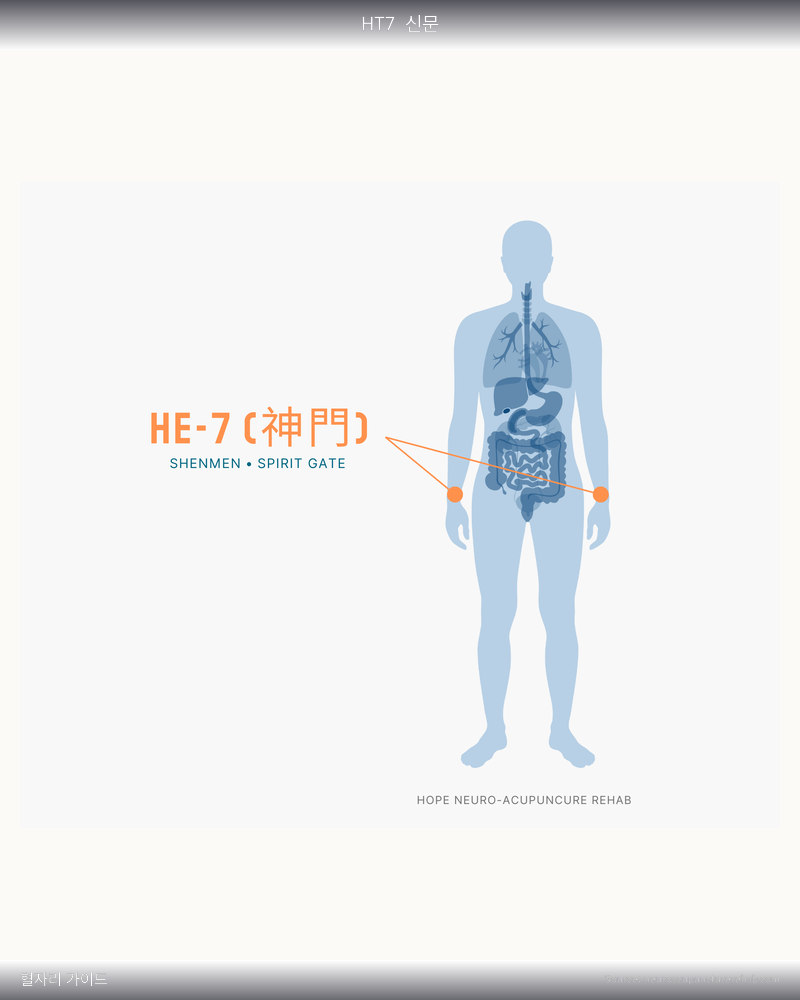
    Step 3 — Press Shenmen (HT7) [2:00~3:00]

    HT7 acupuncture point

    Location: On the inner wrist crease, in the hollow next to the tendon on the pinky side

    Method: Gently press the hollow area on the wrist crease with your opposite thumb.

    Timing: Press firmly for 3-5 seconds → rest 3 seconds → repeat 5 times (about 1 minute)

    Effect: Calms a racing heart and brings peace to your mind.

    Step 4 — Press Baihui (GV20) [3:00~4:00]

    Location: The very top center of the head (where a line connecting the ears meets the midline)

    Method: Stack your middle fingers and gently press the crown of your head. A warm sensation is a good sign.

    Timing: Press firmly for 3-5 seconds → rest 3 seconds → repeat 5 times (about 1 minute)

    Effect: Clears stagnant energy from the head and sharpens your mind.

    Step 5 — Press Neiguan (PC6) [4:00~5:00]

    PC6 acupuncture point

    Location: Three finger-widths above the inner wrist crease, toward the elbow

    Method: Press firmly between the two tendons on the inner wrist with your opposite thumb.

    Timing: Press firmly for 3-5 seconds → rest 3 seconds → repeat 5 times (about 1 minute)

    Effect: Relieves chest tightness and brings emotional comfort.

    Great job! Routine complete!

    Finish with 3 deep breaths. Can you feel your body getting lighter?

    Routine at a Glance

    Step Acupoint Location Time Effect
    1 Hegu (LI4) Webbing between thumb and index finger 0:00~1:00 Releases tension and clears the mind.
    2 Taichong (LR3) Between big toe and second toe where bones meet 1:00~2:00 Soothes liver energy to relieve anger and stress.
    3 Shenmen (HT7) Inner wrist crease, hollow next to pinky-side tendon 2:00~3:00 Calms a racing heart and brings peace of mind.
    4 Baihui (GV20) Top center of the head 3:00~4:00 Clears stagnant energy and sharpens the mind.
    5 Neiguan (PC6) Three finger-widths above inner wrist crease 4:00~5:00 Relieves chest tightness and brings emotional comfort.

    Pro Tips

    • Doing this before work or during lunch break can improve your afternoon focus.
    • Practicing 2-3 times daily can build your stress resilience.
    • Having caffeine 30 minutes after acupressure enhances the effect.
    • Combining deep breathing with acupressure doubles the benefits!

    Frequently Asked Questions

    Q. How many times a day should I do the stress acupressure routine?

    A. 2-3 times a day — morning, noon, and evening — is most effective. Especially try it right when you feel stressed.

    Q. Should it hurt when I press the acupoints?

    A. A dull ache with a “ah, that feels good” sensation is just right. Pressing too hard can tense the muscles, so keep it at a comfortable level.

    Q. Can I do this routine at the office?

    A. Of course! Hegu, Shenmen, and Neiguan are near your hands, so you can do them right at your desk. For Taichong (foot), briefly slip off your shoe, and for Baihui (crown), just lightly press.

    Q. Will I feel the effects of stress acupressure right away?

    A. Most people feel their shoulders lighten and their mind clear after just one session. With consistent practice for 2+ weeks, your overall stress management improves.

    Q. Is stress acupressure safe for pregnant women?

    A. Hegu (LI4) in this routine may cause strong stimulation for pregnant women. During pregnancy, consult a licensed practitioner before proceeding.
    Pregnancy Warning: Hegu (LI4) included in this routine may stimulate uterine contractions and is not recommended for pregnant women. During pregnancy, skip this acupoint or consult a licensed practitioner before proceeding.
    Medical Disclaimer: This article is for informational purposes only and does not replace professional medical diagnosis or treatment. If symptoms persist or worsen, please consult a healthcare professional.
  • Insomnia Self-Acupressure Routine 5 Minutes

    Insomnia Self-Acupressure Routine 5 Minutes

    Summary: A 5-minute self-acupressure routine for insomnia relief. Learn how to stimulate 5 acupoints in order: HT7, PC6, SP6, GV20, and EX-HN3. An easy acupressure guide anyone can follow without photos.
    HT7 혈자리 위치 그림

    🎯 Insomnia Self-Acupressure Routine 5 Minutes

    🙋 Recommended For You If…

    • You can’t fall asleep for more than 30 minutes after lying down
    • You wake up frequently and can’t get deep sleep
    • Your mind won’t stop racing and you toss and turn
    • You want to fall asleep naturally without sleeping pills
    • You feel sleepy during the day but wide awake at night

    🧘 Before You Begin

    1. Find a comfortable position. You can sit on a chair or comfortably on the floor.
    2. Rub your hands together to warm them up. Warm hands stimulate acupoints more effectively.
    3. Take 3 deep breaths in and out. Inhale through your nose and exhale slowly through your mouth.

    Ready? Let’s get started! 💪

    ⏱️ Start the 5-Minute Routine!

    Spend 1 minute on each acupoint — 5 minutes total. Follow along slowly!

    Step 1 — Press HT7 (Shenmen) [0:00~1:00]

    HT7 acupuncture point

    📍 Location: The inner wrist crease, in the hollow on the little-finger side of the tendon

    👆 Method: Use the opposite thumb to gently press into the hollow above the wrist crease.

    ⏱️ Time: Press firmly for 3–5 seconds → Rest for 3 seconds → Repeat 5 times (about 1 minute)

    ✨ Effect: Calms heart heat and steadies the mind to invite sleep.

    Step 2 — Press PC6 (Neiguan) [1:00~2:00]

    PC6 acupuncture point

    📍 Location: 3 finger-widths above the inner wrist crease, toward the elbow

    👆 Method: Use the opposite thumb to press firmly between the two tendons on the inner wrist.

    ⏱️ Time: Press firmly for 3–5 seconds → Rest for 3 seconds → Repeat 5 times (about 1 minute)

    ✨ Effect: Releases tension and induces deep sleep.

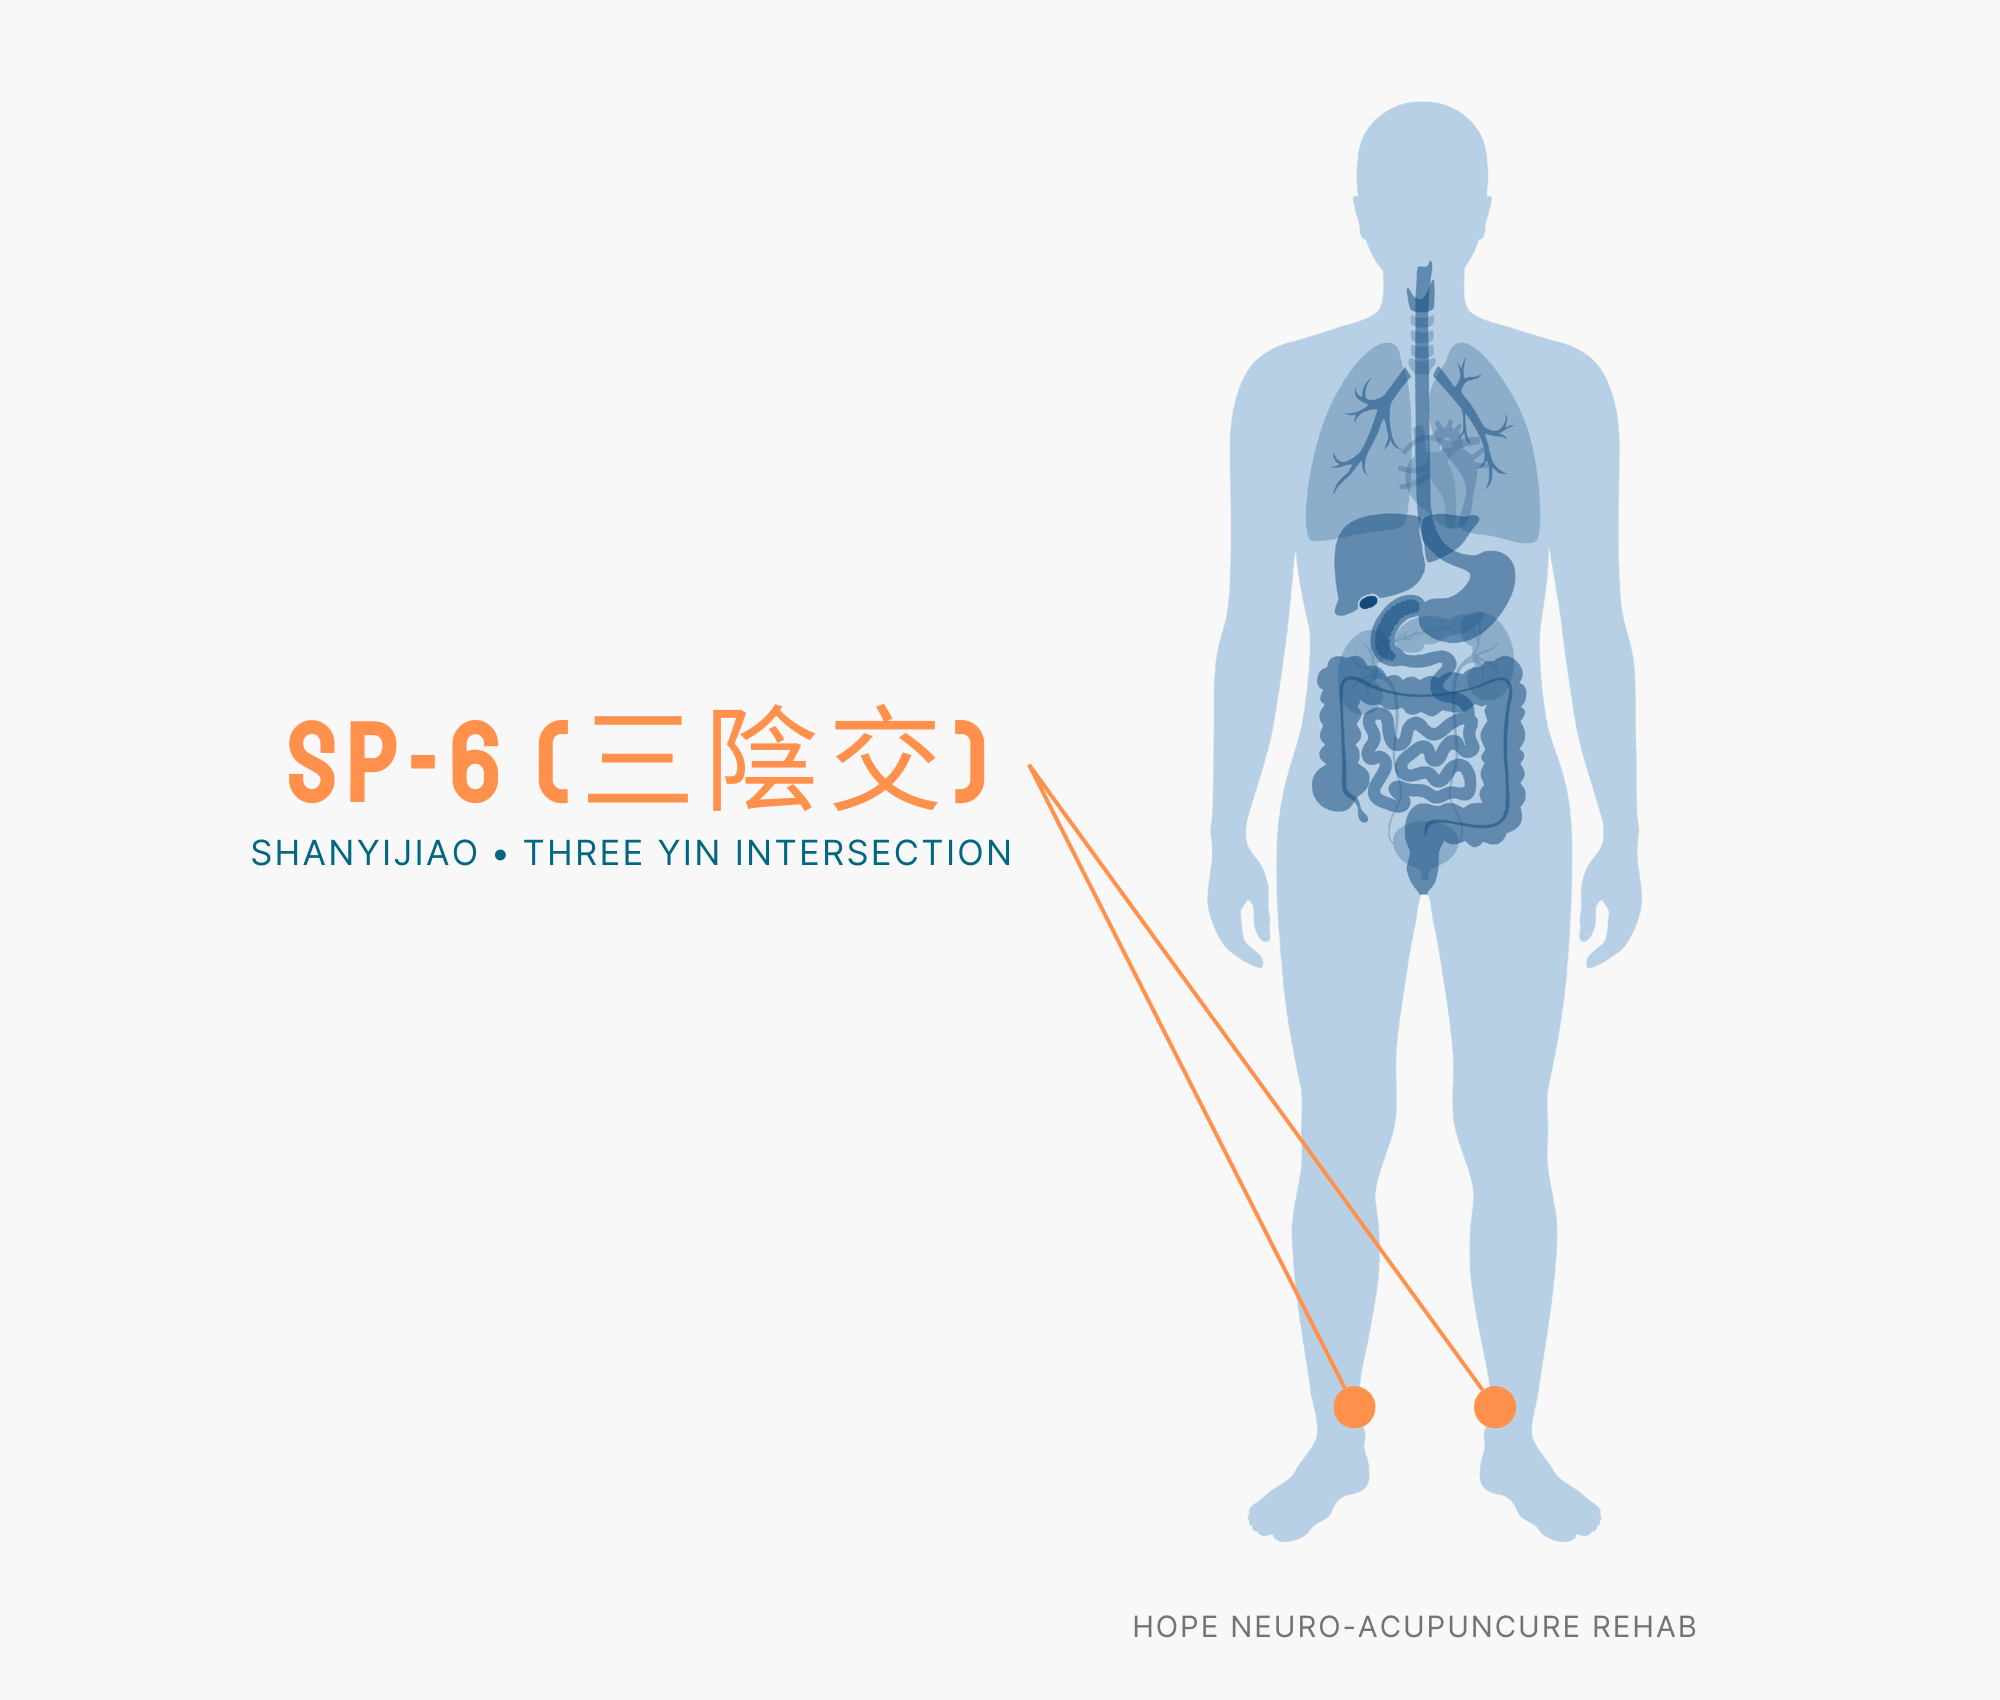
    Step 3 — Press SP6 (Sanyinjiao) [2:00~3:00]

    SP6 acupuncture point

    📍 Location: 4 finger-widths above the inner ankle bone

    👆 Method: Use the opposite thumb to press the inner side of the shin, pushing upward along the bone.

    ⏱️ Time: Press firmly for 3–5 seconds → Rest for 3 seconds → Repeat 5 times (about 1 minute)

    ✨ Effect: Where the liver, spleen, and kidney meridians meet! Nourishes yin energy to support deep sleep.

    Step 4 — Press GV20 (Baihui) [3:00~4:00]

    📍 Location: The center of the top of the head (the highest point on the line connecting both ears)

    👆 Method: Overlap the middle fingers of both hands and lightly press the crown of the head. A warm sensation is a good sign.

    ⏱️ Time: Press firmly for 3–5 seconds → Rest for 3 seconds → Repeat 5 times (about 1 minute)

    ✨ Effect: Concentrates yang energy to cool the head and calm the mind.

    Step 5 — Press EX-HN3 (Yintang) [4:00~5:00]

    📍 Location: The midpoint between the two eyebrows on the forehead

    👆 Method: Use the tip of your middle finger to gently press the center between your eyebrows. Closing your eyes makes it even better.

    ⏱️ Time: Press firmly for 3–5 seconds → Rest for 3 seconds → Repeat 5 times (about 1 minute)

    ✨ Effect: Releases tension in the forehead and brings mental stillness.

    🎉 Great job! Routine complete!

    Finish with 3 deep breaths. Do you feel lighter?

    📋 Quick-Reference Routine Chart

    Step Acupoint Location Time Effect
    1 HT7 (Shenmen) Inner wrist crease, hollow on the little-finger side of the tendon 0:00~1:00 Calms heart heat and steadies the mind to invite sleep.
    2 PC6 (Neiguan) 3 finger-widths above the inner wrist crease, toward the elbow 1:00~2:00 Releases tension and induces deep sleep.
    3 SP6 (Sanyinjiao) 4 finger-widths above the inner ankle bone 2:00~3:00 Where the liver, spleen, and kidney meridians meet! Nourishes yin energy to support deep sleep.
    4 GV20 (Baihui) Center of the top of the head (highest point on the line connecting both ears) 3:00~4:00 Concentrates yang energy to cool the head and calm the mind.
    5 EX-HN3 (Yintang) Midpoint between the two eyebrows on the forehead 4:00~5:00 Releases tension in the forehead and brings mental stillness.

    🍯 Tips

    • Doing it 30 minutes before bedtime is most effective.
    • Dim the lights and put your phone down before you start.
    • Avoiding caffeine after 2 pm enhances the effect of acupressure.
    • Doing it after a warm foot soak doubles the sleep-inducing effect.

    ❓ Frequently Asked Questions

    Q. When is the best time to do insomnia acupressure?

    A. Doing it 30 minutes before bed is ideal. Pressing gently while lying in bed can help sleep come naturally.

    Q. Do I need to do it every day to see results?

    A. Yes, sleep habits don’t change overnight. You need to practice consistently every day for at least 2 weeks to notice an improvement in sleep quality.

    Q. I’m taking sleeping pills — is it safe to do acupressure at the same time?

    A. Yes, acupressure has no interaction with medication, so it is safe to combine. However, always consult your doctor before stopping sleeping pills.

    Q. Does this routine help with insomnia in children?

    A. It is suitable for children aged 6 and older. Gently pressing HT7 and EX-HN3 can help children fall asleep comfortably.

    Q. Should pregnant women avoid SP6 (Sanyinjiao)?

    A. Yes, SP6 can stimulate the uterus, so pregnant women should skip this point and do only the remaining 4 acupoints.

    ⚠️ Pregnancy Warning: Pregnant women should avoid pressing this acupoint as it may stimulate uterine contractions.
    ⚠️ Medical Disclaimer: This article is for informational purposes only and does not replace professional medical diagnosis or treatment. If symptoms persist or worsen, please consult a healthcare professional.
  • Menstrual Pain Relief Self-Acupressure Routine 5 Minutes

    Menstrual Pain Relief Self-Acupressure Routine 5 Minutes

    Summary: A 5-minute self-acupressure routine for menstrual pain relief. Learn how to stimulate 5 acupoints in order: SP6, CV4, LR3, SP8, and ST36. An easy acupressure guide anyone can follow without photos.

    🎯 Menstrual Pain Relief Self-Acupressure Routine 5 Minutes

    🙋 Recommended For You If…

    • Your lower abdomen aches before and after your period starts
    • Menstrual cramps make daily activities difficult
    • Your back also aches along with your period pain
    • You want to manage the pain naturally and reduce reliance on painkillers
    • You experience abdominal bloating and discomfort before your period

    🧘 Before You Begin

    1. Find a comfortable position. You can sit on a chair or comfortably on the floor.
    2. Rub your hands together to warm them up. Warm hands stimulate acupoints more effectively.
    3. Take 3 deep breaths in and out. Inhale through your nose and exhale slowly through your mouth.

    Ready? Let’s get started! 💪

    ⏱️ Start the 5-Minute Routine!

    Spend 1 minute on each acupoint — 5 minutes total. Follow along slowly!

    Step 1 — Press SP6 (Sanyinjiao) [0:00~1:00]

    SP6 acupuncture point

    📍 Location: 4 finger-widths above the inner ankle bone

    👆 Method: Use the opposite thumb to press the inner side of the shin, pushing upward along the bone.

    ⏱️ Time: Press firmly for 3–5 seconds → Rest for 3 seconds → Repeat 5 times (about 1 minute)

    ✨ Effect: The key acupoint connected to the uterus! The most effective point for menstrual pain.

    Step 2 — Press CV4 (Guanyuan) [1:00~2:00]

    📍 Location: 4 finger-widths below the navel

    👆 Method: Overlap both hands, place them below the navel, and gently rotate clockwise.

    ⏱️ Time: Press firmly for 3–5 seconds → Rest for 3 seconds → Repeat 5 times (about 1 minute)

    ✨ Effect: Warms the lower abdomen to reduce uterine cramping.

    Step 3 — Press LR3 (Taichong) [2:00~3:00]

    📍 Location: Where the bones of the big toe and second toe meet on the top of the foot

    👆 Method: Use your thumb to press into the space between the bones, pushing toward the top of the foot.

    ⏱️ Time: Press firmly for 3–5 seconds → Rest for 3 seconds → Repeat 5 times (about 1 minute)

    ✨ Effect: Promotes Qi and blood circulation to relieve lower abdominal pain.

    Step 4 — Press SP8 (Diji) [3:00~4:00]

    SP8 acupuncture point

    📍 Location: 4 finger-widths below the inner side of the knee

    👆 Method: Use your thumb to press firmly next to the bone below the inner knee. It may be a bit tender!

    ⏱️ Time: Press firmly for 3–5 seconds → Rest for 3 seconds → Repeat 5 times (about 1 minute)

    ✨ Effect: Quickly reduces acute menstrual cramp pain.

    Step 5 — Press ST36 (Zusanli) [4:00~5:00]

    ST36 acupuncture point

    📍 Location: 4 finger-widths below the knee, on the outer side

    👆 Method: Use your thumb to press firmly on the outer side of the shinbone. A heavy, full sensation means you’ve found the right spot.

    ⏱️ Time: Press firmly for 3–5 seconds → Rest for 3 seconds → Repeat 5 times (about 1 minute)

    ✨ Effect: Replenishes Qi and blood to boost overall condition.

    🎉 Great job! Routine complete!

    Finish with 3 deep breaths. Do you feel lighter?

    📋 Quick-Reference Routine Chart

    Step Acupoint Location Time Effect
    1 SP6 (Sanyinjiao) 4 finger-widths above the inner ankle bone 0:00~1:00 The key acupoint connected to the uterus! The most effective point for menstrual pain.
    2 CV4 (Guanyuan) 4 finger-widths below the navel 1:00~2:00 Warms the lower abdomen to reduce uterine cramping.
    3 LR3 (Taichong) Where the bones of the big toe and second toe meet on the top of the foot 2:00~3:00 Promotes Qi and blood circulation to relieve lower abdominal pain.
    4 SP8 (Diji) 4 finger-widths below the inner side of the knee 3:00~4:00 Quickly reduces acute menstrual cramp pain.
    5 ST36 (Zusanli) 4 finger-widths below the knee, on the outer side 4:00~5:00 Replenishes Qi and blood to boost overall condition.

    🍯 Tips

    • Starting 2–3 days before your period begins has a preventive effect.
    • Placing a heat pack or warm towel on your abdomen while doing acupressure doubles the effect!
    • During your period, it’s fine to increase to 3 times a day.
    • Combining with warm ginger tea or jujube tea is even better for Qi and blood circulation.

    ❓ Frequently Asked Questions

    Q. Does it work immediately when cramps are severe?

    A. SP6 and SP8 have an immediate pain-relieving effect. You can usually feel the pain diminishing within 20–30 minutes after completing the 5-minute routine.

    Q. Is it safe to combine with painkillers?

    A. Yes, acupressure has no interaction with medication, so it is safe to combine. Using acupressure alongside medication can help reduce the amount of painkiller needed.

    Q. Is it beneficial to do this when I’m not on my period?

    A. Absolutely! Doing it regularly improves Qi and blood circulation so that period pain itself can lessen over time. Try doing it 3 or more times per week.

    Q. I have uterine fibroids — is this routine safe for me?

    A. Light stimulation is generally fine, but if the fibroids are large or there is heavy bleeding, consult a gynecologist or traditional medicine practitioner first.

    Q. Is SP6 (Sanyinjiao) dangerous for pregnant women?

    A. Yes, SP6 can stimulate uterine contractions, so pregnant women must never stimulate this acupoint. For pain during pregnancy, consult a gynecologist.

    ⚠️ Pregnancy Warning: Pregnant women should avoid pressing this acupoint as it may stimulate uterine contractions.
    ⚠️ Medical Disclaimer: This article is for informational purposes only and does not replace professional medical diagnosis or treatment. If symptoms persist or worsen, please consult a healthcare professional.
  • Indigestion Self-Acupressure Routine 5 Minutes

    Indigestion Self-Acupressure Routine 5 Minutes

    Summary: A 5-minute self-acupressure routine for indigestion relief. Learn how to stimulate 5 acupoints in order: ST36, CV12, PC6, SP4, and ST25. An easy acupressure guide anyone can follow without photos.
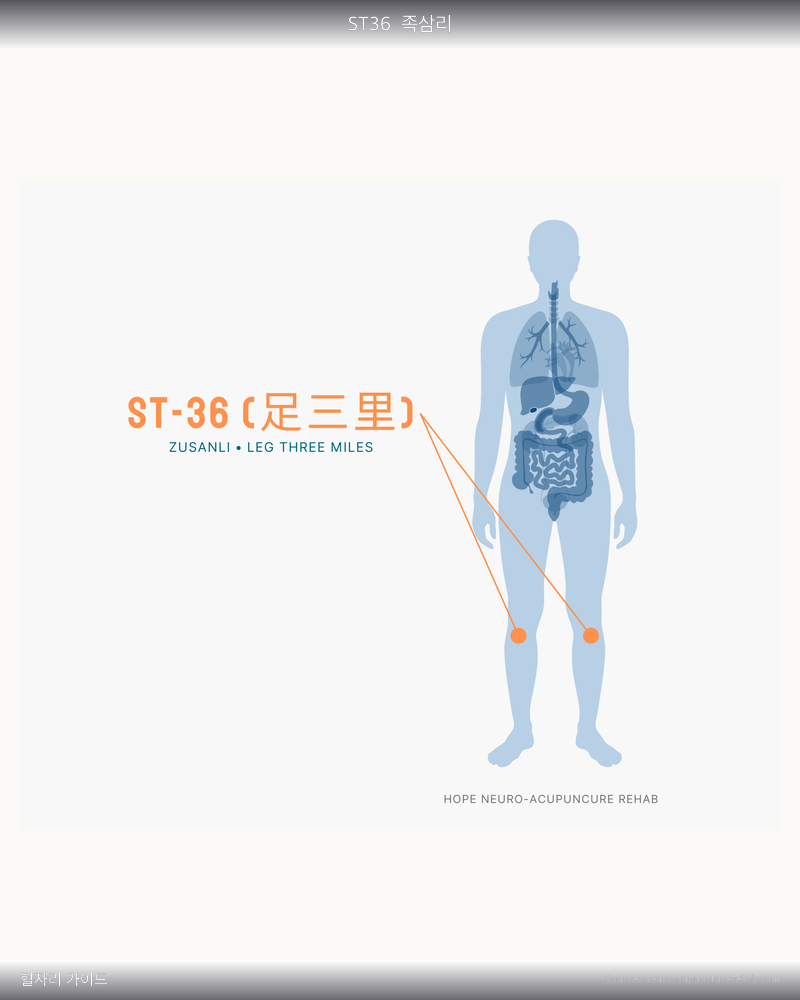
    ST36 혈자리 위치 그림

    🎯 Indigestion Self-Acupressure Routine 5 Minutes

    🙋 Recommended For You If…

    • Your stomach feels bloated and heavy after a meal
    • You have poor digestion and feel like food is stuck
    • Your stomach is sensitive due to stress
    • Your epigastric area feels uncomfortable and you have gas
    • Your stomach is upset after overeating

    🧘 Before You Begin

    1. Find a comfortable position. You can sit on a chair or comfortably on the floor.
    2. Rub your hands together to warm them up. Warm hands stimulate acupoints more effectively.
    3. Take 3 deep breaths in and out. Inhale through your nose and exhale slowly through your mouth.

    Ready? Let’s get started! 💪

    ⏱️ Start the 5-Minute Routine!

    Spend 1 minute on each acupoint — 5 minutes total. Follow along slowly!

    Step 1 — Press ST36 (Zusanli) [0:00~1:00]

    ST36 acupuncture point

    📍 Location: 4 finger-widths below the knee, on the outer side

    👆 Method: Use your thumb to press firmly on the outer side of the shinbone. A heavy, full sensation means you’ve found the right spot.

    ⏱️ Time: Press firmly for 3–5 seconds → Rest for 3 seconds → Repeat 5 times (about 1 minute)

    ✨ Effect: Activates stomach movement to promote digestion.

    Step 2 — Press CV12 (Zhongwan) [1:00~2:00]

    📍 Location: The midpoint between the sternum and the navel

    👆 Method: Overlap both hands and gently rotate clockwise between the sternum and navel.

    ⏱️ Time: Press firmly for 3–5 seconds → Rest for 3 seconds → Repeat 5 times (about 1 minute)

    ✨ Effect: The signature stomach acupoint! Directly improves digestive power.

    Step 3 — Press PC6 (Neiguan) [2:00~3:00]

    PC6 acupuncture point

    📍 Location: 3 finger-widths above the inner wrist crease, toward the elbow

    👆 Method: Use the opposite thumb to press firmly between the two tendons on the inner wrist.

    ⏱️ Time: Press firmly for 3–5 seconds → Rest for 3 seconds → Repeat 5 times (about 1 minute)

    ✨ Effect: Calms nausea and an unsettled stomach.

    Step 4 — Press SP4 (Gongsun) [3:00~4:00]

    SP4 acupuncture point

    📍 Location: Behind the prominent bone on the inner side of the big toe

    👆 Method: Use your thumb to press firmly behind the bone at the inner arch of the foot.

    ⏱️ Time: Press firmly for 3–5 seconds → Rest for 3 seconds → Repeat 5 times (about 1 minute)

    ✨ Effect: Enhances spleen function to aid food digestion.

    Step 5 — Press ST25 (Tianshu) [4:00~5:00]

    ST25 acupuncture point

    📍 Location: 3 finger-widths on either side of the navel

    👆 Method: Place the index and middle fingers of both hands on either side of the navel and slowly rotate clockwise.

    ⏱️ Time: Press firmly for 3–5 seconds → Rest for 3 seconds → Repeat 5 times (about 1 minute)

    ✨ Effect: Promotes intestinal movement to relieve bloating and constipation.

    🎉 Great job! Routine complete!

    Finish with 3 deep breaths. Do you feel lighter?

    📋 Quick-Reference Routine Chart

    Step Acupoint Location Time Effect
    1 ST36 (Zusanli) 4 finger-widths below the knee, on the outer side 0:00~1:00 Activates stomach movement to promote digestion.
    2 CV12 (Zhongwan) The midpoint between the sternum and the navel 1:00~2:00 The signature stomach acupoint! Directly improves digestive power.
    3 PC6 (Neiguan) 3 finger-widths above the inner wrist crease, toward the elbow 2:00~3:00 Calms nausea and an unsettled stomach.
    4 SP4 (Gongsun) Behind the prominent bone on the inner side of the big toe 3:00~4:00 Enhances spleen function to aid food digestion.
    5 ST25 (Tianshu) 3 finger-widths on either side of the navel 4:00~5:00 Promotes intestinal movement to relieve bloating and constipation.

    🍯 Tips

    • Doing it 30 minutes to 1 hour after a meal is most effective for promoting digestion.
    • Abdominal acupressure should always be performed clockwise to align with intestinal movement.
    • Warm water or barley tea is better than cold drinks to combine with this routine.
    • ST36 is the “all-in-one stomach point” — pressing it before and after meals helps improve digestive power.

    ❓ Frequently Asked Questions

    Q. Does this routine work immediately when I have indigestion?

    A. Yes! In particular, CV12 and ST36 have an immediate effect on relieving stagnation. Drinking warm water while pressing makes it even better.

    Q. Is it okay to press the abdomen if I have gastritis?

    A. Light rubbing is fine, but if you have severe gastritis or a stomach ulcer, avoid direct stimulation on the abdomen and focus on ST36 and PC6 instead.

    Q. Does it help with irritable bowel syndrome (IBS)?

    A. ST25 and CV12 help normalize intestinal function. With consistent practice, symptoms of abdominal pain, diarrhea, and constipation may improve.

    Q. Is it okay to do acupressure on an empty stomach in the morning?

    A. Yes, gently rubbing CV12 and ST25 on an empty stomach in the morning wakes up the digestive system and improves appetite.

    Q. Does it help with acid reflux (GERD)?

    A. PC6 helps relieve acid reflux symptoms. However, for severe cases, be sure to see a gastroenterologist and use acupressure as a supplementary measure.

    ⚠️ Medical Disclaimer: This article is for informational purposes only and does not replace professional medical diagnosis or treatment. If symptoms persist or worsen, please consult a healthcare professional.
  • Headache Relief Self-Acupressure Routine 5 Minutes

    Headache Relief Self-Acupressure Routine 5 Minutes

    Summary: A 5-minute self-acupressure routine for headache relief. Learn how to stimulate 5 acupoints in order: LI4, GB20, EX-HN5, GV20, and LR3. An easy acupressure guide anyone can follow without photos.
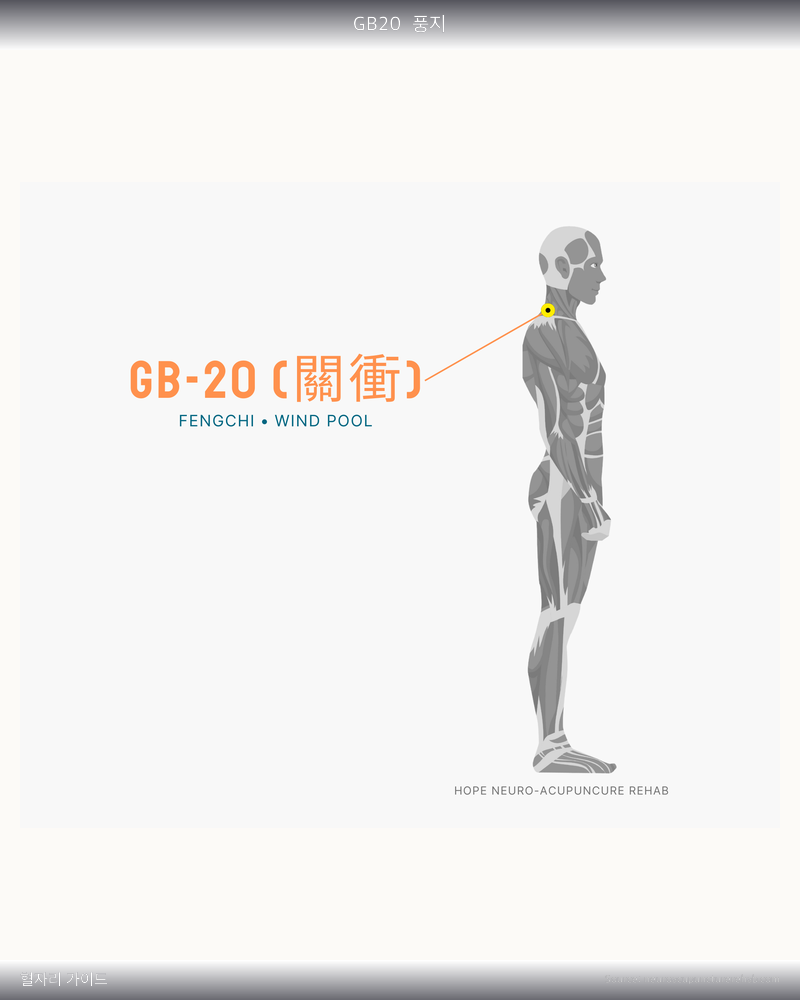
    GB20 혈자리 위치 그림

    🎯 Headache Relief Self-Acupressure Routine 5 Minutes

    🙋 Recommended For You If…

    • Your head throbs from prolonged computer or smartphone use
    • You feel the early warning signs of a migraine coming on
    • Your head feels heavy when the weather is overcast or air pressure changes
    • You want to relieve a headache naturally before taking medication
    • A headache suddenly comes on during a meeting or class

    🧘 Before You Begin

    1. Find a comfortable position. You can sit on a chair or comfortably on the floor.
    2. Rub your hands together to warm them up. Warm hands stimulate acupoints more effectively.
    3. Take 3 deep breaths in and out. Inhale through your nose and exhale slowly through your mouth.

    Ready? Let’s get started! 💪

    ⏱️ Start the 5-Minute Routine!

    Spend 1 minute on each acupoint — 5 minutes total. Follow along slowly!

    Step 1 — Press LI4 (Hegu) [0:00~1:00]

    LI4 acupuncture point

    📍 Location: The webbing between the thumb and index finger

    👆 Method: Use the opposite thumb to press firmly into the webbing. A slight aching sensation means you’ve found the right spot.

    ⏱️ Time: Press firmly for 3–5 seconds → Rest for 3 seconds → Repeat 5 times (about 1 minute)

    ✨ Effect: Quickly relieves pain in the head and face.

    Step 2 — Press GB20 (Fengchi) [1:00~2:00]

    GB20 acupuncture point

    📍 Location: The hollows on both sides below the back of the skull

    👆 Method: Place both thumbs in the hollows below the back of the skull and press upward.

    ⏱️ Time: Press firmly for 3–5 seconds → Rest for 3 seconds → Repeat 5 times (about 1 minute)

    ✨ Effect: Refreshingly relieves headaches at the back of the head and temples.

    Step 3 — Press EX-HN5 (Taiyang) [2:00~3:00]

    📍 Location: The hollow at the temple, between the outer corner of the eye and the tip of the eyebrow

    👆 Method: Use the middle fingers of both hands to gently press circles at the temples.

    ⏱️ Time: Press firmly for 3–5 seconds → Rest for 3 seconds → Repeat 5 times (about 1 minute)

    ✨ Effect: Relieves temporal pain and eye fatigue at the same time.

    Step 4 — Press GV20 (Baihui) [3:00~4:00]

    📍 Location: The center of the top of the head (the highest point on the line connecting both ears)

    👆 Method: Overlap the middle fingers of both hands and lightly press the crown of the head. A warm sensation is a good sign.

    ⏱️ Time: Press firmly for 3–5 seconds → Rest for 3 seconds → Repeat 5 times (about 1 minute)

    ✨ Effect: Improves Qi and blood circulation throughout the head to eliminate the headache.

    Step 5 — Press LR3 (Taichong) [4:00~5:00]

    📍 Location: Where the bones of the big toe and second toe meet on the top of the foot

    👆 Method: Use your thumb to press into the space between the bones, pushing toward the top of the foot.

    ⏱️ Time: Press firmly for 3–5 seconds → Rest for 3 seconds → Repeat 5 times (about 1 minute)

    ✨ Effect: Clears heat from the liver to relieve the headache.

    🎉 Great job! Routine complete!

    Finish with 3 deep breaths. Do you feel lighter?

    📋 Quick-Reference Routine Chart

    Step Acupoint Location Time Effect
    1 LI4 (Hegu) The webbing between the thumb and index finger 0:00~1:00 Quickly relieves pain in the head and face.
    2 GB20 (Fengchi) The hollows on both sides below the back of the skull 1:00~2:00 Refreshingly relieves headaches at the back of the head and temples.
    3 EX-HN5 (Taiyang) The hollow at the temple, between the outer corner of the eye and the tip of the eyebrow 2:00~3:00 Relieves temporal pain and eye fatigue at the same time.
    4 GV20 (Baihui) Center of the top of the head (highest point on the line connecting both ears) 3:00~4:00 Improves Qi and blood circulation throughout the head to eliminate the headache.
    5 LR3 (Taichong) Where the bones of the big toe and second toe meet on the top of the foot 4:00~5:00 Clears heat from the liver to relieve the headache.

    🍯 Tips

    • Starting immediately when you feel the early warning signs of a headache is most effective.
    • Closing your eyes in a dim room doubles the effect.
    • If headaches are frequent, try doing it consistently twice a day, morning and evening.
    • Drinking a glass of warm water after acupressure helps flush out waste products.

    ❓ Frequently Asked Questions

    Q. Does this routine work for migraines?

    A. Yes, EX-HN5 (Taiyang) and GB20 (Fengchi) are especially effective for migraines. However, for severe migraines, acupressure alone may not be enough — please also consider consulting a specialist.

    Q. Should I avoid pressing headache acupoints too hard?

    A. Yes, especially the head area should be pressed gently. The right intensity is one that feels relieving. If it hurts or you feel dizzy, reduce the pressure.

    Q. Is the acupressure method different for tension headaches versus migraines?

    A. The basic acupoints are the same, but for tension headaches focus more on GB20 and GV20, while for migraines focus more on EX-HN5 and LI4.

    Q. Can I do acupressure and take headache medication at the same time?

    A. Yes, acupressure has no interaction with medication, so it is fine to combine. It can actually complement the effects of headache medication.

    Q. What should I do if I get a headache every day?

    A. Daily recurring headaches can be a sign of an underlying condition. Alongside acupressure, it is strongly recommended to seek evaluation from a neurologist or traditional medicine practitioner.

    ⚠️ Pregnancy Warning: Pregnant women should avoid pressing this acupoint as it may stimulate uterine contractions.
    ⚠️ Medical Disclaimer: This article is for informational purposes only and does not replace professional medical diagnosis or treatment. If symptoms persist or worsen, please consult a healthcare professional.
  • Shoulder and Neck Pain Self-Acupressure Routine 5 Minutes

    Shoulder and Neck Pain Self-Acupressure Routine 5 Minutes

    Summary: A 5-minute self-acupressure routine for shoulder and neck pain relief. Learn how to stimulate 5 acupoints in order: GB20, GB21, SI3, BL10, and LI4. An easy acupressure guide anyone can follow without photos.
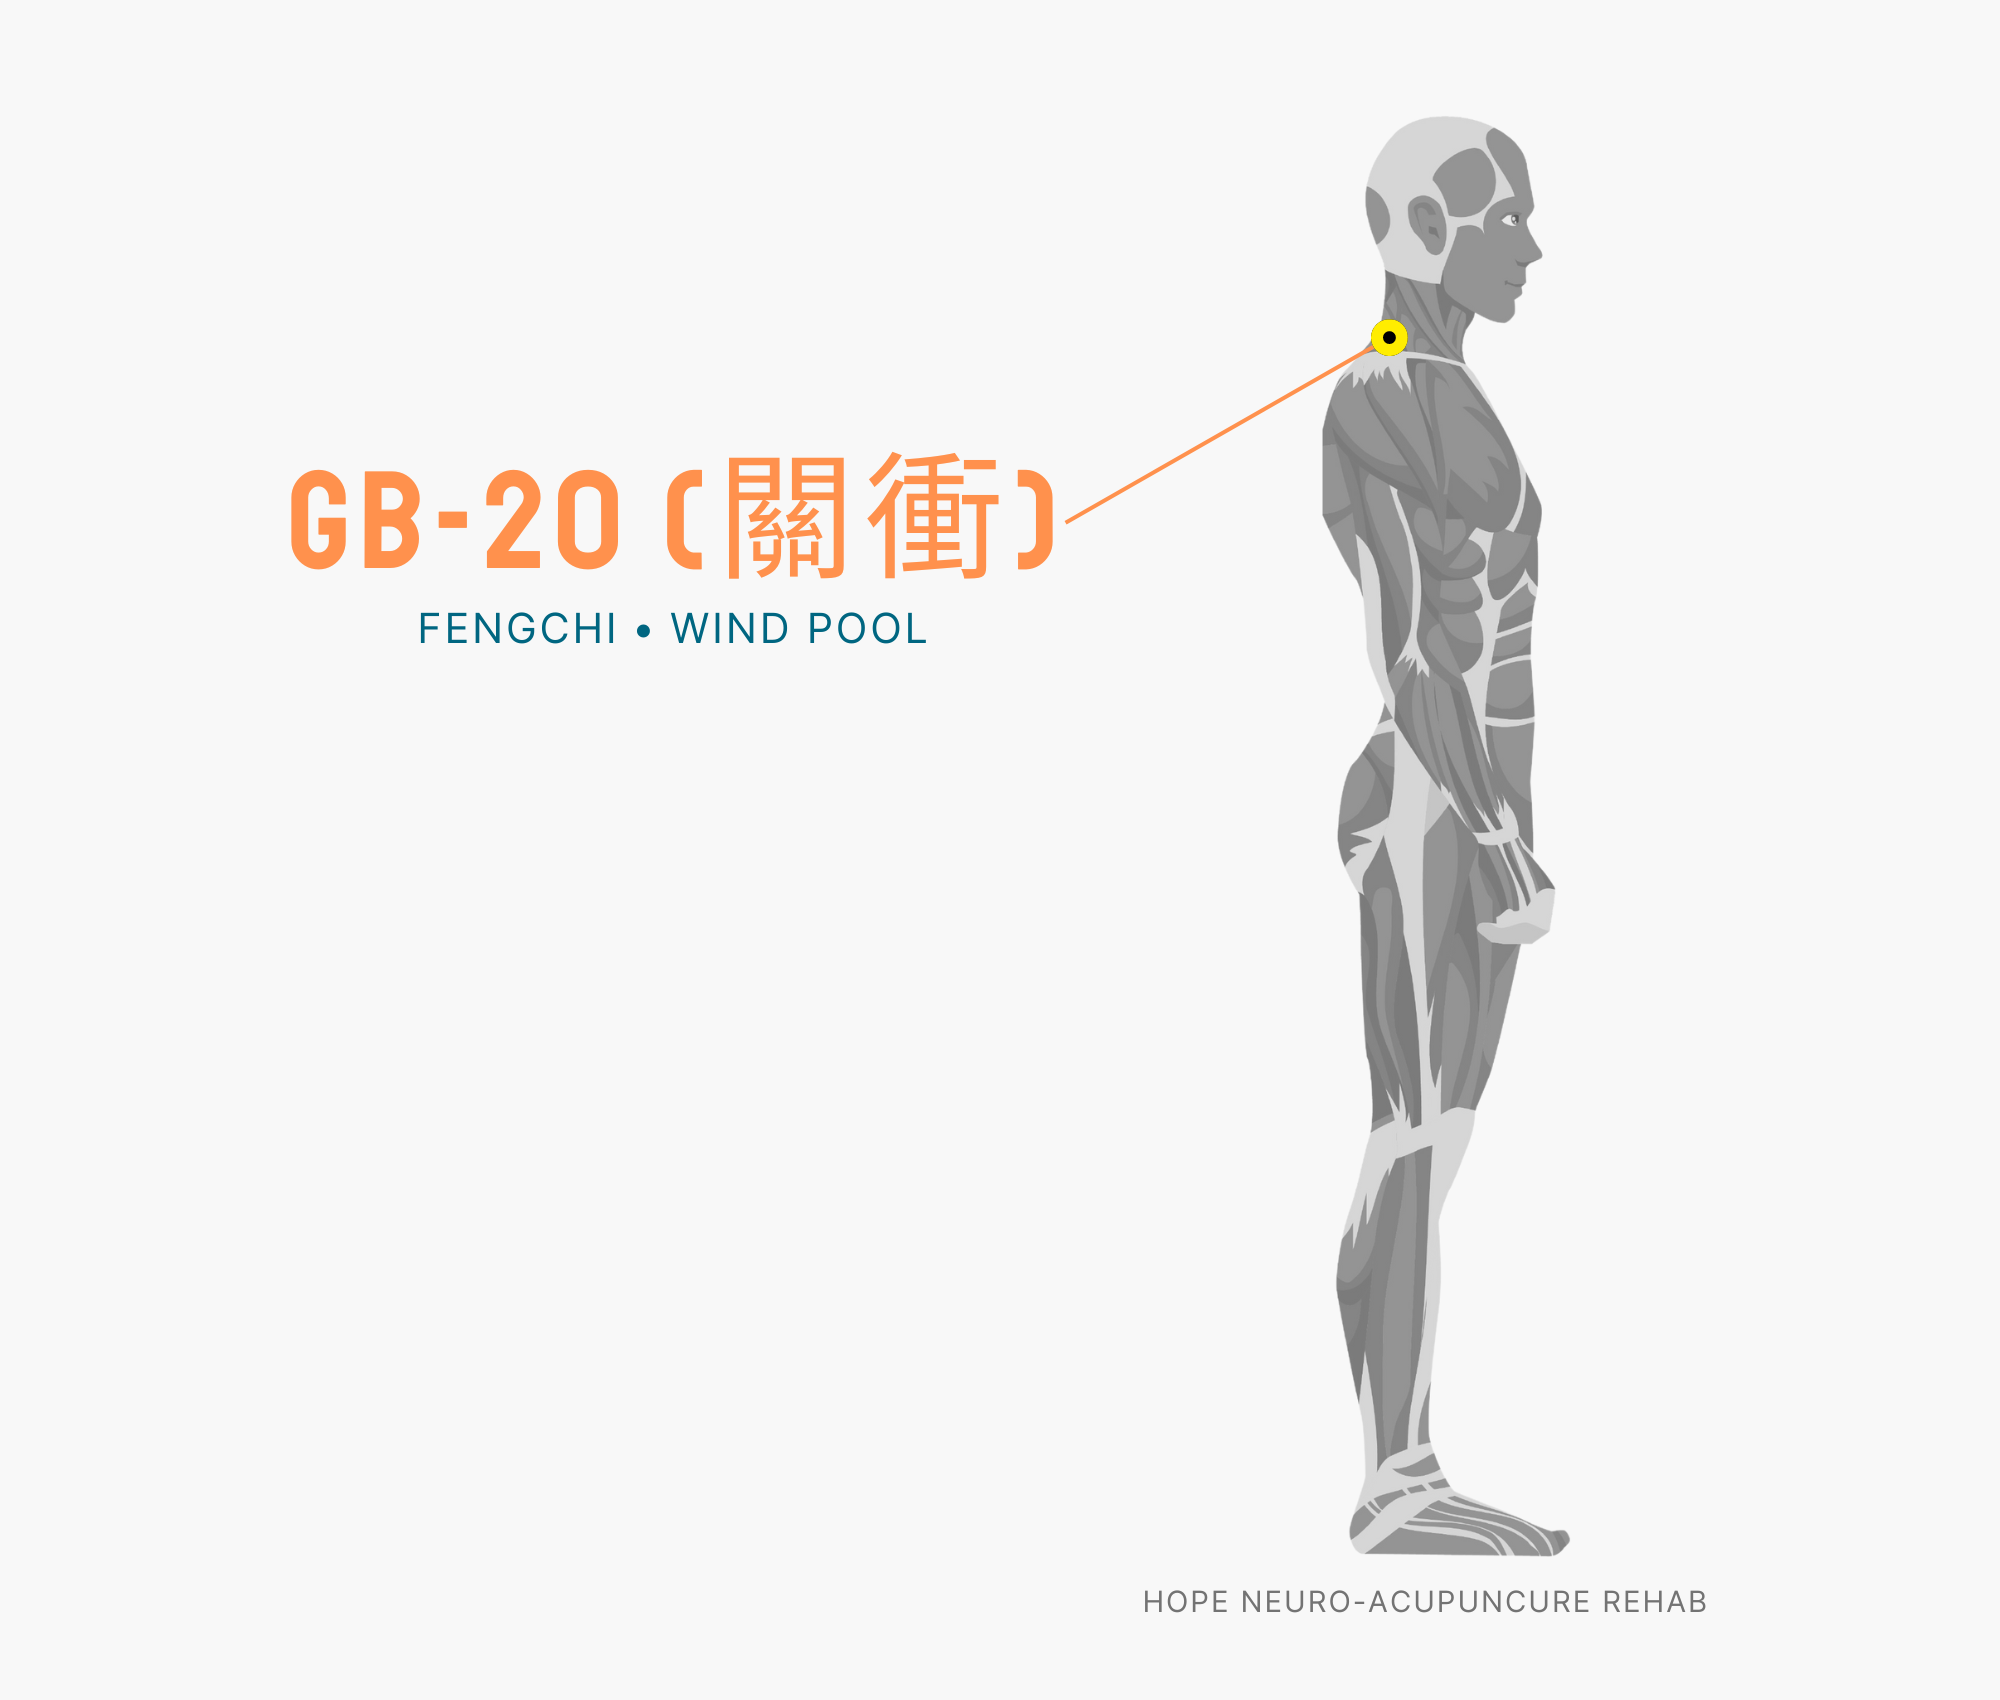
    GB20 혈자리 위치 그림

    🎯 Shoulder and Neck Pain Self-Acupressure Routine 5 Minutes

    • ⏱️ Duration: 5 minutes
    • 📍 Number of acupoints: 5
    • 🔄 Order: GB20 (Fengchi) → GB21 (Jianjing) → SI3 (Houxi) → BL10 (Tianzhu) → LI4 (Hegu)
    • 💡 Benefits: Shoulder and neck pain relief and improvement

    🙋 Recommended For You If…

    • Your shoulders and neck are stiff from computer work
    • Your neck is sore from prolonged smartphone use
    • Your shoulders feel so tense they seem raised up to your ears
    • Your neck makes cracking sounds when you turn your head
    • You have pain from habitual forward head posture (tech neck)

    🧘 Before You Begin

    1. Find a comfortable position. You can sit on a chair or comfortably on the floor.
    2. Rub your hands together to warm them up. Warm hands stimulate acupoints more effectively.
    3. Take 3 deep breaths in and out. Inhale through your nose and exhale slowly through your mouth.

    Ready? Let’s get started! 💪

    ⏱️ Start the 5-Minute Routine!

    Spend 1 minute on each acupoint — 5 minutes total. Follow along slowly!

    Step 1 — Press GB20 (Fengchi) [0:00~1:00]

    GB20 acupuncture point

    📍 Location: The hollows on both sides below the back of the skull

    👆 Method: Place both thumbs in the hollows below the back of the skull and press upward.

    ⏱️ Time: Press firmly for 3–5 seconds → Rest for 3 seconds → Repeat 5 times (about 1 minute)

    ✨ Effect: Releases tension in the back neck muscles to relieve stiffness.

    Step 2 — Press GB21 (Jianjing) [1:00~2:00]

    📍 Location: The midpoint of the top of the shoulder, where the neck meets the shoulder

    👆 Method: Use the middle and index fingers of the opposite hand to press firmly on top of the shoulder.

    ⏱️ Time: Press firmly for 3–5 seconds → Rest for 3 seconds → Repeat 5 times (about 1 minute)

    ✨ Effect: The signature acupoint for directly releasing shoulder tension.

    Step 3 — Press SI3 (Houxi) [2:00~3:00]

    SI3 acupuncture point

    📍 Location: The border between the palm and back of the hand, below the little finger

    👆 Method: Use the opposite thumb to press next to the slightly prominent bone below the little finger.

    ⏱️ Time: Press firmly for 3–5 seconds → Rest for 3 seconds → Repeat 5 times (about 1 minute)

    ✨ Effect: Releases stiffness in the neck and upper back muscles and expands range of motion.

    Step 4 — Press BL10 (Tianzhu) [3:00~4:00]

    BL10 acupuncture point

    📍 Location: Slightly lower and more medial than GB20 on the back of the head

    👆 Method: Use both thumbs to press the outer sides of the two tendons at the back of the neck, pushing upward.

    ⏱️ Time: Press firmly for 3–5 seconds → Rest for 3 seconds → Repeat 5 times (about 1 minute)

    ✨ Effect: Releases back-neck tension to make turning the head easier.

    Step 5 — Press LI4 (Hegu) [4:00~5:00]

    LI4 acupuncture point

    📍 Location: The webbing between the thumb and index finger

    👆 Method: Use the opposite thumb to press firmly into the webbing. A slight aching sensation means you’ve found the right spot.

    ⏱️ Time: Press firmly for 3–5 seconds → Rest for 3 seconds → Repeat 5 times (about 1 minute)

    ✨ Effect: Promotes circulation throughout the upper body to relieve neck and shoulder tension.

    🎉 Great job! Routine complete!

    Finish with 3 deep breaths. Do you feel lighter?

    📋 Quick-Reference Routine Chart

    Step Acupoint Location Time Effect
    1 GB20 (Fengchi) The hollows on both sides below the back of the skull 0:00~1:00 Releases tension in the back neck muscles to relieve stiffness.
    2 GB21 (Jianjing) The midpoint of the top of the shoulder, where the neck meets the shoulder 1:00~2:00 The signature acupoint for directly releasing shoulder tension.
    3 SI3 (Houxi) The border between the palm and back of the hand, below the little finger 2:00~3:00 Releases stiffness in the neck and upper back muscles and expands range of motion.
    4 BL10 (Tianzhu) Slightly lower and more medial than GB20 on the back of the head 3:00~4:00 Releases back-neck tension to make turning the head easier.
    5 LI4 (Hegu) The webbing between the thumb and index finger 4:00~5:00 Promotes circulation throughout the upper body to relieve neck and shoulder tension.

    🍯 Tips

    • Doing it once every 2 hours, 3–4 times a day, is most effective.
    • Also try adjusting your monitor to eye level alongside this routine.
    • A hot shower to loosen up the shoulders beforehand makes the acupressure even more effective.
    • Between pressing sessions, slowly rotate your head left and right as a stretch.

    ❓ Frequently Asked Questions

    Q. Can this routine improve severe forward head posture (tech neck)?

    A. Acupressure can temporarily relieve tension in knotted muscles, but you must also work on posture correction to get lasting improvement. Do the routine consistently while also paying attention to your posture.

    Q. What should I do if pressing my shoulder is very painful?

    A. If it is too painful, reduce the pressure and start by lightly stroking the area from the side. After a few days, you will be able to press more comfortably.

    Q. Can I do this routine if I have a cervical disc herniation?

    A. It may help with mild cervical disc issues, but if you have arm numbness or severe pain, please see a specialist first.

    Q. Can I do this while sitting in an office chair?

    A. Yes! All acupoints in this routine can be reached while sitting in a chair. In particular, SI3 and LI4 can even be pressed discreetly during a meeting.

    Q. Is GB21 (Jianjing) dangerous for pregnant women?

    A. Yes, GB21 can stimulate uterine contractions, so pregnant women should avoid it. For shoulder pain during pregnancy, consult a traditional medicine practitioner.

    ⚠️ Pregnancy Warning: Pregnant women should avoid pressing this acupoint as it may stimulate uterine contractions.
    ⚠️ Medical Disclaimer: This article is for informational purposes only and does not replace professional medical diagnosis or treatment. If symptoms persist or worsen, please consult a healthcare professional.
  • Anxiety Relief Self-Acupressure Routine 5 Minutes

    Anxiety Relief Self-Acupressure Routine 5 Minutes

    Summary: A 5-minute self-acupressure routine for anxiety relief. Learn how to stimulate 5 acupoints in order: HT7, PC6, GV20, CV17, and EX-HN3. An easy acupressure guide anyone can follow without photos.
    HT7 혈자리 위치 그림

    🎯 Anxiety Relief Self-Acupressure Routine 5 Minutes

    • ⏱️ Duration: 5 minutes
    • 📍 Number of acupoints: 5
    • 🔄 Order: HT7 (Shenmen)PC6 (Neiguan)GV20 (Baihui) → CV17 (Danzhong) → EX-HN3 (Yintang)
    • 💡 Benefits: Anxiety relief and improvement

    🙋 Recommended For You If…

    • You feel anxious and restless for no apparent reason
    • Your chest feels tight and you have difficulty breathing
    • You want to calm your nerves before an important presentation or exam
    • Worries won’t stop before falling asleep
    • Your heart is racing and your palms are sweating

    🧘 Before You Begin

    1. Find a comfortable position. You can sit on a chair or comfortably on the floor.
    2. Rub your hands together to warm them up. Warm hands stimulate acupoints more effectively.
    3. Take 3 deep breaths in and out. Inhale through your nose and exhale slowly through your mouth.

    Ready? Let’s get started! 💪

    ⏱️ Start the 5-Minute Routine!

    Spend 1 minute on each acupoint — 5 minutes total. Follow along slowly!

    Step 1 — Press HT7 (Shenmen) [0:00~1:00]

    HT7 acupuncture point

    📍 Location: The inner wrist crease, in the hollow on the little-finger side of the tendon

    👆 Method: Use the opposite thumb to gently press into the hollow above the wrist crease.

    ⏱️ Time: Press firmly for 3–5 seconds → Rest for 3 seconds → Repeat 5 times (about 1 minute)

    ✨ Effect: Calms an anxious, restless mind.

    Step 2 — Press PC6 (Neiguan) [1:00~2:00]

    PC6 acupuncture point

    📍 Location: 3 finger-widths above the inner wrist crease, toward the elbow

    👆 Method: Use the opposite thumb to press firmly between the two tendons on the inner wrist.

    ⏱️ Time: Press firmly for 3–5 seconds → Rest for 3 seconds → Repeat 5 times (about 1 minute)

    ✨ Effect: Relieves chest tightness and reduces feelings of anxiety.

    Step 3 — Press GV20 (Baihui) [2:00~3:00]

    📍 Location: The center of the top of the head (the highest point on the line connecting both ears)

    👆 Method: Overlap the middle fingers of both hands and lightly press the crown of the head. A warm sensation is a good sign.

    ⏱️ Time: Press firmly for 3–5 seconds → Rest for 3 seconds → Repeat 5 times (about 1 minute)

    ✨ Effect: Clears scattered thoughts and settles the mind.

    Step 4 — Press CV17 (Danzhong) [3:00~4:00]

    📍 Location: The midpoint of the line connecting both nipples (on the sternum)

    👆 Method: Use the tip of your middle finger to gently press on the sternum. It works even better when you breathe in deeply as you press.

    ⏱️ Time: Press firmly for 3–5 seconds → Rest for 3 seconds → Repeat 5 times (about 1 minute)

    ✨ Effect: Opens up the tight chest and brings relief.

    Step 5 — Press EX-HN3 (Yintang) [4:00~5:00]

    📍 Location: The midpoint between the two eyebrows on the forehead

    👆 Method: Use the tip of your middle finger to gently press the center of the space between your eyebrows. Closing your eyes makes it even better.

    ⏱️ Time: Press firmly for 3–5 seconds → Rest for 3 seconds → Repeat 5 times (about 1 minute)

    ✨ Effect: Quiets racing thoughts and brings a sense of calm.

    🎉 Great job! Routine complete!

    Finish with 3 deep breaths. Do you feel lighter?

    📋 Quick-Reference Routine Chart

    Step Acupoint Location Time Effect
    1 HT7 (Shenmen) Inner wrist crease, hollow on the little-finger side of the tendon 0:00~1:00 Calms an anxious, restless mind.
    2 PC6 (Neiguan) 3 finger-widths above the inner wrist crease, toward the elbow 1:00~2:00 Relieves chest tightness and reduces feelings of anxiety.
    3 GV20 (Baihui) Center of the top of the head (highest point on the line connecting both ears) 2:00~3:00 Clears scattered thoughts and settles the mind.
    4 CV17 (Danzhong) Midpoint of the line connecting both nipples (on the sternum) 3:00~4:00 Opens up the tight chest and brings relief.
    5 EX-HN3 (Yintang) Midpoint between the two eyebrows on the forehead 4:00~5:00 Quiets racing thoughts and brings a sense of calm.

    🍯 Tips

    • Starting immediately when anxiety rises is most effective.
    • Closing your eyes and combining with slow deep breathing doubles the effect.
    • Practicing consistently 2–3 times a day, morning and evening, is a great help for managing anxiety.
    • Applying a drop of lavender essential oil to your hands before acupressure adds a psychological calming effect.

    ❓ Frequently Asked Questions

    Q. Does this routine help with panic disorder?

    A. It can help with mild anxiety, but panic disorder requires professional treatment. Use acupressure as a supplementary tool and be sure to consult a mental health professional.

    Q. How many times a day can I do anxiety acupressure?

    A. Up to 4–5 times a day is safe. Do it whenever you feel anxious. In particular, HT7 and PC6 are fine to press frequently throughout the day.

    Q. I’m taking anti-anxiety medication — is it safe to do acupressure?

    A. Yes, acupressure has no interactions with medication, so it is safe. However, always consult your doctor before making any changes to your medication.

    Q. Why does pressing CV17 (Danzhong) make me feel calmer?

    A. In Traditional Chinese Medicine, CV17 is known as the “gathering point of Qi.” Stimulating it releases pent-up energy, opens the chest, and calms the mind.

    Q. Does it work for test anxiety in children?

    A. Yes, it is suitable for children aged 6 and older. Gently pressing HT7 and EX-HN3 can help relieve pre-exam tension.

    ⚠️ Medical Disclaimer: This article is for informational purposes only and does not replace professional medical diagnosis or treatment. If symptoms persist or worsen, please consult a healthcare professional.
  • Cold Prevention Self-Acupressure Routine 5 Minutes

    Cold Prevention Self-Acupressure Routine 5 Minutes

    Summary: A 5-minute self-acupressure routine for cold relief. Learn how to stimulate 5 acupoints in order: LI4, LU7, GV14, ST36, and LI20. An easy acupressure guide anyone can follow without photos.
    LI4 혈자리 위치 그림

    🎯 Cold Prevention Self-Acupressure Routine 5 Minutes

    • ⏱️ Duration: 5 minutes
    • 📍 Number of acupoints: 5
    • 🔄 Order: LI4 (Hegu)LU7 (Lieque) → GV14 (Dazhui) → ST36 (Zusanli) → LI20 (Yingxiang)
    • 💡 Benefits: Cold relief and improvement

    🙋 Recommended For You If…

    • You want to boost your immunity during seasonal changes
    • Many people around you have colds
    • You have early cold symptoms such as a runny nose or sneezing
    • You feel chills and a slight feverish sensation
    • You feel tired and your immune system seems low

    🧘 Before You Begin

    1. Find a comfortable position. You can sit on a chair or comfortably on the floor.
    2. Rub your hands together to warm them up. Warm hands stimulate acupoints more effectively.
    3. Take 3 deep breaths in and out. Inhale through your nose and exhale slowly through your mouth.

    Ready? Let’s get started! 💪

    ⏱️ Start the 5-Minute Routine!

    Spend 1 minute on each acupoint — 5 minutes total. Follow along slowly!

    Step 1 — Press LI4 (Hegu) [0:00~1:00]

    LI4 acupuncture point

    📍 Location: The webbing between the thumb and index finger

    👆 Method: Use the opposite thumb to press firmly into the webbing. A slight aching sensation means you’ve found the right spot.

    ⏱️ Time: Press firmly for 3–5 seconds → Rest for 3 seconds → Repeat 5 times (about 1 minute)

    ✨ Effect: Boosts immunity and dispels cold-inducing factors.

    Step 2 — Press LU7 (Lieque) [1:00~2:00]

    LU7 acupuncture point

    📍 Location: Just above the bony prominence on the thumb side of the wrist

    👆 Method: Use the opposite index finger to press just above the bony prominence on the thumb side of the wrist.

    ⏱️ Time: Press firmly for 3–5 seconds → Rest for 3 seconds → Repeat 5 times (about 1 minute)

    ✨ Effect: Strengthens lung energy to reduce nasal congestion and coughing.

    Step 3 — Press GV14 (Dazhui) [2:00~3:00]

    📍 Location: Just below the most prominent bone at the base of the neck (7th cervical vertebra)

    👆 Method: Slightly lower your head and press firmly below the prominent bone with your middle finger.

    ⏱️ Time: Press firmly for 3–5 seconds → Rest for 3 seconds → Repeat 5 times (about 1 minute)

    ✨ Effect: Raises yang energy to expel cold pathogens and strengthen immunity.

    Step 4 — Press ST36 (Zusanli) [3:00~4:00]

    ST36 acupuncture point

    📍 Location: 4 finger-widths below the knee, on the outer side

    👆 Method: Use your thumb to press firmly on the outer side of the shinbone. A heavy, full sensation means you’ve found the right spot.

    ⏱️ Time: Press firmly for 3–5 seconds → Rest for 3 seconds → Repeat 5 times (about 1 minute)

    ✨ Effect: Enhances digestive function to improve overall physical strength and immunity.

    Step 5 — Press LI20 (Yingxiang) [4:00~5:00]

    LI20 acupuncture point

    📍 Location: On both sides of the nostrils, at the nasolabial groove

    👆 Method: Use the index fingers of both hands to press small circles on both sides of the nostrils.

    ⏱️ Time: Press firmly for 3–5 seconds → Rest for 3 seconds → Repeat 5 times (about 1 minute)

    ✨ Effect: Opens nasal congestion and stops a runny nose.

    🎉 Great job! Routine complete!

    Finish with 3 deep breaths. Do you feel lighter?

    📋 Quick-Reference Routine Chart

    Step Acupoint Location Time Effect
    1 LI4 (Hegu) The webbing between the thumb and index finger 0:00~1:00 Boosts immunity and dispels cold-inducing factors.
    2 LU7 (Lieque) Just above the bony prominence on the thumb side of the wrist 1:00~2:00 Strengthens lung energy to reduce nasal congestion and coughing.
    3 GV14 (Dazhui) Just below the most prominent bone at the base of the neck (7th cervical vertebra) 2:00~3:00 Raises yang energy to expel cold pathogens and strengthen immunity.
    4 ST36 (Zusanli) 4 finger-widths below the knee, on the outer side 3:00~4:00 Enhances digestive function to improve overall physical strength and immunity.
    5 LI20 (Yingxiang) On both sides of the nostrils, at the nasolabial groove 4:00~5:00 Opens nasal congestion and stops a runny nose.

    🍯 Tips

    • During seasonal changes, doing it once every morning is effective for cold prevention.
    • If you notice early cold symptoms, increase to 3 times a day.
    • Drinking ginger tea or warm water after acupressure creates a synergistic effect.
    • LI20 (next to the nostrils) is great to press frequently whenever your nose gets congested.

    ❓ Frequently Asked Questions

    Q. I already have a cold — does acupressure help?

    A. Yes, doing it in the early stages of a cold (days 1–2) can help relieve symptoms and speed up recovery. However, if you have a high fever, see a doctor first.

    Q. Can I do this routine for children?

    A. It is suitable for children aged 6 and older. Use about half the pressure of an adult’s and keep each point to 30 seconds.

    Q. Does it work for the flu (influenza)?

    A. Acupressure alone is not sufficient for the flu. Be sure to visit a medical facility, and use acupressure as a supplementary measure.

    Q. Which acupoints should I focus on for a severe runny nose?

    A. Intensively stimulating LI20 (next to the nostrils) and LI4 is effective for relieving a runny nose and nasal congestion.

    Q. Can I do acupressure and take cold medicine at the same time?

    A. Yes, acupressure has no interaction with medication, so it is safe to combine. Use it as a complementary approach.

    ⚠️ Pregnancy Warning: Pregnant women should avoid pressing this acupoint as it may stimulate uterine contractions.
    ⚠️ Medical Disclaimer: This article is for informational purposes only and does not replace professional medical diagnosis or treatment. If symptoms persist or worsen, please consult a healthcare professional.
  • Fatigue Recovery Self-Acupressure Routine 5 Minutes

    Fatigue Recovery Self-Acupressure Routine 5 Minutes

    Summary: A 5-minute self-acupressure routine for fatigue relief. Learn how to stimulate 5 acupoints in order: ST36, SP6, CV6, GV20, and KI3. An easy acupressure guide anyone can follow without photos.
    ST36 혈자리 위치 그림

    🎯 Fatigue Recovery Self-Acupressure Routine 5 Minutes

    🙋 Recommended For You If…

    • Chronic fatigue makes it hard to get up in the morning
    • You feel your energy drain away as the afternoon arrives
    • Coffee no longer fights off drowsiness
    • Your body seems slow to recover after exercise
    • Your stamina is depleted during exam periods or late-night work shifts

    🧘 Before You Begin

    1. Find a comfortable position. You can sit on a chair or comfortably on the floor.
    2. Rub your hands together to warm them up. Warm hands stimulate acupoints more effectively.
    3. Take 3 deep breaths in and out. Inhale through your nose and exhale slowly through your mouth.

    Ready? Let’s get started! 💪

    ⏱️ Start the 5-Minute Routine!

    Spend 1 minute on each acupoint — 5 minutes total. Follow along slowly!

    Step 1 — Press ST36 (Zusanli) [0:00~1:00]

    ST36 acupuncture point

    📍 Location: 4 finger-widths below the knee, on the outer side

    👆 Method: Use your thumb to press firmly on the outer side of the shinbone. A heavy, full sensation means you’ve found the right spot.

    ⏱️ Time: Press firmly for 3–5 seconds → Rest for 3 seconds → Repeat 5 times (about 1 minute)

    ✨ Effect: The all-purpose point! Simultaneously boosts digestion and physical stamina.

    Step 2 — Press SP6 (Sanyinjiao) [1:00~2:00]

    SP6 acupuncture point

    📍 Location: 4 finger-widths above the inner ankle bone

    👆 Method: Use the opposite thumb to press the inner side of the shin, pushing upward along the bone.

    ⏱️ Time: Press firmly for 3–5 seconds → Rest for 3 seconds → Repeat 5 times (about 1 minute)

    ✨ Effect: Stimulates three meridians at once to help generate Qi and blood.

    Step 3 — Press CV6 (Qihai) [2:00~3:00]

    📍 Location: 2 finger-widths below the navel

    👆 Method: Overlap both hands and place them below the navel, pressing gently. It is good when it feels warm.

    ⏱️ Time: Press firmly for 3–5 seconds → Rest for 3 seconds → Repeat 5 times (about 1 minute)

    ✨ Effect: The “Sea of Qi”! Restores vitality and recharges energy.

    Step 4 — Press GV20 (Baihui) [3:00~4:00]

    📍 Location: The center of the top of the head (the highest point on the line connecting both ears)

    👆 Method: Overlap the middle fingers of both hands and lightly press the crown of the head. A warm sensation is a good sign.

    ⏱️ Time: Press firmly for 3–5 seconds → Rest for 3 seconds → Repeat 5 times (about 1 minute)

    ✨ Effect: Raises yang energy to clear the head and restore vitality.

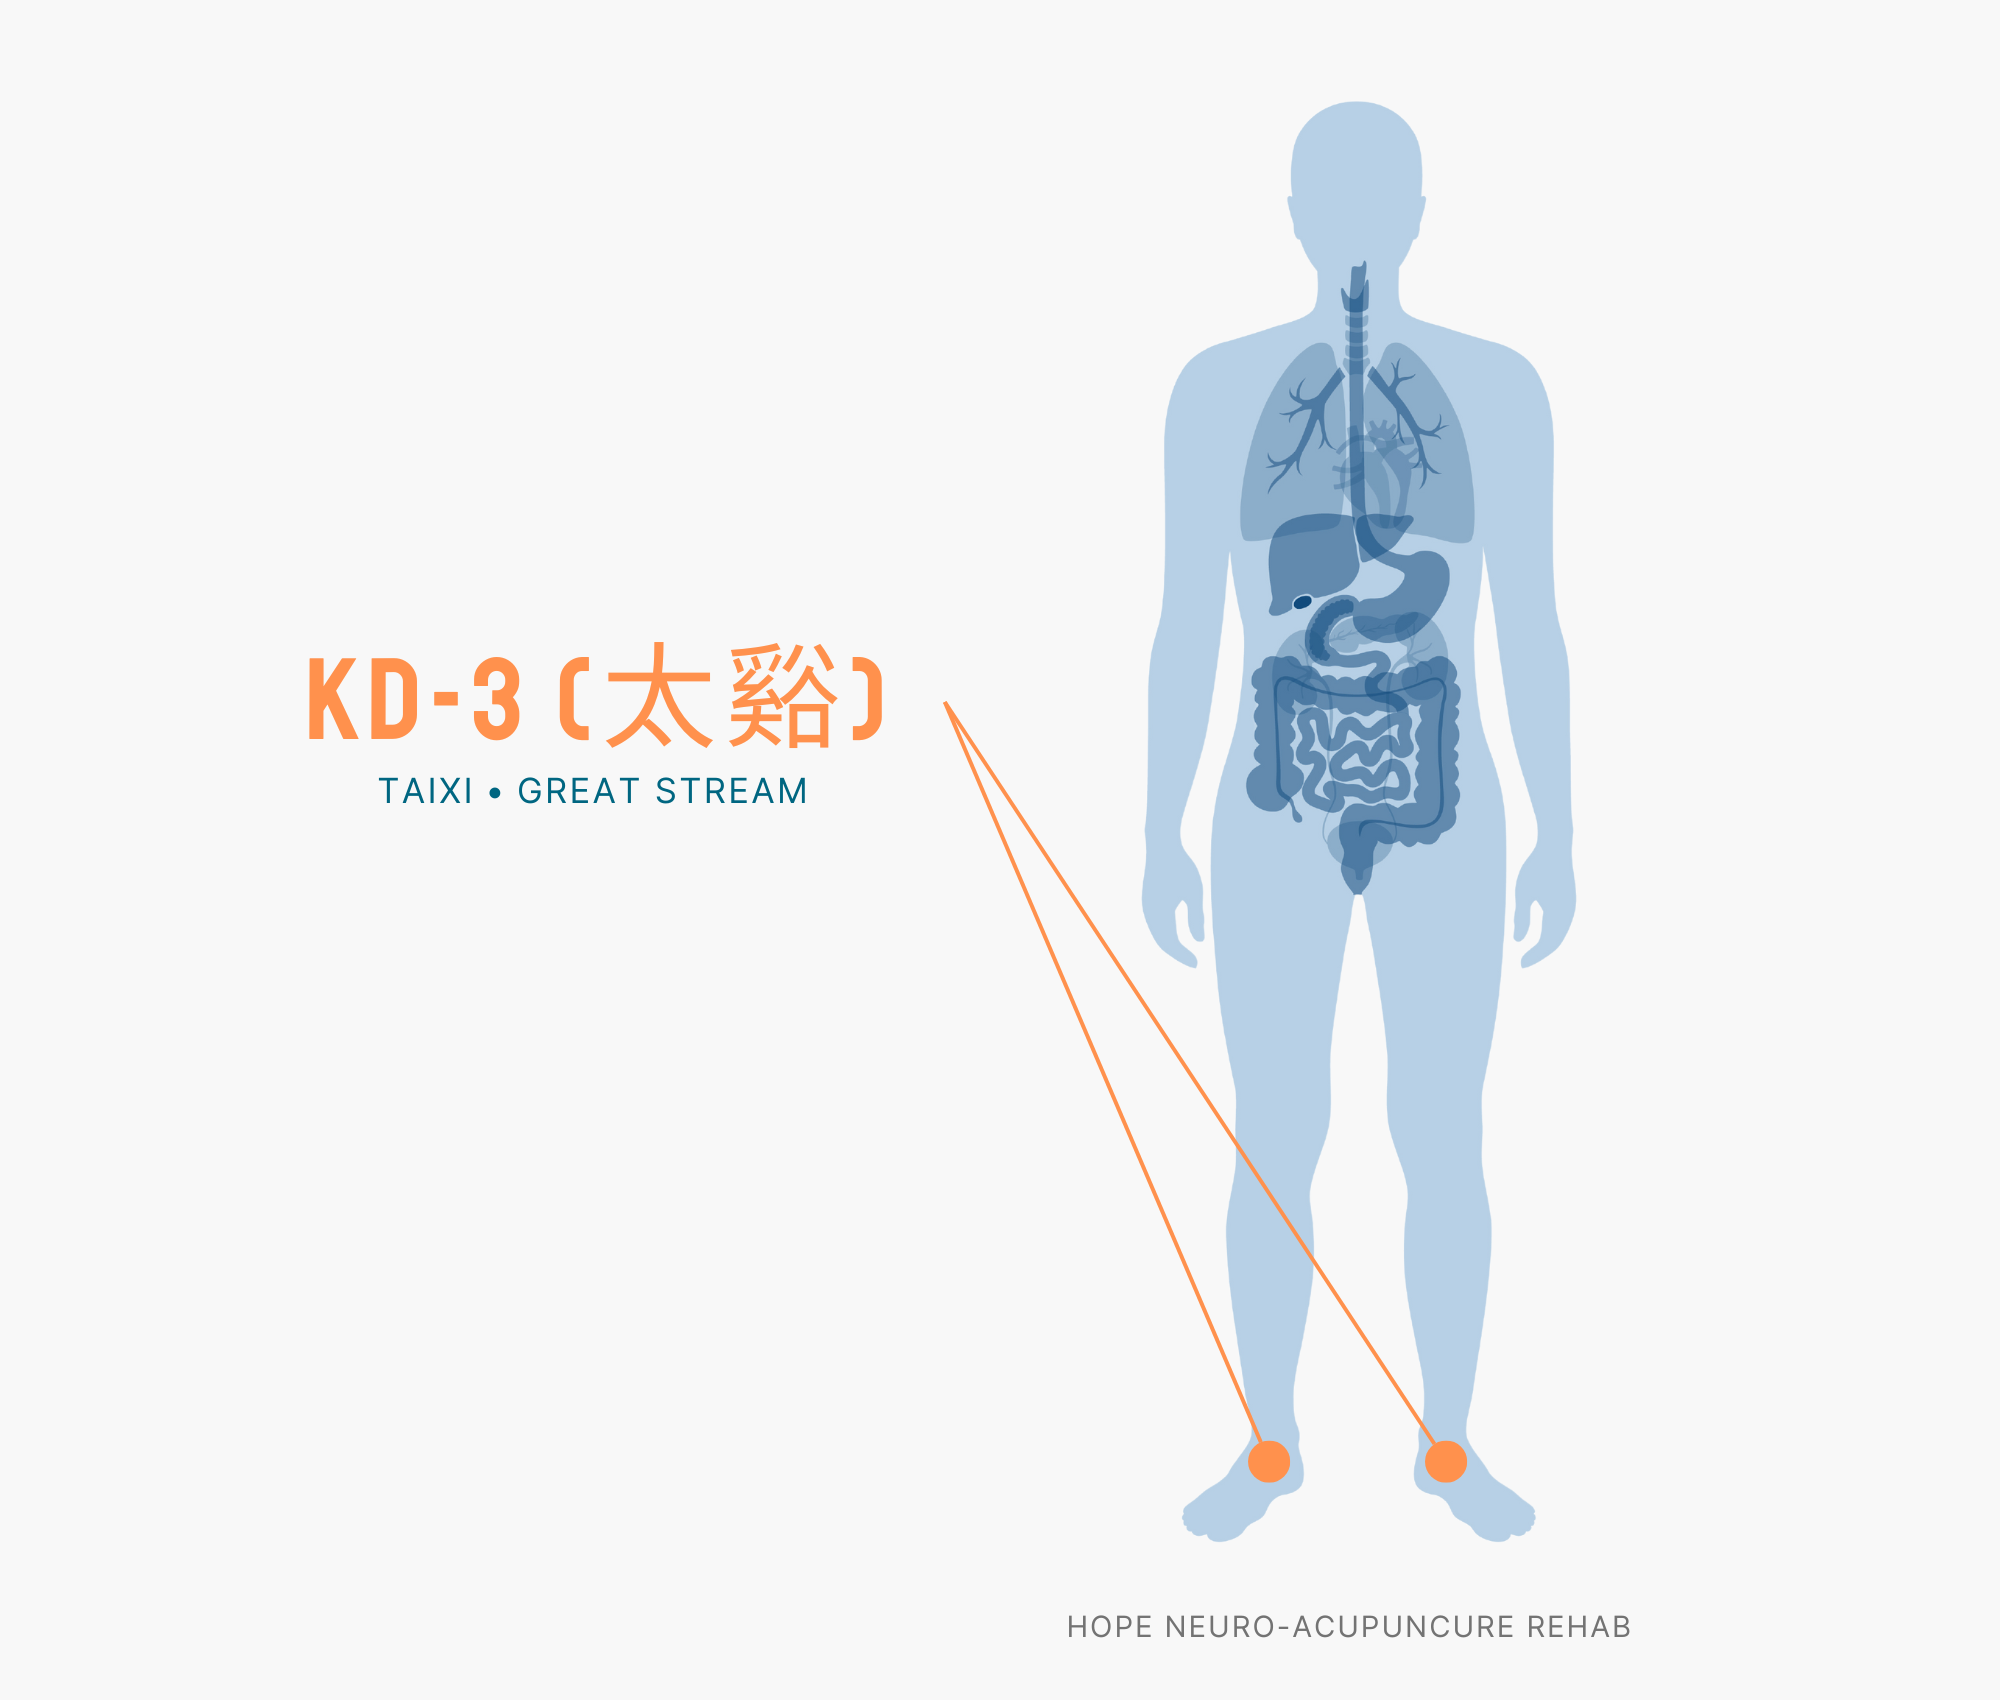
    Step 5 — Press KI3 (Taixi) [4:00~5:00]

    KI3 acupuncture point

    📍 Location: Between the inner ankle bone and the Achilles tendon

    👆 Method: Use the opposite thumb to press into the hollow between the inner ankle bone and the Achilles tendon.

    ⏱️ Time: Press firmly for 3–5 seconds → Rest for 3 seconds → Repeat 5 times (about 1 minute)

    ✨ Effect: Replenishes kidney energy to address deep-seated fatigue.

    🎉 Great job! Routine complete!

    Finish with 3 deep breaths. Do you feel lighter?

    📋 Quick-Reference Routine Chart

    Step Acupoint Location Time Effect
    1 ST36 (Zusanli) 4 finger-widths below the knee, on the outer side 0:00~1:00 The all-purpose point! Simultaneously boosts digestion and physical stamina.
    2 SP6 (Sanyinjiao) 4 finger-widths above the inner ankle bone 1:00~2:00 Stimulates three meridians at once to help generate Qi and blood.
    3 CV6 (Qihai) 2 finger-widths below the navel 2:00~3:00 The “Sea of Qi”! Restores vitality and recharges energy.
    4 GV20 (Baihui) Center of the top of the head (highest point on the line connecting both ears) 3:00~4:00 Raises yang energy to clear the head and restore vitality.
    5 KI3 (Taixi) Between the inner ankle bone and the Achilles tendon 4:00~5:00 Replenishes kidney energy to address deep-seated fatigue.

    🍯 Tips

    • Doing it after waking up in the morning and during the sluggish afternoon hours (2–4 pm) is most effective.
    • Practicing consistently 5 or more times per week, you will notice your baseline energy levels rising.
    • Combine acupressure with 7+ hours of sleep per night and a balanced diet.
    • ST36 is called the “all-purpose point” for a reason — press it whenever you get the chance!

    ❓ Frequently Asked Questions

    Q. Does acupressure really help with chronic fatigue?

    A. In Traditional Chinese Medicine, fatigue is a state of Qi deficiency. Stimulating ST36 and CV6 replenishes Qi and helps with fatigue recovery. Try it consistently for at least 2 weeks.

    Q. Can acupressure replace energy drinks?

    A. It doesn’t provide the sudden alertness of caffeine, but with consistent practice your baseline stamina improves. You’ll be able to maintain a clear mind without caffeine.

    Q. Can I do this before and after exercise?

    A. Doing it before exercise helps warm up the body, and doing it after helps speed up recovery. ST36 and KI3 are especially good for muscle recovery.

    Q. Should I see a doctor if my fatigue is very severe?

    A. If extreme fatigue persists for more than 2 weeks, it may be worth checking for thyroid function or anemia. Use acupressure as a supplement and seek professional care.

    Q. Should pregnant women avoid SP6 (Sanyinjiao)?

    A. Yes, SP6 can stimulate the uterus, so pregnant women should skip this point and do only the remaining 4 acupoints.

    ⚠️ Pregnancy Warning: Pregnant women should avoid pressing this acupoint as it may stimulate uterine contractions.
    ⚠️ Medical Disclaimer: This article is for informational purposes only and does not replace professional medical diagnosis or treatment. If symptoms persist or worsen, please consult a healthcare professional.
  • Back Pain Self-Acupressure Routine 5 Minutes

    Back Pain Self-Acupressure Routine 5 Minutes

    Summary: A 5-minute self-acupressure routine for back pain relief. Learn how to stimulate 5 acupoints in order: BL23, BL40, GV4, BL25, and KI3. An easy acupressure guide anyone can follow without photos.
    ST36 혈자리 위치 그림

    🎯 Back Pain Self-Acupressure Routine 5 Minutes

    • ⏱️ Duration: 5 minutes
    • 📍 Number of acupoints: 5
    • 🔄 Order: BL23 (Shenshu) → BL40 (Weizhong) → GV4 (Mingmen) → BL25 (Dachangshu) → KI3 (Taixi)
    • 💡 Benefits: Back pain relief and improvement

    🙋 Recommended For You If…

    • Your back is stiff after sitting for long periods
    • Your back feels sore and tight when you wake up in the morning
    • Your back aches after driving for a long time
    • Your back feels fatigued after carrying heavy loads
    • Your back feels cold and chilly

    🧘 Before You Begin

    1. Find a comfortable position. You can sit on a chair or comfortably on the floor.
    2. Rub your hands together to warm them up. Warm hands stimulate acupoints more effectively.
    3. Take 3 deep breaths in and out. Inhale through your nose and exhale slowly through your mouth.

    Ready? Let’s get started! 💪

    ⏱️ Start the 5-Minute Routine!

    Spend 1 minute on each acupoint — 5 minutes total. Follow along slowly!

    Step 1 — Press BL23 (Shenshu) [0:00~1:00]

    BL23 acupuncture point

    📍 Location: Between the 2nd and 3rd lumbar vertebrae, 2 finger-widths on either side of the spine

    👆 Method: Place both fists against both sides of your lower back and rub up and down. Keep going until it feels warm!

    ⏱️ Time: Press firmly for 3–5 seconds → Rest for 3 seconds → Repeat 5 times (about 1 minute)

    ✨ Effect: Strengthens kidney energy to address the root cause of back pain.

    Step 2 — Press BL40 (Weizhong) [1:00~2:00]

    BL40 acupuncture point

    📍 Location: The center of the back of the knee crease

    👆 Method: Sit in a chair with your knee slightly bent, and press the center of the knee crease with the middle fingers of both hands.

    ⏱️ Time: Press firmly for 3–5 seconds → Rest for 3 seconds → Repeat 5 times (about 1 minute)

    ✨ Effect: Relieves pain that radiates from the back down to the legs.

    Step 3 — Press GV4 (Mingmen) [2:00~3:00]

    📍 Location: On the spine at the level of the navel (on the back)

    👆 Method: Overlap both hands and place them on the spine at the back, then rub in circular motions.

    ⏱️ Time: Press firmly for 3–5 seconds → Rest for 3 seconds → Repeat 5 times (about 1 minute)

    ✨ Effect: Replenishes yang energy in the lower back, warming a cold, aching back.

    Step 4 — Press BL25 (Dachangshu) [3:00~4:00]

    BL25 acupuncture point

    📍 Location: Between the 4th and 5th lumbar vertebrae, 2 finger-widths on either side

    👆 Method: Place both thumbs on the upper part of the pelvis at the lower back and press firmly.

    ⏱️ Time: Press firmly for 3–5 seconds → Rest for 3 seconds → Repeat 5 times (about 1 minute)

    ✨ Effect: Directly relieves lower back pain and stiffness.

    Step 5 — Press KI3 (Taixi) [4:00~5:00]

    KI3 acupuncture point

    📍 Location: Between the inner ankle bone and the Achilles tendon

    👆 Method: Use the opposite thumb to press into the hollow between the inner ankle bone and the Achilles tendon.

    ⏱️ Time: Press firmly for 3–5 seconds → Rest for 3 seconds → Repeat 5 times (about 1 minute)

    ✨ Effect: Nourishes kidney energy to build foundational stamina for the back.

    🎉 Great job! Routine complete!

    Finish with 3 deep breaths. Do you feel lighter?

    📋 Quick-Reference Routine Chart

    Step Acupoint Location Time Effect
    1 BL23 (Shenshu) Between the 2nd and 3rd lumbar vertebrae, 2 finger-widths on either side of the spine 0:00~1:00 Strengthens kidney energy to address the root cause of back pain.
    2 BL40 (Weizhong) The center of the back of the knee crease 1:00~2:00 Relieves pain that radiates from the back down to the legs.
    3 GV4 (Mingmen) On the spine at the level of the navel (on the back) 2:00~3:00 Replenishes yang energy in the lower back, warming a cold, aching back.
    4 BL25 (Dachangshu) Between the 4th and 5th lumbar vertebrae, 2 finger-widths on either side 3:00~4:00 Directly relieves lower back pain and stiffness.
    5 KI3 (Taixi) Between the inner ankle bone and the Achilles tendon 4:00~5:00 Nourishes kidney energy to build foundational stamina for the back.

    🍯 Tips

    • Doing it right after waking up in the morning and before bed is most effective.
    • Warming your lower back with a warm towel before acupressure makes it even more effective.
    • For acute back pain (e.g., a sudden strain), do not push through — visit a doctor first.
    • Combining acupressure with gentle back stretches afterward creates a synergistic effect.

    ❓ Frequently Asked Questions

    Q. Can people with a herniated disc do this acupressure routine?

    A. It may help with mild disc symptoms, but if you have leg numbness or severe pain, please see an orthopedic specialist or traditional medicine practitioner first.

    Q. Can I do back acupressure on my own?

    A. Yes! BL23 and BL25 can easily be done alone by rubbing with your fists. BL40 and KI3 can be comfortably reached in a seated position.

    Q. Can I use a tennis ball?

    A. That’s a great idea! Lying on the floor with a tennis ball placed under your lower back is an effective way to stimulate BL23 and BL25.

    Q. How often should I do back acupressure?

    A. For chronic back pain, try doing it 2–3 times a day for at least 2 weeks. You will gradually feel the pain diminishing.

    Q. Is it okay to exercise after back acupressure?

    A. Light stretching or walking is fine. However, for high-intensity exercise such as heavy weightlifting, it is safer to wait at least 30 minutes after acupressure.

    ⚠️ Medical Disclaimer: This article is for informational purposes only and does not replace professional medical diagnosis or treatment. If symptoms persist or worsen, please consult a healthcare professional.