Introduction
When your menstrual cycle is irregular, it can shake up your daily life. Periods that come too early or too late, or that are heavier or lighter than normal, go beyond mere inconvenience and can cause stress and anxiety. In traditional Chinese medicine, irregular menstruation is diagnosed as a disruption in qi circulation, blood deficiency, or uterine cold conditions, and acupoint stimulation is considered effective for improving these issues. Acupoint massage is a method that can be done simply at home without medication, offering a natural way to manage irregular periods.
Five Acupoints
1. Sanyinjiao (SP6, Sanyinjiao)
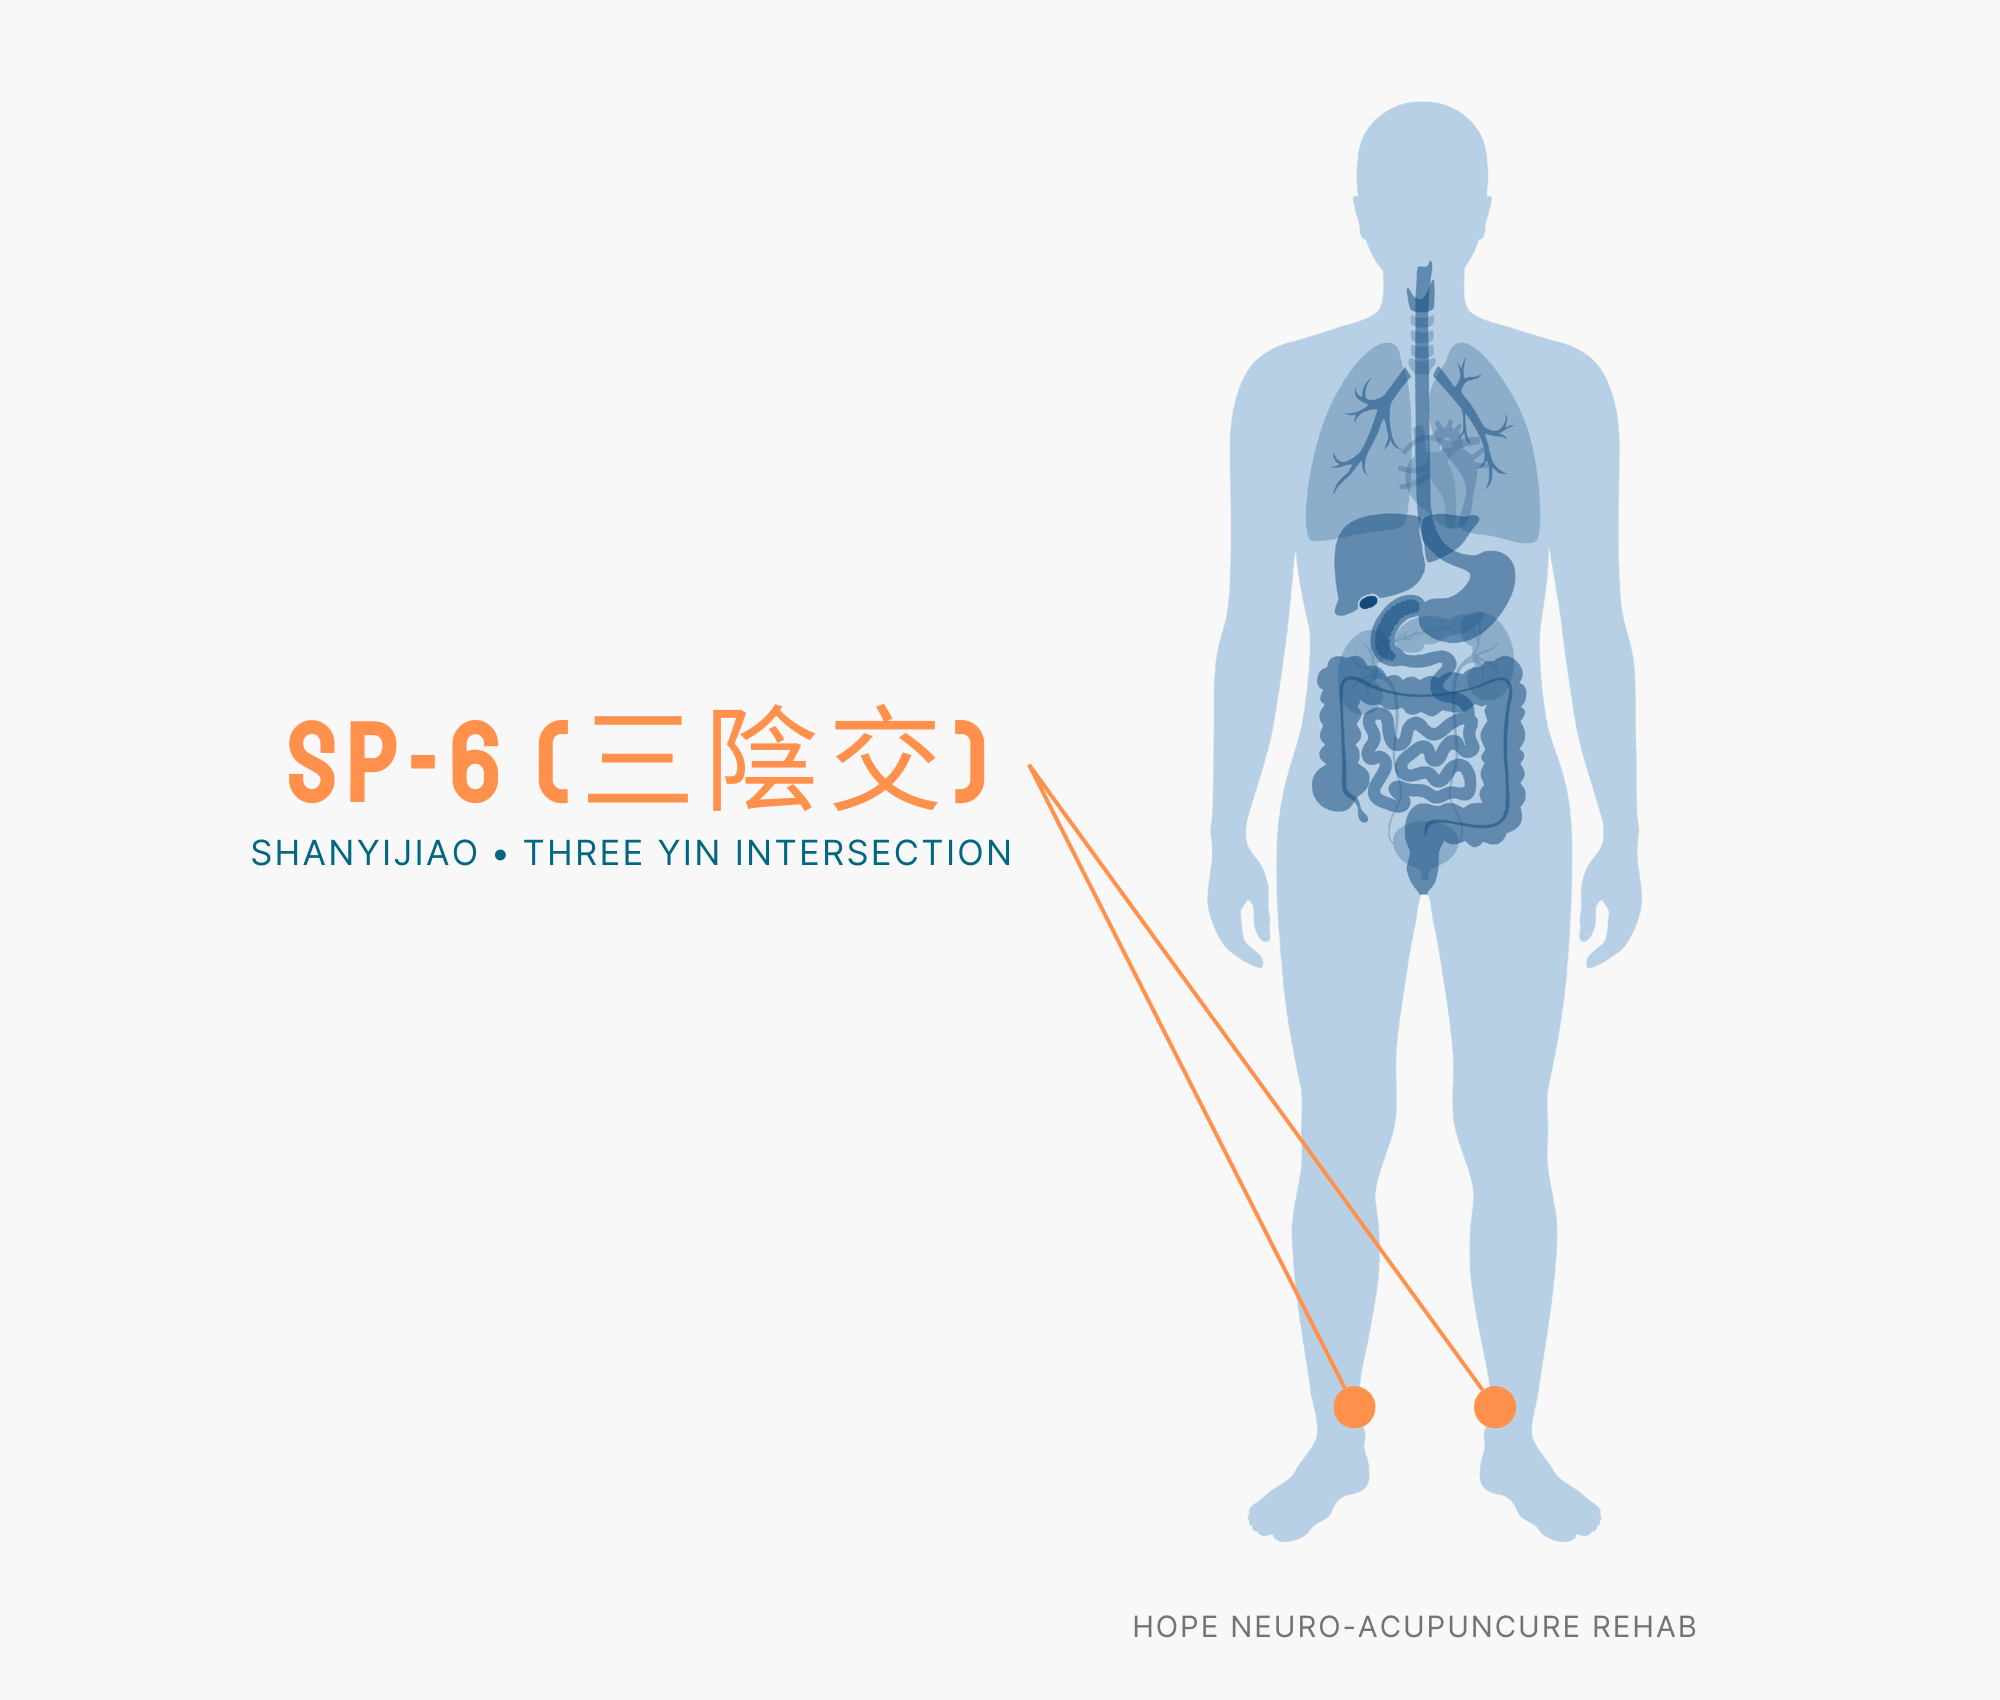
Location and WHO Code: SP6 is located on the inner side of the tibia (shinbone), about four finger-widths (approximately 10cm) above the inner ankle bone (medial malleolus).
Massage Technique: Press vertically with your thumb for about 3-5 seconds, then release. Stimulate each leg for 1 minute, for a total of 2 minutes.
Benefits: Sanyinjiao is the most important acupoint for treating irregular menstruation. It regulates uterine and ovarian function, promotes hormone secretion, and alleviates menstrual pain and premenstrual syndrome. Stimulating it 1-2 weeks before your period is effective for normalizing the menstrual cycle.
2. Xuehai (SP10, Xuehai)

Location and WHO Code: SP10 is located on the inner side of the knee, above the medial side of the kneecap. It is in a slight depression about one finger-width above the kneecap when the knee is bent.
Massage Technique: Place your thumbs on both knees and gently massage in circular motions for 1 minute on each side.
Benefits: Xuehai means “sea of blood” and promotes the discharge of menstrual blood while improving blood circulation. It is particularly effective when menstrual flow is light or the blood color is dark, and for irregular periods due to blood deficiency.
3. Hegu (LI4, Hegu)

Location and WHO Code: LI4 is located at the highest point of the webbing between the thumb and index finger. It is the point where pressing with the opposite thumb produces a sensation of slight discomfort.
Massage Technique: Press firmly with your thumb to the point of slight discomfort, then release. Stimulate each hand for 1 minute, for a total of 2 minutes.
Benefits: Hegu promotes qi circulation throughout the body and has excellent pain-relieving properties. It reduces menstrual pain, improves irregular periods caused by stress, and balances the autonomic nervous system.
4. Qihai (CV6, Qihai)
Location and WHO Code: CV6 is located on the midline, about 1.5 finger-widths (approximately 1.5cm) below the navel. It is slightly above the midpoint between the navel and the pubic bone.
Massage Technique: Gently massage in circular motions with warm fingertips for 2-3 minutes. Avoid strong pressure and focus on conveying warmth.
Benefits: Qihai is the lower dantian (lower energy center) and replenishes uterine energy while strengthening reproductive function. It is helpful for light menstrual flow or late periods, supporting overall stamina recovery and hormonal balance.
5. Taichong (LR3, Taichong)
Location and WHO Code: LR3 is located on the top of the foot at the boundary point of the webbing between the big toe and the second toe. It is in the muscle depression area of the dorsum of the foot.
Massage Technique: Press with your thumb to the point of slight discomfort, then release. Stimulate each foot for 1 minute, for a total of 2 minutes.
Benefits: Taichong improves liver qi circulation, reducing stress and emotional anxiety. Since traditional Chinese medicine considers stress a primary cause of irregular menstruation, regulating emotions through this point helps improve hormonal imbalance and promote regular menstruation.
5-Minute Self-Massage Routine
Time Allocation and Order:
• Preparation (30 seconds): Wash your hands and feet with warm water and sit in a comfortable position.
• Qihai (1 minute): Gently massage in circular motions on your abdomen.
• Hegu (1 minute): Press firmly on each hand for 30 seconds.
• Taichong (1 minute): Press each foot for 30 seconds.
• Sanyinjiao (1 minute): Press the inner tibia of each leg.
• Xuehai (1 minute): Gently massage both knees in circular motions.
Recommended Timing: Begin 5-7 days before your period starts and practice daily in the morning or evening. Avoid strong pressure during menstruation, and take a break for one week after your period ends.
Enhanced Heat Effect: Applying a warm pack (heat pack, warm belt) to your abdomen and lower back for 5-10 minutes after stimulating each acupoint enhances the effects.