“`html
Back Pain: Why Does It Occur and How to Address It?
Back pain has become a chronic condition in modern life. Prolonged sitting at work, smartphone use, and poor posture cause the muscles around the cervical and thoracic vertebrae to become stiff, leading to pain. The entire neck, shoulders, and back feel tense and heavy, which occurs because blood circulation is impaired and muscles lack oxygen.
In traditional Chinese medicine, such back pain is addressed fundamentally through acupoint stimulation. When specific acupoints are pressed, muscle tension releases, and blood and qi (energy) circulation improves along the meridians, alleviating pain. Without medication, immediate relief can be felt using just your fingers, making this method ideal for modern self-care.
5 Acupoints for Back Pain Relief — Precise Locations and Acupressure Techniques
1. Jianjing (肩井, GB21) — Immediate Relaxation of Shoulder and Upper Back Muscles
WHO Code: GB21 (Gallbladder Meridian 21)
Location: The midpoint of the line extending from the back of the neck toward the shoulder tip. It is the highest point of the shoulder muscle that becomes most prominent when bending the neck forward.
Acupressure technique: Press with your thumb for 3 seconds and rest for 2 seconds, repeating for 1 minute. Alternating acupressure on both Jianjing points quickly releases muscle tension throughout the shoulders and back.
Effect: Most effective for releasing shoulder knots (hardened muscles), and excellent for neck stiffness, migraines, and upper body tension caused by stress. Immediately after acupressure, pain significantly decreases along with a warming sensation.
2. Fengchi (風池, GB20) — Improved Blood Flow to Cervical Vertebrae and Brain
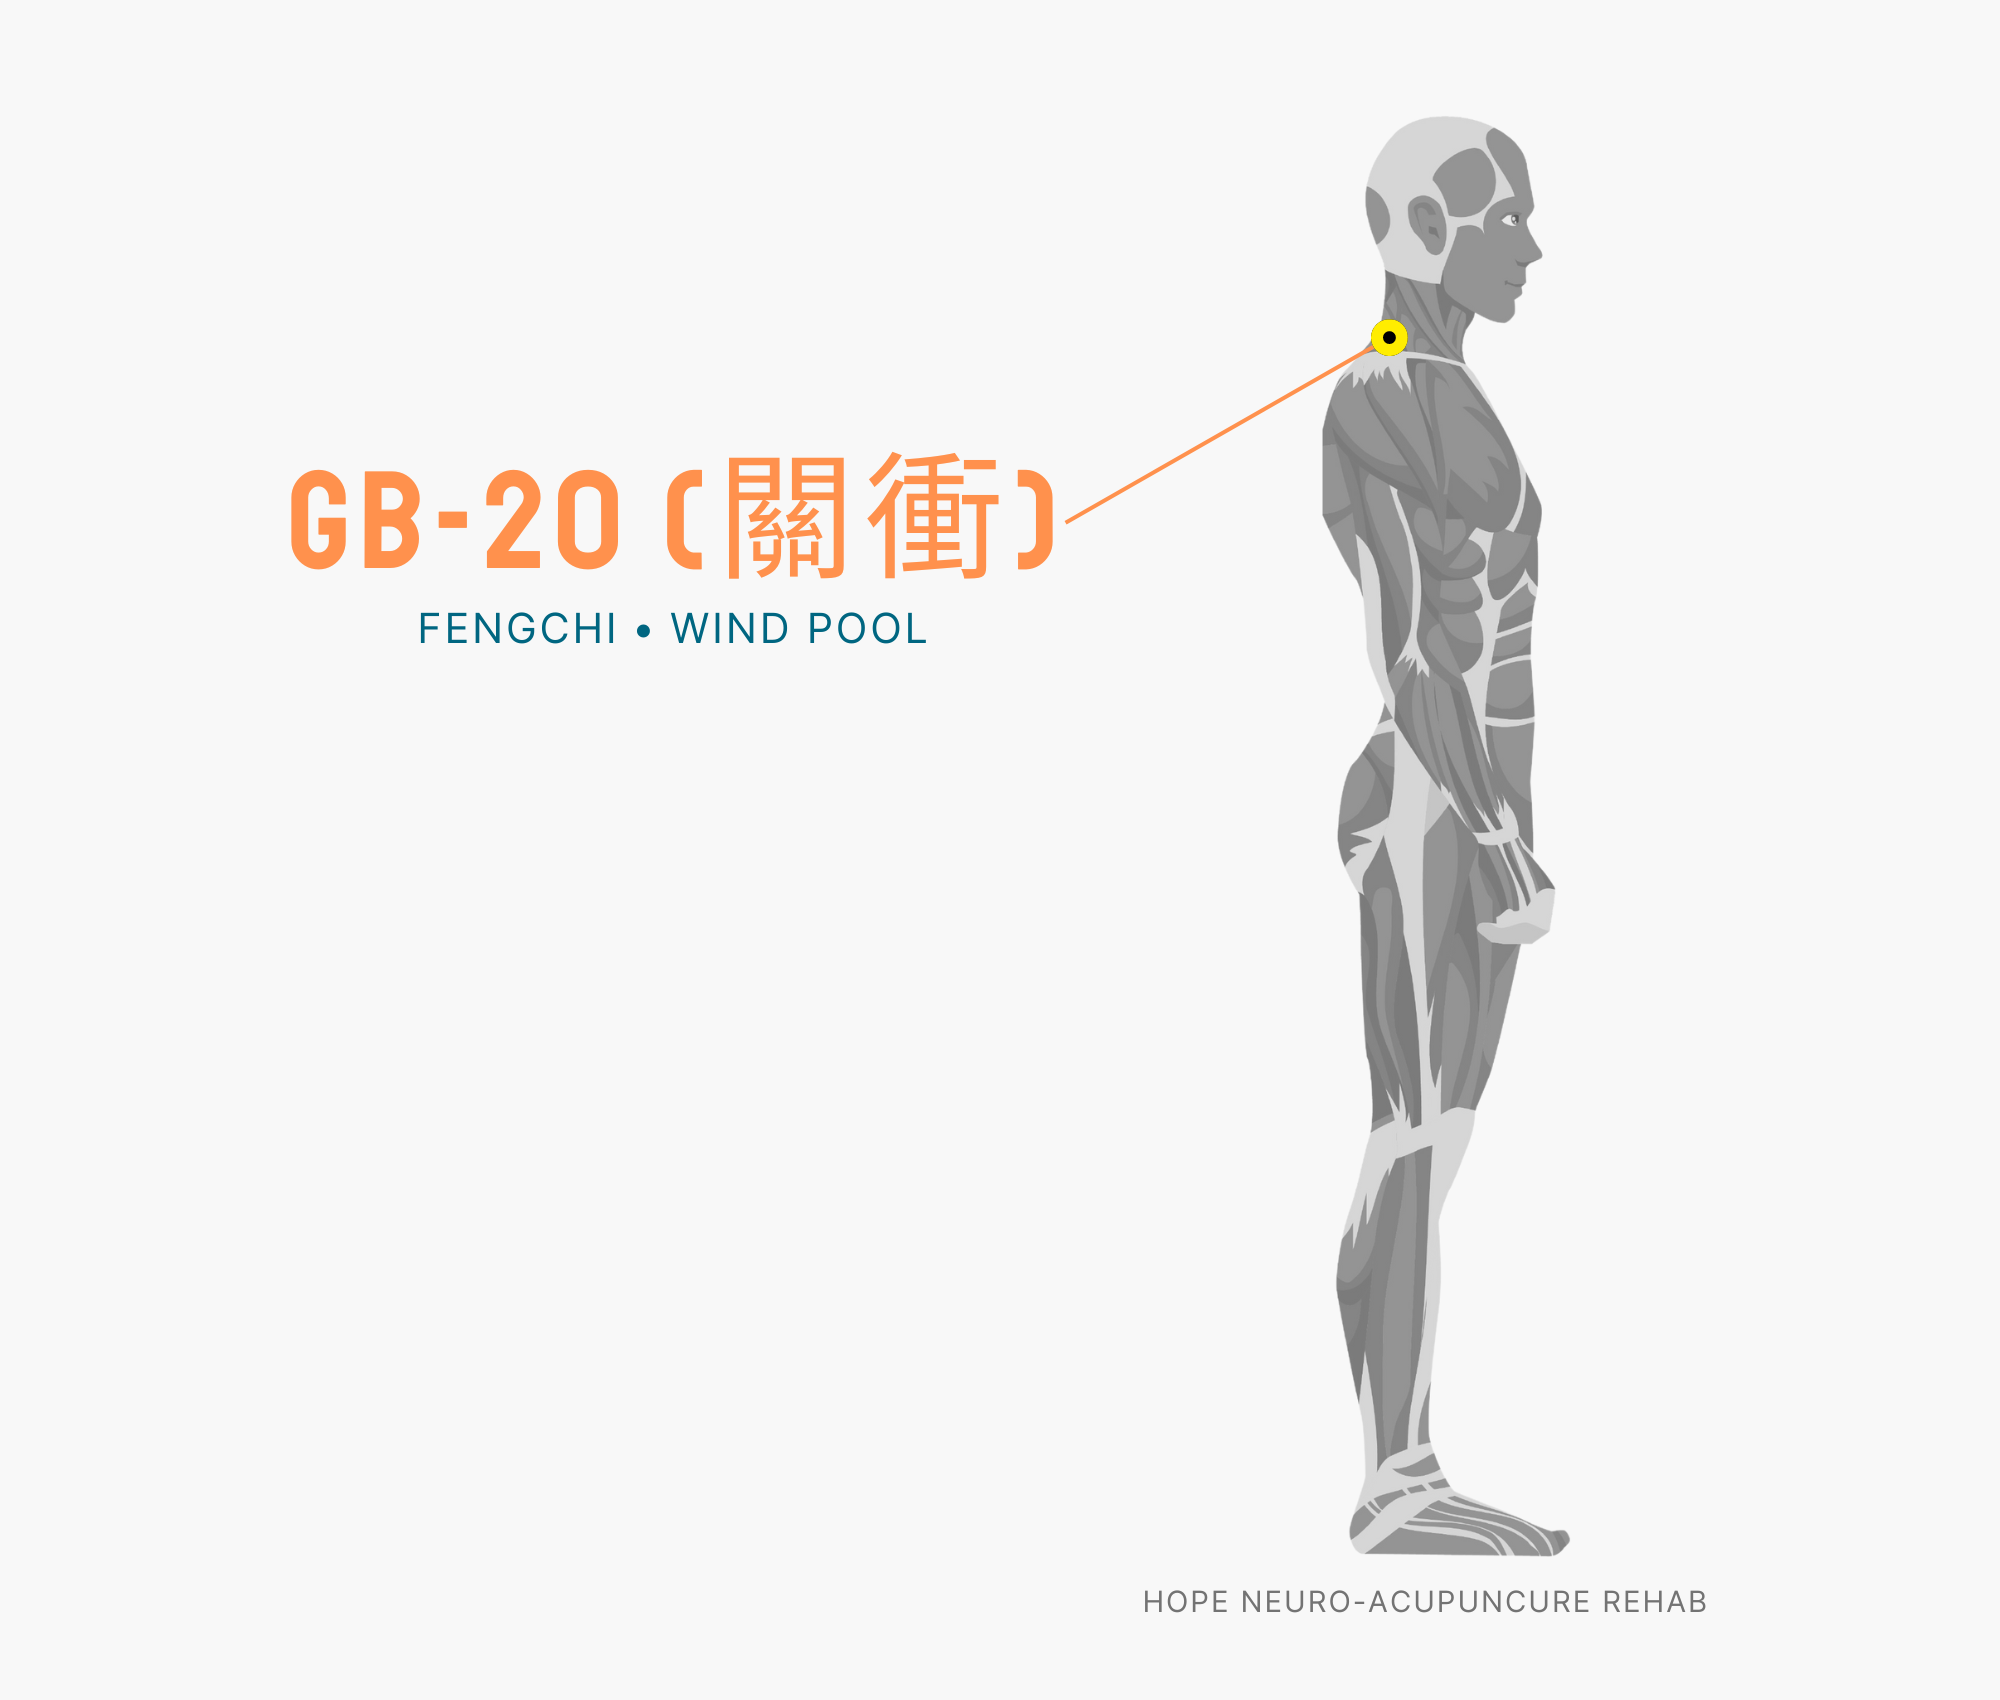
WHO Code: GB20 (Gallbladder Meridian 20)
Location: The back of the neck, in the hollow area between the cervical vertebra 7 and shoulder blade. Follow the back of your neck upward with your finger until you find the hollow area just below the hairline.
Acupressure technique: Gently press simultaneously with both thumbs, using an upward pushing motion for 3 seconds, then rest for 2 seconds, repeating for 1 minute. Continue repeating until the stiffness in the neck releases.
Effect: Improves blood circulation around the cervical vertebrae, quickly alleviating back of neck pain, cervical headaches, and neck stiffness. As blood flow to the brain increases, feelings of heaviness also ease.
3. Tianzhui (天柱, BL10) — Lower Cervical and Upper Back Connection Area

WHO Code: BL10 (Bladder Meridian 10)
Location: The center of the back of the neck, located at the outer boundary of the sternocleidomastoid muscle (neck side muscle). It is the point directly below where the neck and shoulder meet when bending the neck slightly.
Acupressure technique: Pinch with thumb and index finger while pressing for 3 seconds, then release for 2 seconds. Alternate sides for 1-2 minutes. A slight level of pain sensation is effective.
Effect: Relieves tension in the muscle groups connecting the lower cervical vertebrae to the upper back, and is particularly effective when experiencing both neck and back pain. Fatigue is quickly relieved through improved blood circulation.
4. Quchi (曲池, LI11) — Widespread Upper Body Pain Relief

WHO Code: LI11 (Large Intestine Meridian 11)
Location: The outer end of the elbow crease on the front of the elbow. It is the outermost point on the inner side of the elbow when the arm is bent.
Acupressure technique: Press firmly with your thumb in a vertical direction for 3-5 seconds, then release. Repeat for 1 minute. Alternating between both arms increases the effect throughout the upper body.
Effect: Since it stimulates nerve areas throughout the upper body along the Large Intestine Meridian, it relieves not only back pain but also arm numbness, elbow pain, and widespread upper body tension. Particularly effective for nerve-related pain.
5. Feishu (肺兪, BL13) — Deep Relaxation of Central Back Muscle Groups

WHO Code: BL13 (Bladder Meridian 13)
Location: The center of the back, approximately 2 cm to the side of the thoracic vertebra 3 spinous process (the protruding part of the vertebra) on the Bladder Meridian. The precise location is approximately one finger width to the side of the vertebrae on both sides.
Acupressure technique: Place a tennis ball under your back and lean against a wall for deep pressure, or lie flat and press firmly with your thumb in a vertical direction for 3-5 seconds, then release. Repeat for 1 minute.
Effect: Most effective for releasing deep knots in the central back muscle groups, improving breathing comfort and relieving chest discomfort. Improved respiration deepens overall body relaxation further.
5-Minute Self-Acupressure Routine — Effective Order and Time Distribution
Preparation: Sit or lie down comfortably. It’s better to begin after a warm bath when muscles are already relaxed.
- Jianjing Acupressure (1 minute)
Place your thumbs on both Jianjing points and repeat “press for 3 seconds and rest for 2 seconds.” You’ll feel the heaviness in your shoulders ease. - Fengchi Acupressure (1 minute)
Gently press simultaneously with both thumbs, using an upward pushing motion. You’ll notice the stiffness in the back of the neck ease and your mind becomes clearer. - Tianzhui Acupressure (1 minute)
Alternate sides, pinching with thumb and index finger, pressing for 3 seconds then releasing for 2 seconds. - Quchi Acupressure (1 minute)
Alternate between both arms, pressing firmly with your thumb in a vertical direction and then releasing, repeating this motion. - Feishu Acupressure (1 minute)
Lie flat and repeat vertical thumb pressing on both Feishu points on either side of the center back, or place a tennis ball underneath and lean against a wall to stimulate.
After completion: Perform gentle neck stretches in 4 directions for 5-10 seconds each right after acupressure, and the effects will be even more pronounced.
“`