Author: Acupoint Guide Editorial Team

  • Dizziness Self-Acupressure Beginner’s Guide — Start with These 3 Points if You’re New

    Dizziness Self-Acupressure Beginner’s Guide — Start with These 3 Points if You’re New

    Quick Summary: If you suffer from dizziness, starting today, just press 3 acupoints with your fingers. That alone is enough.

    Acupressure Isn’t Difficult

    Did you ever think you needed to know anatomy or special hand techniques to learn acupressure? You don’t. Acupressure isn’t complicated. It’s simply “slowly pressing a specific point.” I know many of you deal with dizziness these days and find it bothersome to visit hospitals, or prefer not to rely solely on medication. I was the same way. Let me share the 3 simplest and most effective points I’ve discovered. Starting today, follow along step by step.

    What to Know Before You Start

    First, “pain does not equal mistake.” When you do acupressure, you should feel something like “Ah, this feels refreshing!” Don’t press so hard that you can’t breathe. Slowly use your fingertip to press until you find a point where you think “Hmm, this is a bit tender.” That’s the right spot. Second, you must breathe deeply. Slowly inhale through your nose and exhale through your mouth. This breathing amplifies the effects of acupressure. Third, wash your hands thoroughly before starting. Your hands are the best tool you have. Finally, find a comfortable position. You can sit in a chair or lie down. Comfort is what matters most.

    Remember These 3 Locations

    First: Zusanli (ST36)

    How to find it: Look just below your knee. From the hollow part below the knee, move down about four finger-widths (approximately 3 cun). Press slightly on the outer side of that area (on the outer edge of the tibia). Both legs have the same point. It may be hard to find at first, but your hands will remember after a few tries.

    How to press: Use your thumb to press slowly. A pressure that makes you think “Ah, this is a bit tender” is correct. Slowly press for 3 seconds, hold for 3 seconds, then slowly release for 3 seconds. Repeat this for about 1 minute. You’ll feel a refreshing sensation along with warmth rather than pain.

    Press it when: It’s good when you wake up feeling dizzy in the morning and your body feels heavy, when you get tired around 3 PM, or when you’re worn out from evening work. This acupoint helps boost your overall vitality.

    Second: Sanyinjiao (SP6)

    How to find it: Find the inner ankle bone (medial malleolus). From that bone, move up about four finger-widths (approximately 3 cun). It’s in the hollow space between the tibia muscle and bone on the inner leg. As you slowly press with your fingers, you’ll find a spot that feels “Hmm, this is a bit tender.” That’s Sanyinjiao.

    How to press: Use your thumb to press, but start with slightly less pressure than you use for Zusanli. If you press too hard, your body will tense up instead. A pressure where you think “Hmm, this feels a bit tender” is best. You can slowly repeat the pressing for about 1 minute. As you press, you’ll feel your leg become slightly heavy or warm.

    Press it when: It’s especially effective when dizziness comes along with chest tightness or digestive discomfort. Try it in the evening lying in bed. It helps promote better sleep.

    Third: Taichong (LR3)

    How to find it: Look at the top of your foot. Follow the bone between your big toe and the next toe upward. Taichong is the hollow part in the middle of the top of the foot, slightly above where the toes meet. When you slowly press with your finger, you’ll feel a spot that makes you say “Ah, here it is!”

    How to press: Use your thumb to press slowly. Rather than pressing straight down, it’s better to press at a slight angle toward the toes. Again, press with the degree of pressure that makes you think “Ah, this feels refreshing.” You can slowly press for about 1 minute. This point releases tension from your head and calms your mind.

    Press it when: It’s effective when dizziness comes with stress or tension. Try it when you have lots of work, when you have things on your mind, or in the evening to release tension.

    Beginner 3-Minute Routine

    The best times are right after waking in the morning and before bed at night. This routine is really simple:

    ① Press Zusanli (1 minute) 1 minute on each leg, 2 minutes total. Start with the right side.

    ② Press Sanyinjiao (1 minute) 30 seconds on each ankle, 1 minute total.

    ③ Press Taichong (1 minute) 30 seconds on each foot, 1 minute total.

    This takes exactly 3-4 minutes. Do this routine every morning and evening. After one week, you’ll feel the difference.

    3 Common Mistakes

    ① Pressing too hard Beginners often think “It’s acupressure, so I should press firmly, right?” Absolutely not. Pressing too hard only tenses your muscles and can actually worsen dizziness. A gentle pressure that feels refreshing is enough.

    ② Rushing through it Pressing too quickly reduces effectiveness. Match your breathing and press slowly, release slowly. That’s the principle of acupressure. It’s better to go slowly and take longer.

    ③ Expecting results in a week Acupressure isn’t magic. You need to do it consistently for at least 2 weeks, and typically 3-4 weeks, before you notice changes. So don’t expect too much and just make it a comfortable habit.

    Moving to the Next Level

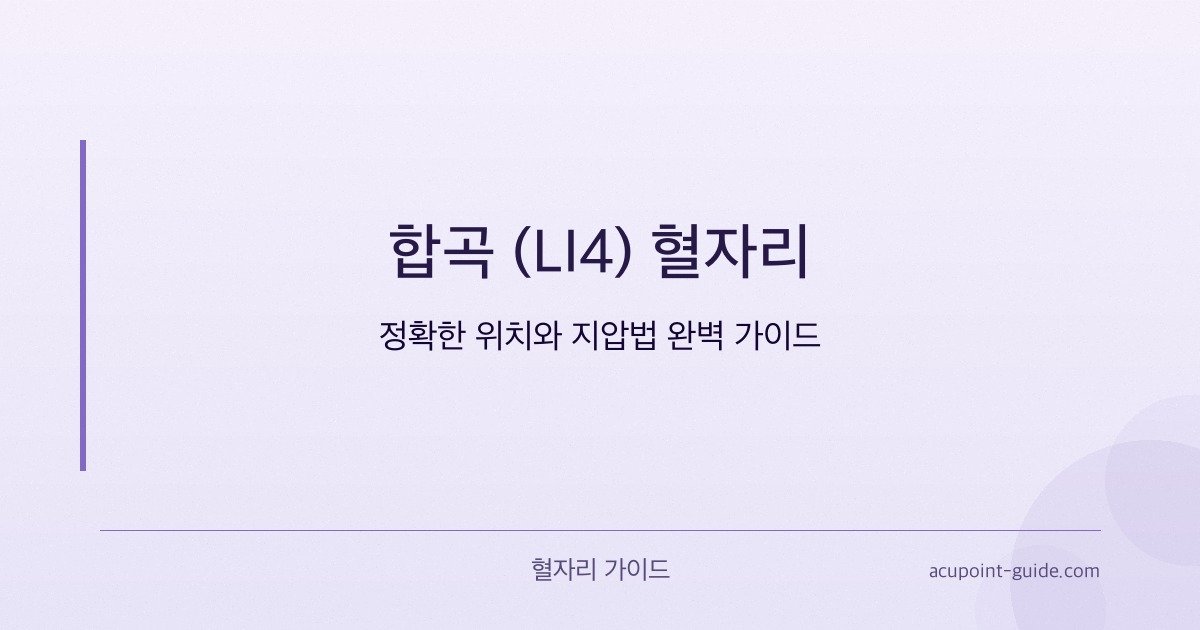
    Are you comfortable with those 3 acupoints? Now it’s time to learn 2 more. Hegu (LI4) is the hollow part above the bone between your thumb and index finger, and it’s excellent for overall pain relief. Fengchi (GB20) is the hollow part below where your neck and head meet, and it’s especially effective for head-related dizziness. You can press these two points the same way as the previous 3. Learn at your own pace, step by step.

    🤰 Pregnancy Warning: Some acupoints such as Sanyinjiao (SP6), Hegu (LI4), and Taichong (LR3) may trigger uterine contractions in pregnant women. If you are pregnant or may be pregnant, you must consult with a healthcare professional or licensed practitioner before using these techniques.
    ⚠️ Medical Disclaimer: This article is provided for informational purposes only and does not replace professional medical diagnosis or treatment. If symptoms persist or are severe, please consult a healthcare professional.
  • 5 Acupoints for Loss of Consciousness — Complete Self-Acupressure Guide

    5 Acupoints for Loss of Consciousness — Complete Self-Acupressure Guide

    One-Line Summary: Pressing five key acupoints on the hands and feet can quickly improve symptoms of loss of consciousness. It’s an emergency treatment technique you can practice anytime, anywhere.

    Introduction

    Many people experience sudden dizziness and mental cloudiness. There are various causes such as overwork, stress, and low blood sugar, but in traditional Chinese medicine, this is viewed as a deficiency of Qi (气) or insufficient blood circulation. If it’s not an emergency situation, you can clarify your consciousness and restore bodily function through acupoint pressing.

    5 Acupoints Effective for Loss of Consciousness

    1. Yongquan — KI1

    Location: On the front part of the sole of the foot, when the toes are curled, it is located in a depression (a small hollow) in the front third of the sole.

    Effects: As the first acupoint on the kidney meridian, it activates Qi throughout the entire body. It quickly improves dizziness and mental cloudiness through consciousness recovery, fatigue improvement, and actions that move excess heat downward.

    Pressing Method: While sitting or lying down, place one foot on the other knee. Repeatedly press the Yongquan area with your thumb tip for 3 seconds, then release for 2 seconds. Practice for 1 minute on each foot, 2-3 times daily.

    2. Shaoshang — LU11

    Location: About 0.1 cun from the outer (pinky side) corner of the thumbnail of the thumb.

    Effects: As the last acupoint on the lung meridian, it deepens breathing and awakens consciousness. It is traditionally known as an emergency acupoint for regaining consciousness in emergency situations. It simultaneously relieves anxiety and feelings of oppression.

    Pressing Method: Press Shaoshang firmly with the thumbnail of your opposite hand. Repeat pressing for 3 seconds at a time, 15-20 times until you feel slight discomfort. Alternate between both hands and press immediately when consciousness becomes cloudy.

    3. Laogong — PC8

    Location: In the center of the palm, where the tip of the middle finger touches when you make a fist.

    Effects: An acupoint on the heart meridian that calms the mind and soothes the nerves. It strengthens heart function to improve blood supply to the brain and alleviates stress-related mental cloudiness and mental anxiety.

    Pressing Method: In a comfortable position, open one palm. With the thumb of your opposite hand, massage the Laogong area in circular motions. Gently stimulate for 2 minutes, then breathe deeply. It is effective to practice 2 times daily, morning and evening.

    4. Shangyang — LI1

    Location: About 0.1 cun from the outer (thumb side) corner of the index finger’s thumbnail.

    Effects: As the starting point of the large intestine meridian, it promotes Qi circulation throughout the body. It has various effects including consciousness recovery, body activation, and temperature regulation of the skin, and also improves digestive discomfort that appears with dizziness.

    Pressing Method: With fingers extended, locate Shangyang precisely with the thumb of your opposite hand. Repeat pressing firmly for 3 seconds, 20 times until you feel discomfort. Stimulate both hands alternately and continue until consciousness clears.

    5. Shaozhong — HT9

    Location: 0.1 cun from the inner (ring finger side) corner of the pinky finger’s thumbnail.

    Effects: As the last acupoint on the heart meridian, it calms the body and mind and restores consciousness. It is particularly effective for mental-related symptoms such as anxiety, insomnia, and mental cloudiness, and also normalizes heartbeat.

    Pressing Method: With the pinky finger extended, press Shaozhong with the thumb of your opposite hand. Repeat pressing for 3-5 seconds, 15 times until you feel slight discomfort. Stimulate both hands alternately and proceed with deep breathing.

    5-Minute Self-Care Routine

    This is a quick pressing technique you can practice when you feel your consciousness becoming cloudy. First, press Shaoshang (LU11) and Shangyang (LI1) firmly on both hands for 1 minute each. Next, massage Laogong (PC8) for 1 minute, and if you can extend your feet, stimulate Yongquan (KI1) for 1 minute. Finally, press Shaozhong (HT9) for 1 minute to finish. Throughout the entire process, breathe deeply and stimulate at a level where you feel slight discomfort. When you practice this routine, most people experience their consciousness clearing and their body becoming activated within 1-2 minutes.

    🤰 Pregnancy Warning: Some acupoints such as Sanyinjiao (SP6), Hegu (LI4), and Taichong (LR3) can trigger uterine contractions in pregnant women. If you are pregnant or potentially pregnant, be sure to consult with a traditional medicine practitioner or healthcare professional before practicing.
    ⚠️ Medical Disclaimer: This article is written for informational purposes only and does not replace professional medical diagnosis or treatment. If symptoms persist or are severe, be sure to consult with a healthcare professional.
  • 5 Acupoints Beneficial for Both Cough and Tinnitus Simultaneously

    5 Acupoints Beneficial for Both Cough and Tinnitus Simultaneously

    One-line summary: To relieve cough and tinnitus simultaneously, daily acupressure on 5 key acupoints located in the neck, head, and chest can help improve symptoms.

    Introduction

    When cough and tinnitus appear together, daily life becomes truly inconvenient. Many people experience sleepless nights from coughing and difficulty concentrating due to ringing sounds in the ears. In traditional Korean medicine, these two symptoms are believed to stem from weakened lung function and imbalance of qi (vital energy). Fortunately, proper acupoint acupressure alone can greatly alleviate symptoms.

    5 Best Acupoints for Cough and Tinnitus

    1. Taixi — KI3

    Location: Inner side of the foot, in the depression between the medial malleolus (inner ankle bone) and the Achilles tendon

    Effect: Taixi is a source point of the kidney meridian that fundamentally strengthens lung function and boosts immunity. It reduces chronic cough, replenishes the body’s vital energy, and also improves tinnitus symptoms.

    Acupressure technique: Sit and place one foot on top of the other knee. Using your thumb, slowly press and release Taixi repeatedly for 1 minute. Repeat alternately on both feet.

    2. Fengchi — GB20

    Location: On the back of the neck, in the depression below the occipital bone (base of the skull), between the trapezius and sternocleidomastoid muscles

    Effect: Fengchi promotes the circulation of qi and blood in the neck and head. It relieves neck pain from coughing and simultaneously improves poor blood circulation, a major cause of tinnitus.

    Acupressure technique: Wrap both hands around the neck and press both Fengchi points simultaneously with your thumbs. Massage in circular motions 20-30 times, then gently tap the area.

    3. Baihui — GV20

    Location: At the crown of the head, at the intersection where the line connecting the tops of both ears meets the midline running from the bridge of the nose to the crown

    Effect: This is an acupoint that clears the mind and calms the spirit. It relieves anxiety and discomfort caused by tinnitus and improves auditory function by increasing cerebral blood flow.

    Acupressure technique: Gently tap the Baihui point with your fingertips on both hands. Lightly tap about 30 times, then press gently on the same point, hold it, and slowly release. Repeat this motion 3 times.

    4. Dazhui — GV14

    Location: At the boundary between the neck and upper back, in the depression directly below the spinous process of the 7th cervical vertebra (the most prominent bone when you bend your head forward)

    Effect: Dazhui is an acupoint that strengthens immunity throughout the body. It improves reduced lung function, the root cause of cough, and is excellent for preventing colds. Tinnitus is also improved.

    Acupressure technique: Place the middle finger of one hand on the middle finger of the other hand and press Dazhui firmly with this doubled finger technique. Press for 10 seconds, rest for 5 seconds, and repeat 5 times. Be careful not to press too hard.

    5. Shanzhong (Tanzhong) — CV17

    Location: At the center of the chest, at the midpoint of the line connecting both nipples on the sternum (4th intercostal space)

    Effect: This is an important acupoint that regulates lung and heart function. It is directly effective in relieving cough and makes breathing deeper and easier, which also helps calm anxiety caused by tinnitus.

    Acupressure technique: Press Shanzhong vertically with the middle finger of one hand. Press gently for 10 seconds, release for 2 seconds, and repeat 5 times. Do not press too hard.

    5-Minute Self-Care Routine

    Practice every morning or evening:

    Step 1 (1 minute): Apply acupressure to the Taixi points on both feet for 1 minute each.
    Step 2 (1 minute): Massage both Fengchi points on the neck simultaneously in circular motions.
    Step 3 (1 minute): Gently tap the Baihui point at the crown of the head.
    Step 4 (1 minute): Repeatedly press and release the Dazhui point at the boundary between the neck and upper back using the doubled finger technique.
    Step 5 (1 minute): Gently apply acupressure to the Shanzhong point at the center of the chest.

    If you consistently follow this routine, you should feel relief from cough and improvement in tinnitus symptoms within 2-3 weeks.

    🤰 Caution for Pregnant Women: Certain acupoints such as Sanyinjiao (SP6), Hegu (LI4), and Taichong (LR3) can trigger uterine contractions in pregnant women. If you are pregnant or may be pregnant, be sure to consult with a traditional Korean medicine practitioner or healthcare professional before practicing these techniques.
    ⚠️ Medical Disclaimer: This article is written for informational purposes only and does not substitute for professional medical diagnosis or treatment. If symptoms persist or are severe, be sure to consult with a healthcare professional.
  • 5 Acupoints Beneficial for Cough and Facial Swelling Simultaneously

    5 Acupoints Beneficial for Cough and Facial Swelling Simultaneously

    One-line Summary: Cough and facial swelling stem from respiratory imbalance and fluid metabolism issues, and can be simultaneously improved through 5 acupoints: Dazhui, Shanzhong, Lieque, Fenglong, and Chize.

    Introduction

    Are you struggling with persistent cough and facial swelling at the same time? This is not just a simple cold but a signal that your respiratory system and body fluid circulation are out of balance. In traditional Chinese medicine, there are effective acupoints that can improve these two symptoms together. Discover this self-care method that you can start with just one finger, without medication, right now.

    5 Best Acupoints for Cough and Facial Swelling

    1. Dazhui — GV14

    Location: Located directly below the depression under the 7th cervical vertebra, which is the most prominent bone when you lower your head. It is positioned on the midline between your neck and back.

    Benefits: Dazhui strengthens the yang qi of the entire body and activates respiratory function. It fundamentally alleviates cough symptoms while simultaneously enhancing immunity to reduce inflammation, which is the cause of facial swelling.

    Acupressure Method: Using your thumb or finger knuckle, apply slow, perpendicular pressure to the Dazhui point. Perform 5 repetitions of 30 seconds each, continuing until you feel a warm sensation. Doing this 3 times a day is most effective.

    2. Shanzhong — CV17

    Location: Located on the sternum in the center of the chest, at the midpoint of the line connecting the two nipples (4th intercostal space).

    Benefits: This acupoint regulates qi in the chest and is very important for treating respiratory conditions. It directly alleviates cough, promotes circulation in the upper body along with chest congestion relief, and quickly resolves facial swelling.

    Acupressure Method: Overlap your index and middle fingers and gently massage the Shanzhong point in circular motions. Do not press too hard; slowly repeat 3 sets for about 30 seconds each. Performing this before bed also helps with better sleep.

    3. Lieque — LU7

    Location: Located about 1.5 cun (approximately 2cm) above the wrist crease on the inside of the wrist, directly above the radial styloid process (the bony prominence on the thumb side).

    Benefits: An important acupoint of the Lung meridian, it directly addresses cough and asthma symptoms. It improves blood circulation to facial skin, quickly relieving facial heaviness and congestion caused by swelling.

    Acupressure Method: Using the thumb of the opposite hand, find the Lieque point and apply pressure at a slightly painful intensity for 30 seconds. Alternating between both hands and performing this 3 times daily, especially when coughing is severe, will show quick results.

    4. Fenglong — ST40

    Location: Located approximately 8 cun (about 24cm) below the outer lower point of the knee in the direction of the ankle, about 2 finger-widths (approximately 3cm) away from the outer (lateral) side of the tibia.

    Benefits: A key acupoint for eliminating dampness, it normalizes body fluid metabolism. It resolves fluid stagnation, the root cause of facial swelling, while simultaneously regulating mucus secretion in the respiratory system to effectively reduce cough.

    Acupressure Method: Sit with your legs extended and gently press the Fenglong point with your thumb while making circular motions. Perform this for 1 minute at a time, 2 times daily. Adjust the pressure intensity if there is pain.

    5. Chize — LU5

    Location: Located at the top of the elbow crease when the elbow is bent, on the outer side of the biceps tendon (the thick tendon on the inside of the forearm).

    Benefits: Directly connected to the lungs, this acupoint provides immediate relief from cough. It promotes circulation in the upper body, quickly improving swelling and heat sensations in the facial area.

    Acupressure Method: Using the thumb of the opposite hand, press the Chize point with slightly stronger intensity, repeating 5 times for 30 seconds each. Performing this twice daily in the morning and evening will quickly improve cough symptoms.

    5-Minute Self-Care Routine

    Step 1 (1 minute): First, apply acupressure to Dazhui (GV14) at the back of the neck for 30 seconds, then massage Shanzhong (CV17) in the center of the chest for 30 seconds. This activates lung function.

    Step 2 (2 minutes): Apply acupressure to Lieque (LU7) on the wrist, alternating hands for 1 minute, and stimulate Chize (LU5) on the elbow for 30 seconds on each arm. This maximizes respiratory circulation in the upper body.

    Step 3 (2 minutes): Finally, apply slow circular acupressure to Fenglong (ST40) on the legs for 1 minute on each leg. This removes dampness within the body, which is the root cause of facial swelling.

    Tip: Practicing this routine 2 times daily (morning and evening) will help you notice improvement in cough and swelling within 5-7 days. Start with warm hands, and drink warm water after acupressure for doubled benefits.

    🤰 Pregnant Women Warning: Certain acupoints such as Sanyinjiao (SP6), Hegu (LI4), and Taichong (LR3) may trigger uterine contractions in pregnant women. If you are pregnant or possibly pregnant, you must consult a traditional Chinese medicine practitioner or healthcare professional before practicing these techniques.
    ⚠️ Medical Disclaimer: This article is provided for informational purposes only and does not replace professional medical diagnosis or treatment. If symptoms persist or worsen, please consult a healthcare professional.
  • LI4 (Union Valley) Acupoint — Complete Guide to Accurate Location and Acupressure Technique

    LI4 (Union Valley) Acupoint — Complete Guide to Accurate Location and Acupressure Technique

    One-line Summary: Hegu (LI4) is a remarkable acupoint on the hand that can quickly relieve headaches, toothaches, and cold symptoms with just simple acupressure—it’s the best self-care acupoint.

    What is Hegu?

    Hegu (Union Valley) is an acupoint belonging to the Large Intestine meridian and is one of the most widely used acupoints in traditional Chinese medicine. Located on the hand with excellent accessibility, it can be easily stimulated anytime and anywhere. Because it works quickly and effectively for various symptoms, it’s known as a “universal acupoint.”

    How to Find the Exact Location

    Step 1: Open your hand and spread your thumb and index finger apart.
    Step 2: Find the most depressed area between the two fingers.
    Step 3: It’s located at the midpoint of the index finger bone (second metacarpal) and slightly below the end of the thumb bone (first metacarpal).
    Step 4: When you press this area, you’ll feel slight tenderness—this is the Hegu acupoint.

    Acupressure Method

    1. Basic Acupressure Technique: Using the opposite thumb, press the Hegu acupoint vertically. Press firmly enough to feel some tenderness, hold for 3-5 seconds, then slowly release.

    2. Rotational Acupressure Technique: While pressing Hegu with your thumb, make small circular motions—rotate clockwise 10 times, then counterclockwise 10 times.

    3. Duration: Apply acupressure for about 5-10 minutes per session, up to 2-3 times per day. When symptoms are acute, stimulating several times at 1-2 minute intervals is also effective.

    Key Benefits

    • Headache Relief: Quickly relieves various types of headaches including migraines, tension headaches, and frontal headaches.
    • Toothache Relief: Quickly relieves acute toothaches and pain caused by gingivitis.
    • Cold Symptom Improvement: Alleviates early cold symptoms, nasal congestion, and sore throat while boosting immunity.
    • Stress Relief: Relieves nervous tension and has a calming effect on mind and body.
    • Facial Pain Relief: Improves facial neuralgia, facial nerve paralysis, and TMJ pain.
    • Other Benefits: Can alleviate eye strain, tinnitus, neck stiffness, and digestive discomfort.

    When is the Best Time to Apply Acupressure?

    Optimal Timing: Applying acupressure immediately when symptoms appear is most effective. Quick pressure when headaches or toothaches suddenly occur, or at the first sign of cold symptoms, helps prevent symptom worsening.

    Preventive Acupressure: Stimulating the point 1-2 times daily during periods of high stress or during cold season can help prevent symptoms from developing.

    No Time Restrictions: You can apply acupressure anytime, though it’s better to do so 30 minutes after eating.

    Precautions

    Pregnancy Precautions: It’s best to avoid Hegu acupressure during pregnancy as it may trigger contractions. Consult with a healthcare professional.

    Avoid Excessive Pressure: While some tenderness is fine, avoid pressing too hard or causing injury.

    Emergency Situations: If acute illness or severe pain persists, seek professional medical care. Hegu acupressure is not emergency medicine.

    Consider Individual Differences: Effects may vary depending on individual constitution and symptom severity.

    🤰 Pregnancy Warning: Some acupoints such as Sanyinjiao (SP6), Hegu (LI4), and Taichong (LR3) may trigger uterine contractions in pregnant women. If you are pregnant or may be pregnant, be sure to consult with a practitioner of traditional Chinese medicine or a healthcare professional before using these points.
    ⚠️ Medical Disclaimer: This article is provided for informational purposes only and does not replace professional medical diagnosis or treatment. If symptoms persist or are severe, be sure to consult with a healthcare professional.
  • BL23 (Kidney Shu) vs GV4 (Ming Men) — Which Acupoint Should You Press?

    BL23 (Kidney Shu) vs GV4 (Ming Men) — Which Acupoint Should You Press?

    One-line summary: Shenshu (BL23) strengthens the kidneys laterally, while Mingmen (GV4) restores original qi centrally—though both are in the lumbar region, their direction and depth differ, and thus their applications also differ.

    What’s the difference between Shenshu and Mingmen?

    For those new to traditional Chinese medicine, Shenshu (BL23) and Mingmen (GV4) are often confused. Both are located below the spinous process of the second lumbar vertebra, and both help with lower back pain and fatigue. However, even though the exact location difference seems small, when the direction of stimulation and depth of penetration differ, the nature of the stimulus the body receives becomes entirely different. Shenshu is an acupoint that regulates qi and blood flowing outward laterally, while Mingmen is an acupoint that restores original qi flowing through the central axis. Depending on symptoms and constitution, which point is stimulated first significantly affects treatment results.

    Understanding Shenshu (BL23) in Depth

    Exact Location

    Shenshu is located at the height below the spinous process of the second lumbar vertebra, approximately 1.5 cun (about 4.5 cm) laterally from the midline of the spine. In other words, it exists as a pair on both sides of the spine. When you palpate the muscle beside the spine with your finger, there is a slightly depressed point—that is the location. Shenshu is located on the meridian called the Bladder meridian (BL), and is a “shu” point that directly stimulates the kidneys. The important point is that Shenshu has lateral distance from the spinous process—this means that stimulation of Shenshu focuses more on the surrounding muscles and kidney function rather than the spine itself.

    Recommended for These Conditions

    Chronic lower back pain, especially pain extending to the lateral side: Since Shenshu strengthens kidney qi, it is excellent for symptoms where the lateral lower back feels tight from standing or sitting for long periods. When fatigue and weakness are severe: Stimulating Shenshu has the effect of replenishing kidney essence (jing), making it ideal for those who wake up in the morning with unrelieved fatigue. Tinnitus (ringing in the ears): The relationship between the kidneys and ears is very close in traditional Chinese medicine, so stimulating Shenshu is effective for stress-related tinnitus. Reproductive health: Shenshu is also connected to the reproductive organs, so it is used for improving infertility and irregular menstruation. Reducing edema: Since Shenshu regulates fluid metabolism, it is especially recommended for those with lower body swelling.

    Acupressure Method and Tips

    Correct posture: You can do this standing or lying down, but the easiest method is to place your hands on your lower back and locate Shenshu with your thumbs. Pressure adjustment: For Shenshu, a “slow lifting motion” is more effective than “firm pressure.” Slowly press over 3 seconds, then slowly release over 3 seconds. Repeat this 10 times over 3 minutes. Important caution: Although Shenshu is near the spine, you must not press the spine itself. The key is to stimulate the muscle tissue beside the spine. Warming effect: Shenshu loves warmth, so stimulating it with warm fingers or applying mugwort moxibustion is even more effective. Optimal time: Stimulating at 5:00 AM to 7:00 AM (the Kidney hour in traditional Chinese medicine), when kidney qi is most abundant, is most effective.

    Understanding Mingmen (GV4) in Depth

    Exact Location

    Mingmen is located much more centrally than Shenshu. It is located directly in the depression between the spinous processes (the indented area between the spinous processes) below the second lumbar vertebra, on the Governing Vessel (GV), which is contrasted with the Conception Vessel. The key difference from Shenshu is that it is positioned exactly on the midline of the spine. The character “ming” (命) in Mingmen means “life” or “fundamental,” reflecting the philosophy that this acupoint deals with the “source” of life energy. Since it is located deeper and more centrally than Shenshu, the stimulation method must also be more careful.

    Recommended for These Conditions

    Acute lower back pain, especially a “twisting” sensation: Since Mingmen addresses the central axis energy of the spine, it shows rapid effects for acute pain from strains. Unexplained fatigue and lethargy: While Shenshu replenishes “kidney essence,” Mingmen restores “original qi” itself. This is for when you feel tired or unmotivated without any particular reason. Decreased digestive function and diarrhea: While Shenshu has no diarrhea benefit, Mingmen restores abdominal central axis yang qi and is effective for improving diarrhea. Knee pain: In traditional Chinese medicine, it is believed that “the lower back is the source,” so restoring original qi through Mingmen delivers energy to the knees, improving knee pain. Urinary difficulty, nocturia: Mingmen is an acupoint that aids the kidney’s transformative function and is effective for symptoms where urine does not flow easily or when waking frequently at night.

    Acupressure Method and Tips

    Correct posture: Since Mingmen is an acupoint on the midline of the spine, stimulating in a kneeling sitting position (seiza) is the safest and most effective. When lying down, place a cushion under the abdomen to prevent excessive compression of the spine. Pressure adjustment: Unlike Shenshu’s “lifting motion,” Mingmen uses “vertical pressing” as the basic technique. Place your thumb perpendicular to the spine and press slowly, aiming for a “pushing sensation” rather than a “stabbing sensation.” Press for 5 seconds and rest for 5 seconds, repeating 5 times. Depth adjustment: Since Mingmen is located deeper than Shenshu, the stimulation should penetrate through the muscle layer to the area around the spine. However, be careful not to damage the spine itself. Start with light pressure initially and gradually increase intensity as you adapt. Heat therapy: Mingmen also loves warmth, so placing a heat pack or applying mugwort moxibustion doubles the effectiveness. Optimal time: Stimulating Mingmen just before dawn (the Kidney hour, 5:00 AM to 7:00 AM) fills your body with energy throughout the day.

    Key Comparison Summary

    Item Shenshu (BL23) Mingmen (GV4)
    Location Lateral to the spine by 1.5 cun (lateral position) On the midline of the spine (midline)
    Anatomical structure Muscle layer (over erector spinae) Between spinous processes (deep layer)
    Meridian Bladder Meridian (BL) Governing Vessel (GV)
    Primary effects Strengthens kidney qi, relieves peripheral symptoms Restores original qi, strengthens central axis
    Lower back pain Pain extending to the lateral side Acute pain of the central axis
    Fatigue/Weakness Physical fatigue, lack of vitality Unexplained lethargy
    Unique benefits Tinnitus, edema Diarrhea, knee pain, nocturia
    Acupressure method Slow lifting motion, emphasis on warmth Vertical pressing, deep stimulation
    Location difficulty Moderate (finding muscles beside spine) Difficult (finding exact midline)
    Beginner recommendation ★★★★☆ ★★★☆☆

    Synergistic Effects When Used Together

    Stimulating both Shenshu and Mingmen together is called “Shenming (kidney-life) combined stimulation.” Combination guide by situation: (1) Chronic lower back pain + fatigue: Restoring kidney qi through Shenshu and strengthening central axis original qi through Mingmen together can provide 1.5 times faster recovery compared to stimulating Shenshu alone. The recommended stimulation order is “Mingmen first (align central axis), then Shenshu (bilateral reinforcement).” (2) Unexplained diarrhea + lower back pain: The diarrhea-improving effect of Mingmen and the kidney qi-strengthening benefit of Shenshu work together to simultaneously normalize intestinal motility and kidney fluid metabolism. (3) Chronic fatigue with knee pain: Simultaneous stimulation of Mingmen (knee pain) and Shenshu (kidney fatigue) improves qi and blood circulation throughout the leg, rapidly resolving knee pain. In actual acupuncture clinic practice, combined treatment is performed, such as applying moxibustion to both Shenshu and Mingmen together (heat moxibustion treatment) or placing herbal acupuncture simultaneously on both points. Precautions: When stimulating both Shenshu and Mingmen on the same day, space them out. It is safest to do Mingmen in the morning (deep stimulation) and Shenshu in the evening (light stimulation). Stimulating too strongly from the beginning may increase fatigue, so start with light intensity and gradually increase strength.

    Conclusion: Situation-Based Selection Guide

    Choose Shenshu first: (1) When you have lower back pain extending to the lateral side, (2) When your lower back feels stiff from standing for long periods, (3) When tinnitus accompanies the symptoms, (4) When you have lower body edema, (5) When a beginner is starting lower back self-care. Choose Mingmen first: (1) When you have acute lower back pain from a sudden strain, (2) When you feel tired without any apparent reason, (3) When you have diarrhea or constipation, (4) When your knees hurt while your lower back is weak, (5) When you have nocturia or urinary difficulty. When you need both: For chronic lower back pain and severe fatigue, using both Shenshu and Mingmen together can provide synergistic effects for faster recovery. However, strong stimulation from the start may actually increase fatigue, so the principle is to start with light intensity (about 30-40% of pain level) and increase strength after 2 weeks. If symptoms do not improve even after 6 or more weeks of stimulation, please consult a professional acupuncturist to identify the exact cause and receive personalized treatment.

    🤰 Pregnancy caution: Certain acupoints such as Sanyinjiao (SP6), Hegu (LI4), and Taichong (LR3) may trigger uterine contractions in pregnant women. If you are pregnant or there is a possibility of pregnancy, please consult with an acupuncturist or medical professional before applying these techniques.
    ⚠️ Medical disclaimer: This article is provided for informational purposes about health and does not replace professional medical diagnosis or treatment. If symptoms persist or are severe, please consult with a medical professional.
  • Eye Fatigue Self-Acupressure Introduction — Start with These 3 Points for Beginners

    Eye Fatigue Self-Acupressure Introduction — Start with These 3 Points for Beginners

    One-line summary: An ultra-simple 3-minute self-acupressure routine to relieve eye fatigue focusing only on fingers and wrists

    Acupressure isn’t difficult

    Are your eyes strained from looking at screens for long periods lately? I’ve been there too. But the good news is that there are acupoints on your fingers, wrists, and the back of your neck that can relieve eye fatigue. You don’t need to be a doctor or expert. Anyone can touch their own body. This guide will explain three acupoints, their exact locations, and how to press them in an easy way for you who are learning acupressure for the first time. No special tools needed, and it won’t cost you anything. You can start right now.

    What to know before you start

    The most important principle of acupressure is ‘moderation’. It’s not about pressing hard, but applying pressure that’s slightly uncomfortable. It shouldn’t hurt. It’s like how it feels good when a friend gives you a light tap on the shoulder. When doing acupressure, try breathing deeply. If you hold your breath, your muscles will tense up. Always remember to start in a comfortable position, with clean hands, and with a calm mind.

    Just remember these 3 spots

    First: Tai Chong (LR3)

    How to find it: Look at the top of your foot. There’s a slightly indented area right in front of where the bone of your big toe meets the bone of your second toe. That’s Tai Chong. When you slowly touch that area with your finger, you’ll feel a slight tingling sensation. That’s the right spot.

    How to press: Slowly press with your thumb. Press for about 3 seconds while exhaling, then release your finger while inhaling. Repeat this for 1 minute. The pressure should be at a level where you think “hmm, this feels about right” rather than hard.

    Try pressing it at these times: Around 3 PM when your eyes are most tired, in the evening after leaving work when you want to rest your eyes, or when your body is generally tense.

    Second: He Gu (LI4)

    How to find it: Open the back of your hand. There’s a concave area between your thumb and index finger where they meet. To be precise, it’s where the bone of your thumb meets the bone of your index finger. You can find it easily by slowly touching that indented area with the thumb of your other hand.

    How to press: Press that indented area with the thumb of your other hand. You don’t need to tense your whole hand. Just focus entirely on that point and press slowly. Press for 3 seconds while exhaling, and release while inhaling. Repeat this for 1 minute. Since it’s on your hand, you can do it anytime, right?

    Try pressing it at these times: During work breaks when you want to give your hands a quick massage, when your vision seems blurry, or when you’re stressed. It’s also great when your fingertips feel numb.

    Third: Feng Chi (GB20)

    How to find it: Feel the back of your neck with your hand. Below the occipital bone (the rounded bone at the back of your head), where your neck meets your shoulders, there are two indented areas. If you trace your hand down from just behind your ear along your neck, you’ll feel a small valley-like area on each side between the lateral muscle (trapezius) and the front neck muscle. That’s Feng Chi.

    How to press: You can press both Feng Chi points simultaneously with the thumbs of both hands, or press one side at a time with one hand. Since there are many neck muscles in this area, you can apply slightly stronger pressure, but you should still maintain a ‘non-painful level’. Press for 3 seconds and release for 3 seconds, repeating this for 1 minute. You’ll feel your neck melting away.

    Try pressing it at these times: When your neck is stiff from looking at the computer for a long time, when you have a headache along with eye fatigue, or when you feel tired in the evening. When your neck becomes comfortable, your eyes become more comfortable too.

    Beginner 3-minute routine

    Try this in a comfortable spot right after waking up in the morning or after leaving work in the evening. First 1 minute: Tai Chong (top of foot) — You can press each foot for 1 minute, or press both feet simultaneously for 30 seconds each. Second 1 minute: He Gu (between fingers) — Alternate pressing both hands. Third 1 minute: Feng Chi (back of neck) — Sit comfortably and press both sides simultaneously with your thumbs. If you do these 3 things once in the morning and once in the evening, you’ll have a much more comfortable day. If you don’t have time, you can prioritize pressing the most tired areas first. Consistency is more important than perfection.

    3 common mistakes

    1. Pressing too hard — If you press to the point of pain, your muscles will become more tense. The right feeling is “hmm, this amount seems sufficient.” Pressing harder doesn’t mean better results.

    2. Not breathing deeply — If you hold your breath while doing acupressure, the effect diminishes. Try breathing slowly and consciously. Press while exhaling, and release while inhaling. This breathing is very important.

    3. Giving up after a few days — The effects of acupressure accumulate. You might not feel much at first, but if you do it consistently for about a week, you’ll notice a change like “huh? My eyes aren’t as tired these days.” Don’t judge too quickly.

    Moving to the next level

    Once you’re sufficiently familiar with these 3 acupoints, you can try two more. One is Jing Ming (inner corner of the eye), which is an acupoint located next to your nose at the inner corner of your eye. Gently tap it with your index finger, and your eye fatigue will melt away. The other is Tai Yang (temple), the area at the sides of the forehead. If you gently tap both temples with your knuckles, headaches and eye fatigue are relieved simultaneously. But for now, focus on mastering these 3 basic acupoints. With a solid foundation, it will be easier to apply them later.

    🤰 Pregnancy warning: Certain acupoints such as San Yin Jiao (SP6), He Gu (LI4), and Tai Chong (LR3) may trigger uterine contractions in pregnant women. If you are pregnant or may be pregnant, you must consult with a traditional medicine practitioner or healthcare professional before practicing.
    ⚠️ Medical disclaimer: This article is written for informational purposes and does not substitute for professional medical diagnosis or treatment. If symptoms persist or worsen, be sure to consult with a healthcare professional.
  • 5 Acupoints That Simultaneously Help with Cough and Abdominal Pain

    5 Acupoints That Simultaneously Help with Cough and Abdominal Pain

    One-line summary: When coughing and abdominal pain occur at the same time, focusing on 5 acupoints that connect the lungs and digestive system can relieve both symptoms together.

    Introduction

    When experiencing coughing and abdominal pain at the same time, daily life becomes very inconvenient. With each cough, the abdominal muscles tense up and abdominal pain worsens, which causes sleep quality to decline. Modern medicine treats these symptoms separately, but Eastern medicine views the root causes of coughing and abdominal pain as interconnected. When you stimulate acupoints that improve qi (energy) flow in the lungs and digestive organs, both symptoms can be relieved together.

    5 Beneficial Acupoints for Coughing and Abdominal Pain

    1. Dazhui — GV14

    Location: The depression below the 7th cervical vertebra prominence at the back of the neck. When you lower your head, it is the small depression directly below the most prominent bone.

    Benefits: Strengthens lung function and directly relieves coughing. Boosts immunity and helps prevent colds, and is an important acupoint for tonifying yang qi throughout the entire body.

    Acupressure technique: Lower your head naturally, then gently rub this point in circular motions with your thumb for 30 seconds. Do not press too hard—light warmth is appropriate.

    2. Danzhong — CV17

    Location: On the sternum in the center of the chest, at the exact midpoint of the line connecting both nipples. Located at the 4th intercostal space (between the 4th ribs).

    Benefits: Directly regulates the respiratory system to relieve coughing and chest tightness. Calms the nervous system and prevents symptom aggravation from stress.

    Acupressure technique: Overlap your index and middle fingers and slowly apply pressure in circular motions for 1 minute. Continue until you feel a sense of ease in your chest.

    3. Qihai — CV6

    Location: About 1.5 cun (approximately 2 centimeters) below the navel, located directly on the anterior midline of the abdomen.

    Benefits: A key acupoint that relieves all abdominal pain. Improves digestive function and promotes intestinal movement to relieve abdominal discomfort. An important point for replenishing qi, the vital life energy.

    Acupressure technique: Overlap two fingers and press slowly below the navel for 1 minute. Direct pressure is more effective than circular motions.

    4. Lieque — LU7

    Location: From the wrist crease on the thumb side, about 1.5 cun (approximately 2 centimeters) toward the arm, near the radial styloid process (the pointed bone above the thumb).

    Benefits: Directly activates the lung meridian to quickly relieve respiratory symptoms such as coughing, colds, and sore throat. Also improves numbness in the wrist.

    Acupressure technique: With the opposite thumb, gently apply circular pressure for 30 seconds on both hands. Continue until you feel a slight stiffness sensation with warmth transmission.

    5. Fenglong — ST40

    Location: From the outer side of the ankle toward the knee, about 8 cun (approximately 12 centimeters) up, about 2 cun (approximately twice the thumb width) lateral to the tibia. Near the outer bone of the calf.

    Benefits: Activates digestive function and directly relieves abdominal discomfort and pain. Removes dampness throughout the body, improves abdominal bloating, and promotes metabolism.

    Acupressure technique: Apply pressure with your thumb in slow circular motions for approximately 2 minutes on both legs. It is effective when you feel slight warmth and a slight aching sensation in the calf.

    5-Minute Self-Care Routine

    The most efficient way to relieve both coughing and abdominal pain simultaneously is to apply pressure in sequence. When you wake up in the morning or when symptoms are severe, follow this routine.

    Step 1 (1 minute): First, start with Dazhui (GV14) at the back of the neck. This is the first step in activating lung function.

    Step 2 (1 minute): Apply pressure to Danzhong (CV17) on the chest to deepen your breathing.

    Step 3 (1 minute): Slowly press Qihai (CV6) below the navel to regulate abdominal energy.

    Step 4 (1 minute 30 seconds): Apply pressure to Lieque (LU7) on both wrists to strengthen the lung meridian.

    Step 5 (1 minute 30 seconds): Finally, apply pressure to Fenglong (ST40) on both calves to activate digestive function.

    🤰 Pregnancy Warning: Some acupoints such as Sanyinjiao (SP6), Hegu (LI4), and Taichong (LR3) may trigger uterine contractions in pregnant women. If you are pregnant or may be pregnant, be sure to consult with a practitioner of traditional Chinese medicine or healthcare professional before practicing.
    ⚠️ Medical Disclaimer: This article is written for informational health purposes and does not replace professional medical diagnosis or treatment. If symptoms persist or are severe, be sure to consult with a healthcare professional.
  • LI3 (Third Interval) Acupoint — Complete Guide to Precise Location and Acupressure Technique

    LI3 (Third Interval) Acupoint — Complete Guide to Precise Location and Acupressure Technique

    One-line Summary: LI3 is an acupoint located behind the second metacarpophalangeal joint of the index finger, and is a versatile acupoint that quickly relieves toothache, sore throat, and eye pain.

    What is LI3?

    LI3 (Three Intervals) is an acupoint belonging to the Large Intestine meridian, located in the second metacarpophalangeal joint area of the finger. This acupoint is known to effectively relieve pain in the face and neck area, and is an important acupoint that has been used for a long time in traditional Chinese medicine. In particular, it is characterized by a quick response to acute pain, serving a role similar to first aid.

    How to Find the Exact Location

    Step 1: Extend your hand comfortably and look at your index finger.
    Step 2: Find the second joint (second metacarpophalangeal joint) of your index finger. This is the area where wrinkles form when you bend and straighten your finger.
    Step 3: Press the indented area (hollow section) on the thumb side (radial side, toward the thumb) of that wrinkle.
    Step 4: When you find the correct location, you should feel slight pain or a refreshing sensation.

    Acupressure Method

    Basic Acupressure Technique:
    1. Prepare by sitting or lying down in a comfortable position.
    2. Use the side of your thumb nail or an acupressure tool.
    3. Apply slight pressure perpendicular to the LI3 acupoint.
    4. Press for 3-5 seconds, then slowly release the pressure.
    5. Repeat this 10 times.
    Tips to Enhance Effectiveness: It is more effective to perform acupressure while breathing deeply. It is fine to apply acupressure frequently when pain is severe.

    Key Benefits

    • Relief from Toothache: Effective for both acute and chronic toothache, and is frequently used as first aid before treatment.
    • Relief from Sore Throat: Quickly relieves pain and discomfort caused by throat inflammation.
    • Improvement of Eye Pain: Reduces eye fatigue, red eyes, eye pain, and relieves vision fatigue.
    • Relief from Headache: Particularly helpful for migraines and tension headaches.
    • Reduction of Facial Swelling: May help reduce facial puffiness.

    When is it Good to Apply Acupressure?

    Optimal Time: There are no specific time restrictions, and you can apply acupressure whenever you feel pain. However, it is best to avoid applying it within 1 hour after eating or when extremely tired.
    Recommended in These Situations: While waiting for treatment, sudden toothache, sore throat, eye fatigue from prolonged screen work, and when experiencing headaches due to stress.

    Precautions

    Contraindications: Pregnant women should avoid LI3 acupressure. Excessive pressure or prolonged acupressure can cause skin damage, so maintain appropriate intensity.
    Guidance: If persistent pain continues for 3 days or longer or worsens, be sure to consult a healthcare professional. Acupoint acupressure is a complementary therapy and cannot completely replace disease treatment.

    🤰 Pregnancy Warning: Certain acupoints such as SP6, LI4, and LR3 can trigger uterine contractions in pregnant women. If you are pregnant or may be pregnant, be sure to consult with a traditional medicine practitioner or healthcare professional before applying acupressure.
    ⚠️ Medical Disclaimer: This article is written for the purpose of providing health information and does not replace professional medical diagnosis or treatment. If symptoms persist or are severe, be sure to consult a healthcare professional.
  • Second Interval (LI2) Acupoint — Complete Guide to Exact Location and Acupressure Technique

    Second Interval (LI2) Acupoint — Complete Guide to Exact Location and Acupressure Technique

    One-line summary: LI2 is a natural acupressure point on the index finger that has immediate effects on relieving toothache and sore throat as an important acupoint of the Large Intestine meridian.

    What is LI2?

    LI2 is an acupoint belonging to the Large Intestine meridian, located on the index finger of the hand. In traditional medicine, it is called “nature’s pain reliever” and is an important acupoint with excellent effects on alleviating inflammatory diseases and pain in the upper body. Historically recorded in many medical classics, it is widely used in modern times as a self-care therapy that can be conveniently applied in daily life.

    How to Find the Exact Location

    Step-by-step location confirmation: First, spread your hand comfortably and examine your index finger. Second, moving downward from the tip of the finger toward the base, find the second interphalangeal joint (second joint). Third, press on the small indented area on the anterior side (toward the nail) of that joint toward the thumb side (radial side). Fourth, when pressing, you should feel slight tenderness or a refreshing sensation to confirm the accurate acupoint. The LI2 point exists at the same location on the opposite hand as well, so you can stimulate both sides.

    Acupressure Method

    Basic acupressure method: First, sit in a comfortable position and spread your hand. Then, precisely position the tip of your opposite hand’s thumb at the LI2 acupoint. Apply pressure vertically and slowly toward LI2 over 2-3 seconds. Press with a tolerable intensity (around 7-8 out of 10) and hold for 3-5 seconds. Slowly release the pressure and relax over 2-3 seconds. Repeat 10-20 times on one hand, then proceed with the other hand in the same manner. Tip for maximum effectiveness: It is important to apply vertical pressure at the exact location without rubbing or rotating. Performing this regularly every day will be even more effective.

    Main Effects

    • Toothache relief: As an acupoint of the Large Intestine meridian, LI2 rapidly alleviates pain around the face and mouth. When acute toothache occurs, immediate acupressure can significantly reduce the intensity of pain.
    • Sore throat improvement: When the throat is sore and inflamed, acupressure on LI2 relieves throat tension and alleviates inflammation. It is effective for sore throat caused by common cold or chronic throat discomfort.
    • Stopping nosebleed: When nosebleed occurs, pressing LI2 regulates blood circulation and stops the nosebleed quickly. It is particularly effective for nosebleeds caused by stress or dryness.

    When is it Good to Apply Acupressure?

    Optimal timing: LI2 can be pressed whenever needed, but it is most effective to apply pressure immediately when pain occurs. Applying pressure when you wake up in the morning can provide preventive effects throughout the day, and evening pressure helps with fatigue recovery. After 30 minutes following meals is a good time for acupressure, and pressing once more before sleep can improve sleep quality. Usage by situation: It can also be used as an emergency treatment by applying pressure immediately when toothache occurs, when experiencing sore throat pain, or when nosebleed happens.

    Precautions

    Precautions when applying acupressure: If you are pregnant or have a serious medical condition, consult with a healthcare professional beforehand. Pressing too strongly can cause tissue damage, so maintain appropriate pressure within the range of tolerable pain. Avoid areas with skin wounds or infections. If symptoms worsen or new symptoms appear after acupressure, visit a medical facility. Since LI2 acupressure is only a supplementary treatment, severe symptoms or persistent pain should be examined by a professional.

    🤰 Pregnancy caution: Some acupoints such as SP6, LI4, LR3, etc., can trigger uterine contractions in pregnant women. If you are pregnant or may be pregnant, be sure to consult with a healthcare professional before applying.
    ⚠️ Medical disclaimer: This article is written for the purpose of providing health information and does not replace professional medical diagnosis or treatment. If symptoms persist or are severe, be sure to consult with a healthcare professional.