Why Manage Headaches with Acupressure Points
Headaches are one of the most common symptoms experienced by modern people. They occur from various causes including stress, neck stiffness, sleep deprivation, and weather changes, and they represent not just a problem in the head itself but a signal of fatigue and imbalance throughout the body. In traditional medicine, headaches are understood as “disrupted circulation of qi and blood,” and specific acupoints are stimulated to correct this imbalance. Acupressure is a self-care method that can be performed anytime and anywhere without medication side effects, and it works by stimulating nerves and muscles to promote blood circulation and relieve muscle tension.
5 Acupoints for Headache Relief
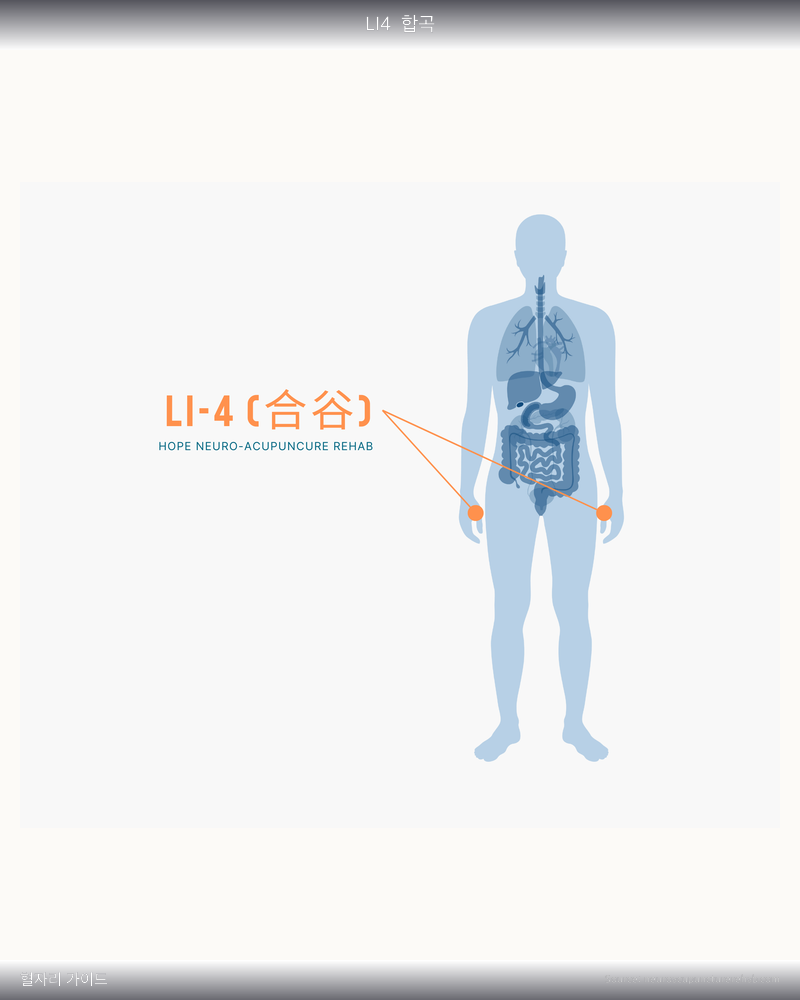
1️⃣ Hegu (LI4)

Location: The hollow between the thumb and index finger (on the back of the hand)
Meridian: Large Intestine Meridian
Mechanism of action: Hegu is known as the “cure-all for all headaches.” Located on the Large Intestine Meridian, which transmits nerve signals, it regulates nerve stimulation directed to the brain. It is effective for relieving nearly all types of headaches, including migraines, tension headaches, and headaches caused by colds.
Acupressure technique: Using the thumb of the opposite hand, slowly press Hegu, maintaining stimulation at a slightly tender point for 5-10 seconds, and repeat 3 times. Massaging the wrist in counterclockwise circles is also beneficial.
Effects: Immediate headache relief, stress relief, enhanced immunity
2️⃣ Baihui (GV20)
Location: The crown of the head (where the line connecting both ears intersects with the line drawn up from the bridge of the nose)
Meridian: Governing Vessel
Mechanism of action: The acupoint closest to the brain center that directly relieves tension in the crown area. It is particularly effective for pain in the vertex and headaches caused by brain fatigue, and also helps improve concentration and reduce anxiety.
Acupressure technique: Place the middle and ring fingers of both hands overlapping on Baihui, press vertically downward for 5 seconds. Repeat 20 times with a gentle whole-head massage feeling.
Effects: Vertex pain relief, brain fatigue relief, better sleep
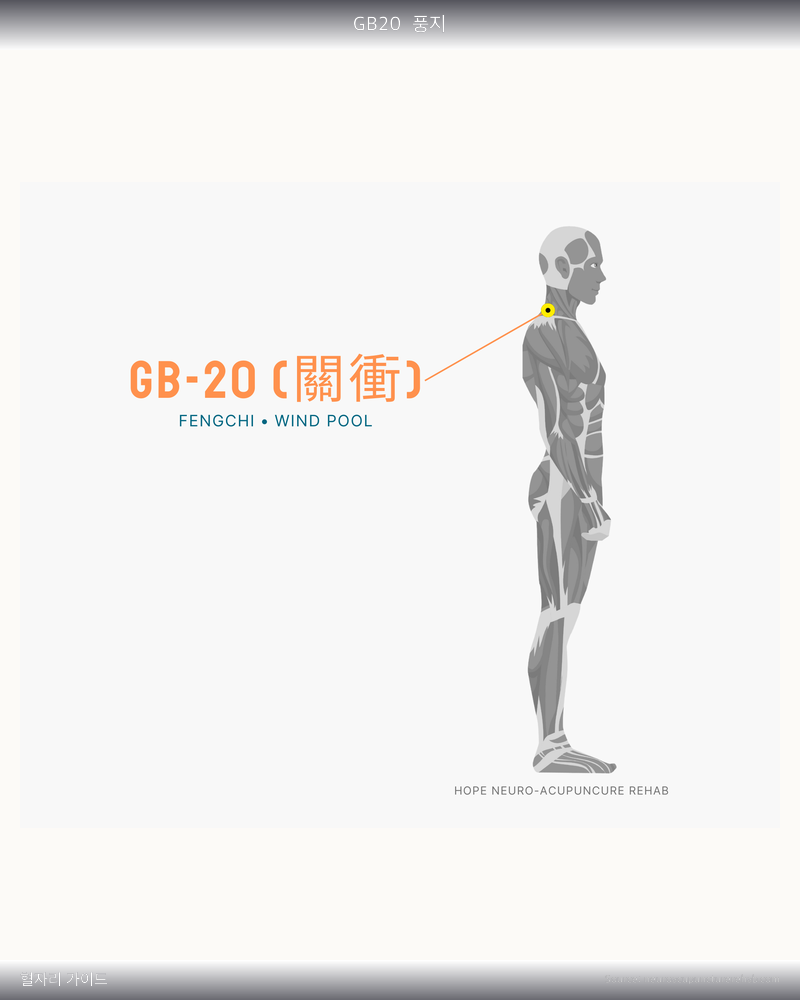
3️⃣ Fengchi (GB20)
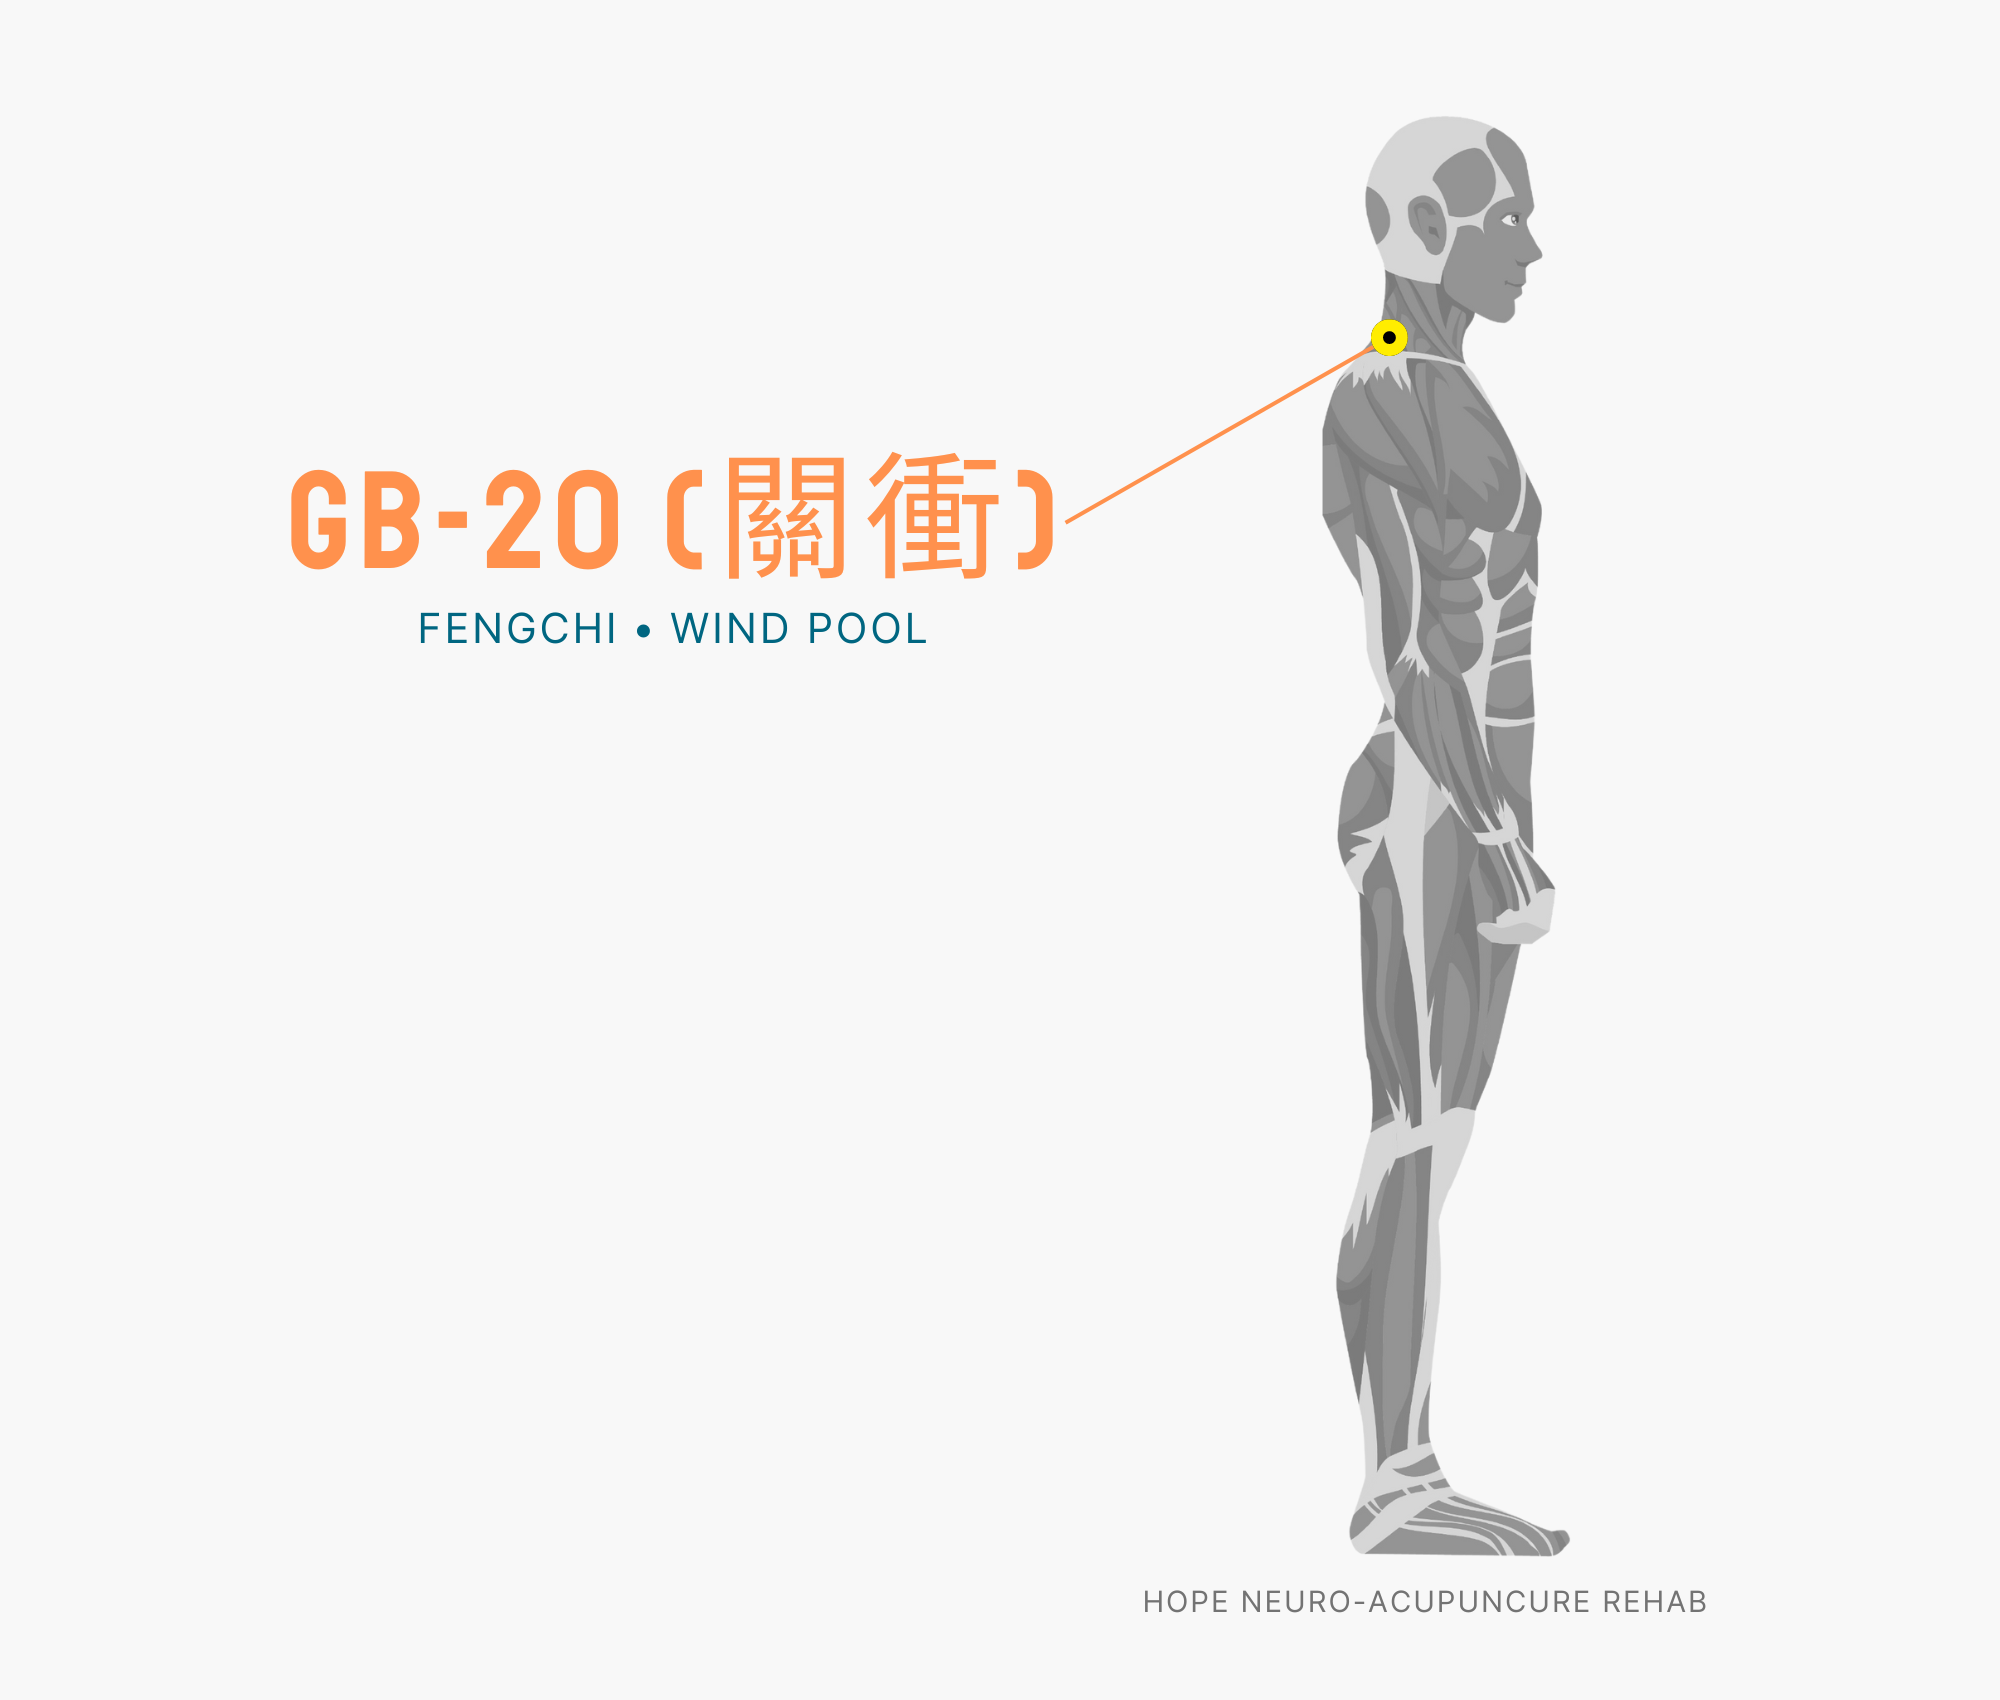
Location: The hollow area on both sides of the cervical spine at the base of the skull below the occipital bone
Meridian: Gallbladder Meridian
Mechanism of action: Located at the junction of bone and muscle in the neck area, it is most effective for relieving headaches caused by neck stiffness and occipital tension. It helps prevent the forward neck posture and smartphone-induced neck tension common in modern people from developing into headaches.
Acupressure technique: Use the thumbs of both hands to find Fengchi and press slowly, tilting the head slightly backward to add more stimulation. Repeat pressing for 5 seconds, 5 times, preferably starting with one side first.
Effects: Neck stiffness and cervicogenic headache relief, stress-related headache relief, improved neck mobility
4️⃣ Taichong (LR3)
Location: Between the first and second toes on the dorsum of the foot (the hollow point where the bones meet)
Meridian: Liver Meridian
Mechanism of action: An acupoint that governs liver function and emotional stability, effective for relieving headaches and migraines caused by stress and anger. It promotes the liver’s detoxification function, helping the body eliminate toxins and fundamentally improving chronic headaches.
Acupressure technique: Place your foot on your knee or on the ground, find Taichong with your thumb, and press slowly for 3 seconds. You can also massage between the toes in circular motions, and repeat 3 times daily.
Effects: Stress-related and migraine relief, enhanced liver function, emotional stability
5️⃣ Yifeng (TE17)

Location: The hollow area below the earlobe behind the ear
Meridian: Triple Energizer Meridian
Mechanism of action: An area with concentrated nerves and blood vessels around the ear, specialized for relieving headaches in the temporal region and temples. Since the Triple Energizer Meridian governs metabolism and circulation throughout the body, stimulating Yifeng increases blood flow to the brain and fundamentally resolves the cause of headaches.
Acupressure technique: Using the index and middle fingers, find the hollow area behind the ear and massage gently in circular motions. Avoid pressing too hard; apply gentle pressure for 1-2 minutes continuously.
Effects: Migraine and temporal pain relief, relief of tension around the ear, improved cerebral blood flow
5-Minute Self-Acupressure Routine
Best times: After waking in the morning, during lunch, and before bed at night (3 times daily)
- [1 minute] Bilateral Hegu acupressure: 30 seconds each side, slow pressing
- [1 minute] Baihui acupressure: Vertical pressing with both middle fingers, repeat 20 times
- [1 minute] Bilateral Fengchi acupressure: 30 seconds each side, add stimulation by tilting head backward
- [1 minute] Bilateral Taichong acupressure: 30 seconds each foot, massage in circular motions
- [1 minute] Bilateral Yifeng acupressure: 30 seconds each side, gentle circular massage
Additional tips: Washing your hands and feet with warm water before acupressure makes it easier to locate the acupoints. Adequate hydration after acupressure is also important.