Author: Acu Master

  • 5 Acupoints for Elbow Pain — The Complete Self-Acupressure Guide

    5 Acupoints for Elbow Pain — The Complete Self-Acupressure Guide

    One-line Summary: To relieve elbow pain, press 5 acupoints—Quchi (LI11), Shousanli (LI10), Tianding (LI9), Wuhuishu (TE3), and Zhigou (TE8)—twice daily for 3 minutes each to expect improvement within 1-2 weeks.

    Introduction

    When you use a mouse for long periods or do work that puts strain on your arms, you develop a dull, heavy pain around the elbow. This condition, commonly called ‘tennis elbow’ or ‘golf elbow,’ is a frequent occupational condition in modern life.

    While elbow pain is mainly caused by inflammation from overexertion of muscles and tendons, traditional medicine interprets it also as a result of insufficient qi-blood circulation and meridian blockage. Stimulating acupoints restores qi-blood flow in the corresponding meridians, alleviates pain, and promotes self-healing of damaged tissue. Therefore, it is an effective method that can be easily performed in daily life without medication or surgery.

    5 Acupoints for Relieving Elbow Pain

    1. Quchi (LI11) — The Premier Acupoint for Elbow Pain

    LI11 acupuncture point

    WHO Code: LI11
    Location: At the end of the elbow crease on the outer side of the elbow when the arm is bent. It is the point on the thumb side of the crease.
    Acupressure Technique: Apply slow pressure with your thumb in a circular motion for 10-15 seconds. Repeat 3-5 times in one session.
    Benefits: As a junction point on the Large Intestine meridian, Quchi provides the most direct effect in relieving elbow pain. It is excellent for reducing inflammation, improving blood circulation, and alleviating nerve pain. It is particularly effective for outer elbow pain (tennis elbow).

    2. Shousanli (LI10) — The Acupoint for Relieving Arm Fatigue and Heaviness

    LI10 acupuncture point

    WHO Code: LI10
    Location: Located approximately 1 cun (about 1.5 cm) above the outer elbow crease when the arm is bent. It is on the outer side of the biceps tendon.
    Acupressure Technique: Repeatedly press down and release with your thumb. Apply pressure for 5 seconds per point, repeating 3-5 times.
    Benefits: It relieves muscle tension in the arm and eliminates fatigue. It is effective for overall pain relief from the forearm to the wrist, and is particularly good for removing accumulated fatigue from mouse use or repetitive work.

    3. Tianding (LI9) — The Acupoint for Opening Blocked Qi-Blood Above the Elbow

    LI9 acupuncture point

    WHO Code: LI9
    Location: Located on the outer side of the upper arm, approximately 3 cun (about 4.5 cm) above Quchi. It is on the lateral side of the humerus.
    Acupressure Technique: Slowly press with your thumb or index finger and hold for 10 seconds, repeating 3 times. Since the point is deep, apply moderately firm pressure.
    Benefits: It relieves pain in the upper arm and stiffness in muscles. It promotes qi-blood circulation, resolving tension and pain above the elbow, and smoothens arm movement.

    4. Wuhuishu (TE3) — The Acupoint for Quickly Calming Pain on the Side of the Arm
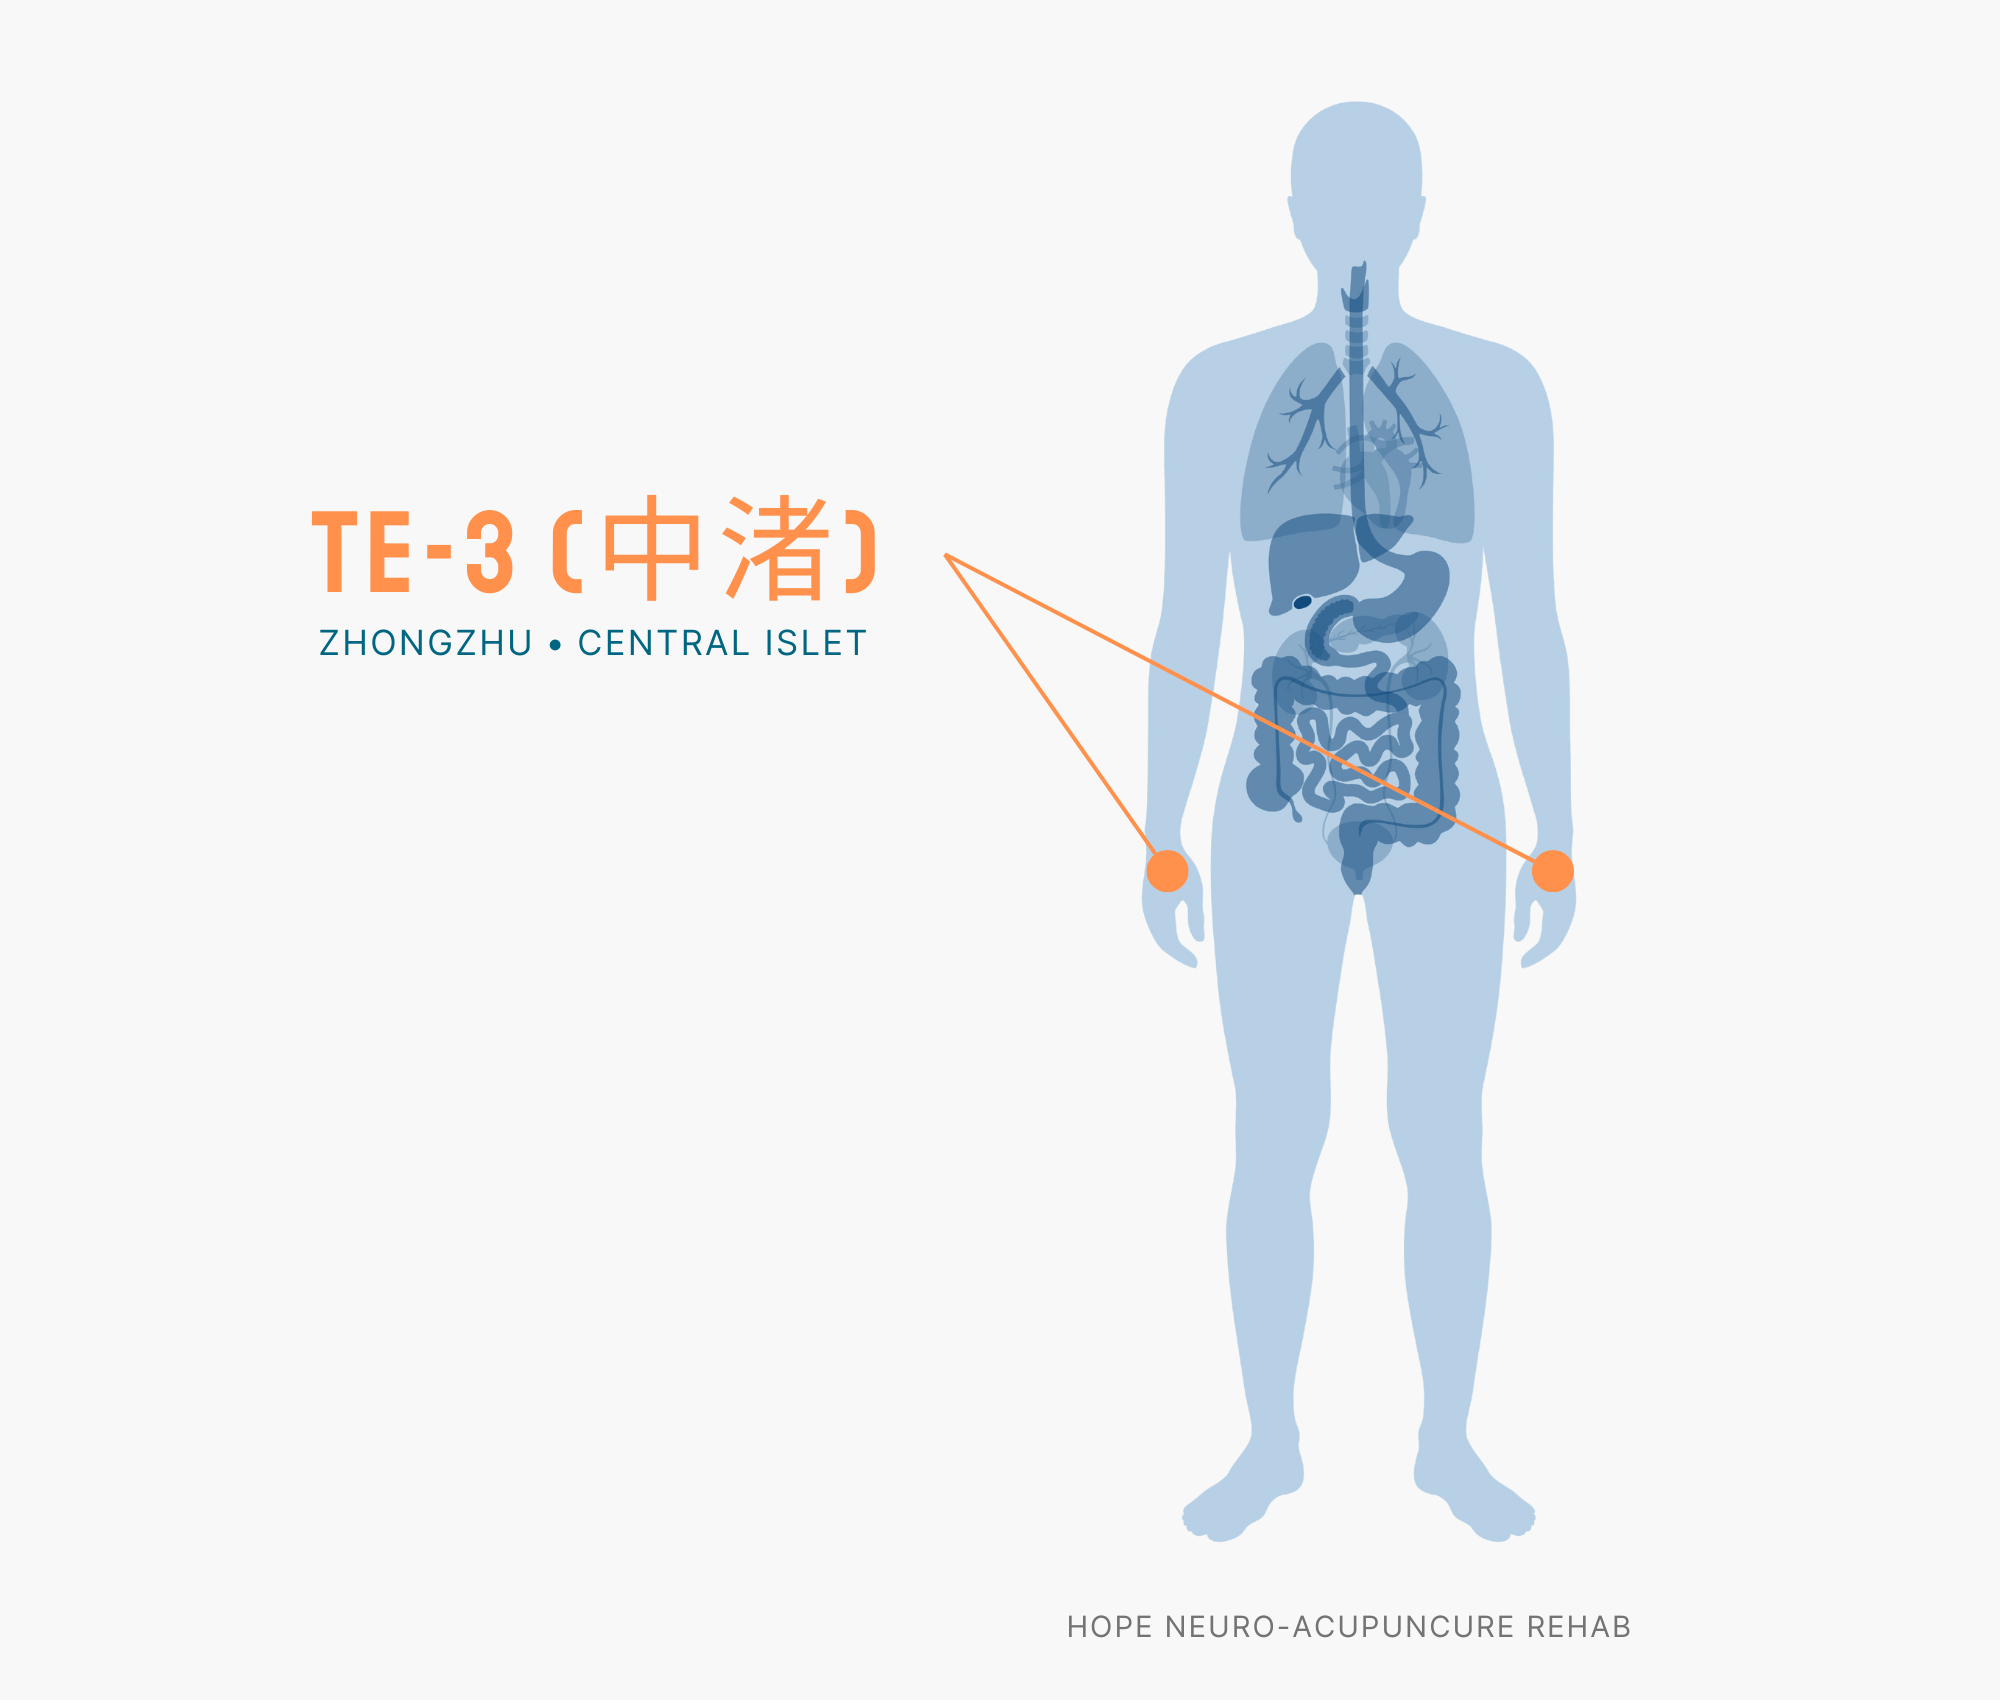
    TE3 acupuncture point

    WHO Code: TE3
    Location: Located on the outer side of the upper arm, approximately 2 cun (about 3 cm) above the elbow crease when the arm is bent. It is above the triceps.
    Acupressure Technique: Precisely stimulate with the tip of your thumb. Press for 5 seconds, then release for 2 seconds, repeating 5 times.
    Benefits: As a point on the Triple Burner meridian, it rapidly relieves nerve pain and muscle pain throughout the arm. It is particularly effective for tingling sensations or burning pain on the side of the arm.

    5. Zhigou (TE8) — The Acupoint for Resolving Pain at the Elbow-Forearm Boundary

    TE8 acupuncture point

    WHO Code: TE8
    Location: Located slightly above the boundary between the elbow and forearm, at the center of the back of the arm. It is near the radial nerve.
    Acupressure Technique: Slowly press with your thumb, applying pressure for 5 seconds without causing pain. Repeat 3-5 times. Since there is a nerve in this area, avoid excessive stimulation.
    Benefits: It relieves pain radiating from the elbow to the forearm. It is particularly useful for relieving forearm pain caused by golf elbow or repetitive strain injury (RSI).

    5-Minute Self-Acupressure Routine

    This routine is most effective when performed twice daily (morning and evening):

    1. Preparation (30 seconds): Sit in a comfortable position and rest your arms comfortably.
    2. Quchi (LI11) Acupressure (1 minute): Place your thumb on Quchi on the painful arm, and repeat circular pressing motions for 10-15 seconds, 3 times.
    3. Shousanli (LI10) Acupressure (1 minute): Move to Shousanli above Quchi and repeat in the same manner, 3 times.
    4. Tianding (LI9) Acupressure (1 minute): Stimulate Tianding on the upper arm, 3 times for 5 seconds each.
    5. Wuhuishu (TE3) & Zhigou (TE8) (1.5 minutes): Alternately stimulate Wuhuishu and Zhigou on the side of the arm, 30 seconds each.
    6. Cool-down (30 seconds): After acupressure, gently stretch your arm to promote blood circulation.

    Note: Avoid strenuous exercise immediately after acupressure and maintain rest for 1-2 hours. It is best to perform this routine at least 2 hours after eating.

    ⚠️ Medical Disclaimer: This article is written for informational purposes and does not replace professional medical diagnosis or treatment. If symptoms persist or are severe, or if you experience swelling, warmth, or severe pain in your elbow, consult a healthcare professional. You may have a serious condition such as fracture, ligament damage, or nerve compression.
  • 5 Acupoints for Excessive Sweating — Complete Self-Acupressure Guide

    5 Acupoints for Excessive Sweating — Complete Self-Acupressure Guide

    One-Line Summary: Applying acupressure to 5 acupoints—SP6, LI4, LR3, BL60, and LU7—for 5 minutes daily can normalize your body’s temperature regulation function and reduce excessive sweating.

    Introduction

    Sweat dripping down even on cool days, excessive sweating so severe that it dampens your clothes and causes odor, making daily life uncomfortable—you’re not alone. Modern people suffer from excessive sweating due to stress, hormonal imbalance, and reduced thermoregulation function. In traditional Chinese medicine, excessive sweat secretion is viewed as a loss of “body fluids” and “qi deficiency.” By stimulating specific acupoints, you can normalize your body’s internal temperature regulation mechanism. Before turning to medication, try starting with simple acupoint acupressure. We’ll show you the exact locations and acupressure techniques for 5 WHO-recognized acupoints.

    The 5 Acupoints

    1. Sanyinjiao (SP6)

    SP6 acupuncture point

    Location: On the inner surface of the tibia (shin bone), approximately 4 finger widths (about 10 cm) above the inner ankle bone. To find the exact location, use the highest point of the prominent bone on the inner ankle as your reference point.

    Acupressure Technique: Using your thumb, press for 3-5 seconds and release for 1 second, repeating this cycle. Apply for about 1 minute on each side, totaling about 2 minutes. The ideal pressure intensity is “hurts good”—tender but pleasant.

    Benefits: Stimulates the spleen meridian to promote body fluid metabolism and reduce excessive water loss. Particularly effective for heat-related sweating caused by hormonal imbalance and helpful for menstrual-related sweating in women. Also contributes to strengthening immunity.

    2. Hegu (LI4)

    LI4 acupuncture point

    Location: In the webbing between the thumb and index finger. It’s located slightly elevated on the back of the hand. When you press it with another finger, you’ll feel a slightly tender spot—that’s the right location.

    Acupressure Technique: Using the tip of your thumb, gradually increase pressure and maintain at the peak for 10-15 seconds. Alternate between both hands and repeat 3-4 times. Apply for about 2 minutes per side, totaling about 4 minutes for both sides.

    Benefits: An important acupoint that regulates qi (vital energy) throughout the body, lowering nervous system excitability and suppressing excessive sweating caused by sympathetic nervous tension. Excellent for enhancing immunity and relieving stress, and also helps improve headaches and fatigue simultaneously.

    3. Taichong (LR3)

    Location: On the top of the foot, in the depression between the first and second metatarsal bones, slightly above the web between the big toe and second toe. It’s located in the hollow space between the bones, and pressure is applied toward the center of the foot.

    Acupressure Technique: Using your thumb, slowly press and release repeatedly. Press for 3-5 seconds, rest for 1 second, and repeat 8-10 times. Apply for about 3 minutes total on both feet.

    Benefits: Regulates the liver meridian to reduce sweating caused by stress and emotional instability. Normalizes hormone secretion and balances the autonomic nervous system to improve unstable temperature regulation. Also helps induce deep sleep, making it particularly effective for nighttime sweating.

    4. Kunlun (BL60)

    BL60 acupuncture point

    Location: In the depression between the lateral ankle bone (fibular malleolus) and the Achilles tendon. It’s located directly behind the most prominent bone on the outer side of the ankle.

    Acupressure Technique: Using the tip of your thumb, press vertically for 3-5 seconds and rest for 1 second, repeating this cycle. Apply pressure alternately to both Kunlun points for a total of about 3 minutes, being careful not to press too hard.

    Benefits: An important acupoint on the bladder meridian that expels internal heat and cools deeper body heat. Particularly effective at relieving nighttime sweating and also improves lower back pain and leg fatigue. Promotes whole-body blood circulation to normalize temperature regulation function.

    5. Lieque (LU7) or Yinlingquan (SP9)

    Location of Lieque: On the inner wrist, about 2.5 cm toward the forearm from the wrist crease, in the depression between two bones (the radius and ulna).

    Lieque Acupressure Technique: Using your thumb, slowly press and release, repeating 6-8 times. Apply for about 1 minute per side, totaling about 2 minutes for both sides.

    Location of Yinlingquan: On the inner side of the knee, in the depression found where the edge of the tibia meets the inner knee as you move upward from the inner knee.

    Yinlingquan Acupressure Technique: Using your thumb, press for 3-5 seconds and rest for 1 second, repeating this cycle for about 2 minutes total on both sides.

    Benefits: Lieque regulates the lung meridian to normalize respiratory function and control sweat secretion on the skin surface. Yinlingquan is particularly effective at removing damp-heat, making it especially beneficial for damp-heat-type excessive sweating. Both acupoints support digestive function and help reduce swelling.

    5-Minute Self-Acupressure Routine

    Total Time Required: About 5 minutes (5 minutes per session, 2 sessions daily recommended)

    Recommended Times: 5 minutes after waking in the morning, and 5 minutes about 1 hour before bedtime

    1. Preparation (30 seconds): Sit in a comfortable position and take 3 deep breaths. Warm your hands and feet.
    2. Sanyinjiao Acupressure (1 minute): Apply pressure to both sides for 30 seconds each. Maintain a moderate pressure intensity.
    3. Hegu Acupressure (1 minute): Apply pressure to Hegu on both hands alternately. Maintain deep, slow breathing.
    4. Taichong Acupressure (1 minute): Gently apply pressure to both feet for 30 seconds each. Move your toes to enhance the effect.
    5. Kunlun Acupressure (1 minute): Apply pressure to both feet for 30 seconds each. Maintaining consistent pressure is important.
    6. Lieque or Yinlingquan (1 minute): Apply pressure to both sides for 30 seconds each. Finish by gently tapping the area.

    Tips to Maximize Effects: Drinking a cup of warm barley tea or water after acupressure helps boost metabolism. Avoid exposure to cold air, and refrain from soaking your hands and feet in cold water for 1 hour after acupressure.

    ⚠️ Medical Disclaimer: This article is provided for informational purposes only and does not replace professional medical diagnosis or treatment. If symptoms persist or are severe, please consult a healthcare professional. Excessive sweating may be a sign of underlying conditions such as diabetes, thyroid disease, or infection, so please seek medical evaluation if necessary.
    🤰 Pregnancy Warning: Among the above acupoints, Hegu (LI4), Sanyinjiao (SP6), Taichong (LR3), and Kunlun (BL60) may induce uterine contractions in pregnant women. If you are pregnant or may be pregnant, please consult with a healthcare professional before practicing. During pregnancy, it is recommended to apply only light pressure to Yinlingquan (SP9) and Lieque (LU7).
  • 5 Helpful Acupoints for Diarrhea — Your Complete Self-Acupressure Guide

    5 Helpful Acupoints for Diarrhea — Your Complete Self-Acupressure Guide

    One-line summary: Diarrhea occurs due to weakened spleen function, and stimulating 5 acupoints including Zusanli, Sanyinjiao, and Tianshu can quickly restore digestive function.

    Introduction

    Sudden diarrhea completely stops your daily life. Frequent bathroom visits, abdominal discomfort, and fatigue are common. In traditional Chinese medicine, diarrhea is viewed as a weakening of spleen function. It occurs when the spleen, which is responsible for food digestion and water absorption, fails to perform its role properly.

    Fortunately, by stimulating acupoints in your body, you can quickly restore spleen function. Five key acupoints are particularly effective for diarrhea relief. Without medication, you can treat yourself anytime, anywhere using just your fingers.

    5 Effective Acupoints for Diarrhea Relief

    1. Zusanli (ST36, Zusanli) — The Foundation of Digestion, the Universal Acupoint

    ST36 acupuncture point

    Location: 10 cm below the knee on the outer side of the shin. From the hollow area below the knee, measure down the width of four fingers to the outer edge of the shin bone.

    Effects: Enhances digestive function, boosts immunity, normalizes intestinal movement. It improves not only diarrhea but also constipation and abdominal bloating. It is one of the most important acupoints in traditional Chinese medicine.

    Massage technique: Place your thumb on the acupoint and press firmly for 3-5 seconds, then release. Repeat 10 times. Applying warm heat enhances the effect.

    2. Sanyinjiao (SP6, Sanyinjiao) — The Center of Spleen Function

    SP6 acupuncture point

    Location: On the inner side of the ankle, 10 cm above the ankle bone. It’s on the inner edge of the shin bone.

    Effects: Restores spleen function, enhances digestion, improves water absorption. It rapidly improves both chronic and acute diarrhea.

    Massage technique: Gently press with your thumb and massage in circular motions. Perform 3 times daily for 1-2 minutes each time for best results.

    3. Tianshu (ST25, Tianshu) — The Key to Normalizing Intestinal Movement

    ST25 acupuncture point

    Location: 5 cm to the side of the belly button. Measure the width of three fingers from the belly button to the side.

    Effects: Normalizes peristalsis, removes abdominal gas, improves both diarrhea and constipation simultaneously. Particularly effective for stress-related diarrhea.

    Massage technique: Using a comfortable finger, draw clockwise circles around the belly button with light pressure. Continue for 2-3 minutes until warmth is felt.

    4. Taibai (SP3, Taibai) — The Acupoint That Strengthens the Foundation of the Spleen

    SP3 acupuncture point

    Location: Below the joint where the big toe and the next toe bone meet, in the hollow area on the inner side of the foot.

    Effects: Fundamentally strengthens spleen function, restores digestive power, improves chronic diarrhea. Known as an acupoint that improves overall constitution.

    Massage technique: Rub back and forth with your thumb like massaging a pelvis. Repeat for 1-2 minutes until warmth is felt.

    5. Shenque (CV8, Shenque) — The Mysterious Power of the Belly Button

    Location: At the center of the belly button. The easiest acupoint to locate.

    Effects: Replenishes spleen yang (warmth), provides immediate diarrhea relief, restores abdominal warmth. Quickly alleviates abdominal coldness caused by diarrhea.

    Massage technique: Place one or two fingers on the belly button and draw gentle circles with warm pressure. Focus on the warming effect rather than pressing directly.

    5-Minute Self-Massage Routine

    Time allocation:

    • Zusanli (ST36): 1 minute (30 seconds each side)
    • Sanyinjiao (SP6): 1 minute (30 seconds each side)
    • Tianshu (ST25): 1 minute (30 seconds each side)
    • Taibai (SP3): 1 minute (30 seconds each side)
    • Shenque (CV8): 1 minute

    Recommended timing: After waking in the morning, 30 minutes after lunch, and before bed in the evening. Repeating 2-3 times daily can lead to symptom improvement within 2-3 days.

    Caution: Avoid exposure to cold air for 30 minutes after massage. Drinking warm water enhances the effect.

    🤰 Pregnancy caution: Sanyinjiao (SP6) among the above acupoints can trigger uterine contractions in pregnant women. If you are pregnant or may be pregnant, consult a professional before proceeding, and use only Zusanli, Tianshu, Taibai, and Shenque.
    ⚠️ Medical Disclaimer: This article is provided for health information purposes and does not replace professional medical diagnosis or treatment. If diarrhea persists for more than 3 days or is accompanied by symptoms such as bloody stools or high fever, consult a healthcare professional immediately.
  • 5 Acupoints for Dizziness — Complete Self-Acupressure Guide

    5 Acupoints for Dizziness — Complete Self-Acupressure Guide

    One-line summary: Daily acupressure on five acupoints—GV20, GB20, LU7, LR3, and SP6—improves blood circulation to the brain and can alleviate dizziness.

    Introduction

    Dizziness symptoms, where the world suddenly seems to spin, not only disrupt daily life but also trigger anxiety. Many people struggle with unexplained dizziness, but Traditional Korean Medicine views this as an imbalance of qi (氣) and blood circulation. Particularly, when blood circulation to the brain is not smooth or when qi flow in the liver becomes obstructed, dizziness tends to occur.

    Acupoint acupressure is a natural treatment method that stimulates specific points on the body to normalize the flow of qi and blood. It can be performed using only your fingers without medication, and consistent practice can significantly alleviate dizziness symptoms. Learn the five acupoint techniques below and practice them daily.

    5 Acupoints to Relieve Dizziness

    1. GV20 (Baihui): The “Universal Remedy” at the Top of the Head

    Location: The point where the line connecting both ears meets the line drawn upward from the space between the eyebrows; at the center of the crown
    How to find it: When you fold your ear, find where the top of the ear meets the center line of the head, then move about 4cm forward (toward the space between the eyebrows)
    How to apply acupressure: Overlap your fingers from both hands and slowly press vertically and release 10-15 times. Apply pressure until you feel a warm sensation
    Benefits: GV20 is where all yang meridians meet. It enhances blood supply to the brain and simultaneously alleviates dizziness and headaches. It clears the mind and is effective for stroke prevention.

    2. GB20 (Fengchi): The Acupoint for Removing Wind from the Back of the Neck

    GB20 acupuncture point

    Location: Behind the neck, above the shoulders, in the hollow space below the skull
    How to find it: When you bend your neck forward, find the hollow areas on both sides below the bone that protrudes at the back of the neck
    How to apply acupressure: Using both thumbs, apply pressure by pushing upward. Hold for 10-20 seconds, rest, and repeat for 3 minutes
    Benefits: It improves blood flow to the brain at the boundary between the neck and head, addressing dizziness, neck stiffness, and headaches all at once. In Traditional Korean Medicine, this is the primary acupoint for treating dizziness caused by “wind” (風).

    3. LU7 (Lieque): The Acupoint for Cold Prevention on the Wrist

    LU7 acupuncture point

    Location: About 1cm toward the thumb side from the inside crease of the wrist
    How to find it: Gently bend your wrist to find the inside crease, then locate the point beyond the thin, long tendon toward the thumb side
    How to apply acupressure: Using the opposite thumb, slowly massage in circular motions. Apply for 2-3 minutes until you feel a slight soreness
    Benefits: It improves qi circulation in the lungs, alleviating dizziness related to breathing. It is excellent for cold prevention and energy recovery, and also helps relieve wrist pain.

    4. LR3 (Taichong): The Liver Detox Acupoint Between the Toes

    Location: In the hollow between the bones of the big toe and second toe on the top of the foot
    How to find it: Following the space between the big toe and second toe on the top of the foot, find the hollow between the bones
    How to apply acupressure: Using your thumb, slowly press and release 20-30 times. Apply for 2-3 minutes per foot
    Benefits: It normalizes qi flow in the liver, improving stress-related dizziness and unstable blood pressure. It is also effective for relieving eye fatigue and insomnia, and helps improve women’s health.

    5. SP6 (Sanyinjiao): The Meeting Point of Three Meridians, the Women’s Acupoint

    SP6 acupuncture point

    Location: About 10cm above the inside of the ankle, on the inner edge of the tibia
    How to find it: Starting from the inside of the ankle, move upward by about four finger widths (approximately 10cm), to the inner edge of the tibia
    How to apply acupressure: Using your thumb, apply pressure in slow circular motions. Apply for about 2-3 minutes per leg
    Benefits: Where the spleen, liver, and kidney meridians meet, it regulates qi flow throughout the body. It simultaneously improves dizziness, anxiety, fatigue, and digestive discomfort, and is excellent for calming the mind.

    5-Minute Self-Acupressure Routine

    A dizziness relief routine you can complete in 5 minutes on a busy morning or evening:

    • 1 minute: GV20 acupressure — Start at the crown to improve brain blood flow
    • 1 minute: GB20 acupressure — Relax tense muscles at the back of the neck
    • 1 minute: LU7 acupressure — Normalize breathing and qi circulation from the wrist
    • 1 minute: LR3 and SP6 acupressure — Regulate qi flow throughout the body from the feet (alternate both feet)
    • 1 minute: Rest and deep breathing — Slowly inhale and exhale to stabilize

    Acupressure tips: It is most effective in the morning when you wake up, in the afternoon at 2-3pm when tired, and around 7pm in the evening. Drinking warm water and resting for 15 minutes after acupressure enhances its effectiveness.

    ⚠️ Medical Disclaimer: This article is provided for informational purposes and does not replace professional medical diagnosis or treatment. If dizziness persists or is severe, especially if there is a possibility of heart disease, brain disease, or benign paroxysmal positional vertigo, consult a healthcare professional. The same applies if you are taking medication or recovering from surgery.
    🤰 Pregnancy Warning: Of the acupoints listed above, LR3 and SP6 may trigger uterine contractions. If you are pregnant or may be pregnant, consult with a Traditional Korean Medicine practitioner before applying these techniques. During pregnancy, only GV20, GB20, and LU7 can be safely applied.
  • 5 Acupoints for Dry Eyes — Complete Self-Acupressure Guide

    5 Acupoints for Dry Eyes — Complete Self-Acupressure Guide

    One-line summary: Dry eye syndrome is relieved by acupressure on the acupoints around the eyes, which improves blood circulation. Stimulate 5 points—Jingming, Zanzhu, Taiyang, Tongziliao, and Sizhukongjing—for 5 minutes daily.

    Introduction

    Dry eye syndrome is a condition that anyone who spends long hours looking at screens experiences. Do you know that frustrating feeling when your eyes feel dry and gritty, become bloodshot, and are hard to keep open? This symptom threatens eye health beyond mere inconvenience, but can be effectively relieved through acupoint acupressure.

    In traditional Chinese medicine, acupoints distributed around the eyes regulate blood circulation to the eyes and help recover from eye fatigue. In particular, stimulating acupoints located around the eyes and face helps ease tension in the muscles around the eyes, promotes tear secretion, and improves blood circulation on the eye surface. Now let me introduce the 5 key acupoints for relieving dry eye syndrome.

    5 Acupoints for Dry Eye Syndrome

    1. Jingming (晴明, BL1) — The First Solution for Eye Health

    BL1 acupuncture point

    Location: The depressed point at the inner corner of the eye (at the boundary between the nose and eye).

    Acupressure technique: Using your index or middle finger on both sides, slowly apply pressure at a rate of about 1 press per second. Apply 10-15 presses with one hand, or about 30 total presses on both sides. Start with a pressure level that feels slightly tender and gradually increase the intensity.

    Benefits: Jingming is the most important acupoint related to the eyes and serves as a fundamental treatment point for nearly all eye conditions, including dry eyes, eye fatigue, bloodshot eyes, and vision decline. Because it most directly improves blood circulation around the eyes, it is the first acupoint used for all eye symptoms.

    2. Zanzhu (攢竹, BL2) — Fatigue Relief at the Inner Eyebrow

    BL2 acupuncture point

    Location: The inner end of both eyebrows, directly above the nose at the point where the eyebrow is closest to the nose.

    Acupressure technique: Using your thumbs on both sides, apply pressure by pushing inward and upward. Hold each press for about 3-5 seconds and repeat 10 times. Since you’re stimulating the eyebrow bone, distribute the pressure evenly along the bone.

    Benefits: Zanzhu is particularly effective for relieving eye fatigue. It helps alleviate heavy eyes, a pulling sensation in the forehead, and darkening vision that may accompany dry eye syndrome. When stimulated together with Jingming, the synergistic effect is maximized.

    3. Taiyang (太陽, EX-HN5) — The Mysterious Acupoint at the Temple

    Location: At the temple area about 1-1.5cm lateral to the outer corner of the eye, in the depressed point between the eye and ear.

    Acupressure technique: Using your middle or ring finger on both sides, gently massage in circular motions. Start with light pressure and gradually increase it, applying 10 circular motions in one direction and 10 in the opposite direction. Alternating between clockwise and counterclockwise motions is also beneficial.

    Benefits: Taiyang promotes blood circulation around the eyes and relieves headaches caused by eye fatigue. It is very effective at relieving migraines and tension around the eyes that may accompany dry eye syndrome.

    4. Tongziliao (瞳子髎, GB1) — The Supplementary Acupoint at the Outer Eye

    GB1 acupuncture point

    Location: About 0.5-1cm lateral to the outer corner of the eye, in the small depressed point above the cheekbone.

    Acupressure technique: Using your ring or middle finger on both sides, apply gentle pressure and hold for about 3-5 seconds. Repeat 10-15 times. Since the skin around the eyes is sensitive, start with very light pressure and adjust the intensity within a pain-free range.

    Benefits: Tongziliao improves blood circulation around the eyes and directly relieves dry eye symptoms. It is particularly effective when stimulated together with Jingming for dry, bloodshot eyes.

    5. Sizhukongjing (絲竹空, TE23) — The Recovery Acupoint at the Eyebrow End

    TE23 acupuncture point

    Location: At the outer end of both eyebrows, where the eyebrow ends. Look for the depressed point that resembles a small valley.

    Acupressure technique: Using your index or middle finger on both sides, apply gentle pressure and hold for about 3-5 seconds. Repeat 10-15 times. Stimulating with a gentle massage along the eyebrow bone is even more effective.

    Benefits: Sizhukongjing is specialized in promoting eye fatigue recovery and blood circulation around the eyes. It helps alleviate eye fatigue and eye twitching symptoms that may accompany dry eye syndrome.

    5-Minute Self-Acupressure Routine

    Recommended timing: It is most effective to practice this routine three times a day—morning, noon, and evening—for 5 minutes each time. You can feel immediate relief when you practice it, especially after using a computer for long periods or when your eyes feel tired.

    Order of practice and time allocation:

    1. Jingming (1 minute) — Allocate sufficient time as it is the most important acupoint. 30 seconds on each side.
    2. Zanzhu (1 minute) — The second most important acupoint. 30 seconds on each side.
    3. Taiyang (1 minute) — Stimulate gently in circular motions. 30 seconds on each side.
    4. Tongziliao (1 minute) — Apply light pressure. 30 seconds on each side.
    5. Sizhukongjing (1 minute) — Gently massage along the eyebrow. 30 seconds on each side.

    Precautions:

    • Be careful not to scratch with your fingernails, as the facial skin in this area is very sensitive.
    • For the first 1-2 weeks, start with light pressure and observe your skin’s reaction before increasing the intensity.
    • If your eyes become bloodshot or experience severe pain after acupressure, stop immediately.
    • You should practice consistently for at least 2-4 weeks to see results.
    ⚠️ Medical Disclaimer: This article is provided for informational purposes only and does not replace professional medical diagnosis or treatment. If symptoms persist or are severe, please consult a healthcare professional.
  • 5 Acupoints for Ear Pain — Complete Self-Acupressure Guide

    5 Acupoints for Ear Pain — Complete Self-Acupressure Guide

    One-line summary: Ear pain can be effectively relieved and blood circulation improved by applying daily acupressure to 5 key acupoints—Auditory Gate (TE17), Chong Zhu (TE3), Wind Pool (GB20), Complete Bone (GB12), and Union Valley (LI4)—for 5 minutes each day.

    Introduction

    Sudden ear pain can significantly disrupt daily life. The ear is a highly sensitive nerve-rich area where pain can occur due to various causes including muscle tension, inflammation, and stress. In particular, modern people are increasingly experiencing ear pain due to “tech neck” from increased smartphone use and stress.

    In Eastern medicine, meridians (pathways) are believed to connect the ear and surrounding areas with various parts of the body. Appropriate stimulation of acupoints promotes blood circulation, relieves nerve tension, and activates the body’s natural healing ability. Since it can be practiced at home anytime with just a finger and without medication, many people are managing ear pain through acupoint acupressure.

    5 Acupoints Effective for Relieving Ear Pain

    1. Auditory Gate (TE17)

    TE17 acupuncture point

    WHO Code: TE17 (Triple Burner Meridian)

    Location: At the front of the ear, in the depression in front of the ear when the mouth is open. The exact location of Auditory Gate is the hollow area directly in front of the jaw joint.

    Massage technique: Using the index and middle fingers of both hands, apply pressure in circular motions for 5-10 seconds, repeating 10 times. Applying pressure while the mouth is slightly open allows for accurate stimulation of the point. Perform this 2-3 times daily.

    Benefits: Auditory Gate is the acupoint with the most direct effect on ear pain. It can alleviate ear infections, hearing loss, tinnitus, and even temporomandibular joint pain. It is particularly effective for pain in front of the ear or lingering symptoms of otitis media.

    2. Chong Zhu (TE3)

    TE3 acupuncture point

    WHO Code: TE3 (Triple Burner Meridian)

    Location: Between the ring finger and pinky finger on the hand, in the groove between the finger bones that forms when the fingers are bent. It is located on both hands.

    Pressure technique: Using the pad of your thumb, apply steady pressure for 5-10 seconds, then release. Repeat this 10 times on each hand, performing on both hands. You should feel slight tenderness.

    Benefits: Chong Zhu is a distal acupoint that alleviates not only ear pain but also migraines, facial neuralgia, and tinnitus. Since the hands can be stimulated anywhere, anytime, you can easily apply acupressure at work or while traveling.

    3. Wind Pool (GB20)

    GB20 acupuncture point

    WHO Code: GB20 (Gallbladder Meridian)

    Location: At the back of the neck, just above the hairline, in the hollow between the neck muscles and the spine. It is located on both sides at the back of the neck behind each ear.

    Massage technique: Using both thumbs, apply moderate pressure upward for 5-10 seconds. If the neck muscles are tight, massage in circular motions. Perform this 2 times daily, 1-2 minutes each morning and evening.

    Benefits: Wind Pool simultaneously alleviates ear and temporal pain as well as neck and shoulder stiffness. It is particularly effective for stress-induced tension pain and is excellent when both headache and ear pain are present.

    4. Complete Bone (GB12)

    GB12 acupuncture point

    WHO Code: GB12 (Gallbladder Meridian)

    Location: Directly in front of the protruding bone behind the ear (mastoid process), at the boundary between the muscle extending from behind the ear downward and the bone.

    Pressure technique: Overlap your index and middle fingers and press forward for 5-10 seconds. Repeat 10 times on each side, performing 2 times daily. Do not press too hard; moderate pressure is appropriate.

    Benefits: Complete Bone directly addresses pain behind the ear and temporal pain. It shows quick results for nerve pain behind the ear or swollen lymph nodes behind the ear, and also relieves tension in the neck and shoulders.

    5. Union Valley (LI4)

    LI4 acupuncture point

    WHO Code: LI4 (Large Intestine Meridian)

    Location: In the hollow between the thumb and index finger on the hand, in the center between the two fingers when the hand is extended. It is also called the “quiet blood area.”

    Pressure technique: Using the thumb of the opposite hand, apply pressure at a level of slight discomfort for 5-10 seconds. You can also massage in circular motions. Perform on both hands. Repeat approximately 10 times, 2-3 times daily.

    Benefits: Union Valley is often called the “sovereign of acupoints” due to its wide range of effects. It is effective for ear pain, facial neuralgia, migraines, and general pain relief, and also helps strengthen immunity and relieve stress. It is particularly a fundamental acupoint for managing whole-body pain.

    5-Minute Self-Acupressure Routine

    The following sequence is recommended to maximize effectiveness:

    1. Chong Zhu (TE3) pressure — 1 minute
      Apply pressure to Chong Zhu on both hands, 30 seconds each, for a total of 1 minute. Since the hands can be stimulated anywhere, it’s good to start this routine in the morning when you wake up.
    2. Union Valley (LI4) pressure — 1 minute
      Apply pressure to Union Valley on both hands, 30 seconds each, for a total of 1 minute. Since both Chong Zhu and Union Valley are located on the hands, it’s efficient to perform them together.
    3. Auditory Gate (TE17) pressure — 1 minute
      With the mouth slightly open, apply pressure to Auditory Gate on both sides, 30 seconds each, for a total of 1 minute. Accurate point stimulation is important, so find the exact location you feel and proceed slowly.
    4. Wind Pool (GB20) pressure — 1 minute
      Apply pressure to Wind Pool on both sides, 30 seconds each, for a total of 1 minute. If the neck muscles are tight, proceed with massage in circular motions.
    5. Complete Bone (GB12) pressure — 1 minute
      Apply pressure to Complete Bone on both sides, 30 seconds each, for a total of 1 minute. If pain behind the ear is severe, you may allocate more time to this step.

    Practice tips: This routine is most effective when performed 2 times daily—after waking in the morning and before sleep in the evening. Drinking warm water after acupressure helps promote blood circulation. On days with severe pain, you can increase the frequency to 3 times daily.

    ⚠️ Medical Disclaimer: This article is written for informational health purposes and does not replace professional medical diagnosis or treatment. If ear pain persists for more than 2 weeks, or if accompanied by other symptoms such as hearing loss, fever, or discharge, please consult an otolaryngologist or healthcare professional. Additionally, if you suspect ear trauma or perforation, please visit a medical facility immediately.
    🤰 Pregnancy Warning: Among the acupoints introduced in this post, Union Valley (LI4) can trigger uterine contractions in pregnant women. If you are pregnant or there is a possibility of pregnancy, perform only the other acupoints (Auditory Gate, Chong Zhu, Wind Pool, and Complete Bone) while excluding Union Valley, or consult with a professional before practicing.
  • 5 Acupoints for Depression — Complete Self-Acupressure Guide

    5 Acupoints for Depression — Complete Self-Acupressure Guide

    One-line summary: Applying acupressure to the Taichong, Sanyinjiao, Neiguan, Hegu, and Kunlun points twice daily can improve liver, spleen, and heart function to relieve depression and lethargy.

    Introduction

    Reluctance to wake up in the morning, finding no joy in anything, and a persistently heavy heart—this depression is common for modern people, but ignoring it can seriously disrupt daily life. If you can’t rely solely on medication, consider acupoint therapy from traditional medicine, which has thousands of years of history. By stimulating specific acupoints, you can normalize the flow of qi in the liver, spleen, and heart to enhance emotional regulation, lower stress hormones, and promote quality sleep. This guide introduces the 5 most effective acupoints for relieving depression along with scientific evidence, plus a simple 5-minute self-acupressure routine you can do at home.

    The Five Acupoints

    1. Taichong (太衝, LR3) — Liver Meridian’s Tonifying Point

    WHO Code: LR3 | Meridian: Liver Meridian | Location: On the top of the foot, in the depression between the first and second metatarsal bones, just below the junction of the toe bones. Acupressure Method: Press with your thumb for 3 seconds, then rest for 1 second; repeat 10 times on both feet. Benefits: The liver is the organ responsible for ‘strategic planning and decision-making.’ Taichong smoothly circulates liver qi, relaxing a liver stiffened by stress and calming irritability while relieving depression and anxiety. It also improves lower body blood circulation to reduce overall fatigue.

    2. Sanyinjiao (三陰交, SP6) — Spleen Meridian’s Effective Point

    SP6 acupuncture point

    WHO Code: SP6 | Meridian: Spleen Meridian | Location: On the inner calf, approximately four finger-widths above the inner ankle bone (medial malleolus). Acupressure Method: Press with your thumb for 10 seconds, then rest for 2 seconds; repeat 8 times on both legs. Benefits: The spleen not only handles digestion and absorption but also regulates ‘thoughts’ and ‘nervousness.’ Sanyinjiao is the meeting point of the spleen, liver, and kidney meridians, normalizing whole-body qi flow and replenishing blood deficiency. It simultaneously improves loss of appetite due to depression, indigestion, and insomnia, while also balancing female hormones.

    3. Neiguan (內關, PC6) — Pericardium Meridian’s Stabilizer

    PC6 acupuncture point

    WHO Code: PC6 | Meridian: Pericardium Meridian | Location: On the inner forearm, three finger-widths from the wrist crease toward the elbow, between the two tendons. Acupressure Method: Press slowly with your thumb for 5 seconds, then rest for 3 seconds; repeat 12 times on both arms. Benefits: The pericardium meridian protects the heart and is responsible for emotional stability and sleep induction. Neiguan is an emergency acupoint that rapidly calms anxiety, panic attacks, and lethargy. It relieves chest tightness, balances the autonomic nervous system, and brings mental and physical peace. It’s most effective when stimulated to the point of mild discomfort.

    4. Hegu (合谷, LI4) — Large Intestine Meridian’s Representative Point

    LI4 acupuncture point

    WHO Code: LI4 | Meridian: Large Intestine Meridian | Location: In the depression where the thumb and index finger meet (on the back of the hand). Acupressure Method: Using your opposite thumb, apply circular pressure for 1 minute on both hands. Benefits: Hegu is the most powerful acupoint for circulating ‘qi’ throughout the body. It relieves muscle tension caused by stress, resolves headaches and neck stiffness, and clarifies the mind. It also improves tension, teeth grinding, and jaw joint discomfort caused by depression. ⚠️ This acupoint should be avoided by pregnant women.

    5. Kunlun (崑崙, BL60) — Bladder Meridian’s Vitality Recovery Point

    BL60 acupuncture point

    WHO Code: BL60 | Meridian: Bladder Meridian | Location: On the outer ankle, in the depression between the lateral malleolus and the Achilles tendon. Acupressure Method: Press with your thumb for 3 seconds, then rest for 1 second; repeat 10 times on both feet. Benefits: The bladder meridian is the longest meridian on the body’s surface and governs whole-body energy. Kunlun relieves severe fatigue from depression, releases neck and shoulder tension, and alleviates lower body heaviness while sharpening mental clarity. It also improves bladder function to relieve frequent urination and nocturia. ⚠️ This acupoint should be avoided by pregnant women.

    5-Minute Self-Acupressure Routine

    Goal: Practice twice daily (morning and evening) to relieve depression symptoms within two weeks

    1. Taichong (LR3) — 1 minute | 30 seconds on each foot | Open liver qi for emotional stability
    2. Sanyinjiao (SP6) — 1 minute | 30 seconds on each leg | Boost spleen energy and replenish blood
    3. Neiguan (PC6) — 1 minute | 30 seconds on each arm | Calm the heart and relieve anxiety
    4. Hegu (LI4) — 1 minute | 30 seconds on each hand | Circulate whole-body qi and sharpen the mind (exclude if pregnant)
    5. Kunlun (BL60) — 1 minute | 30 seconds on each foot | Restore vitality and recharge whole-body energy (exclude if pregnant)

    Key Tips: Gentle pressure that produces a ‘dull ache’ sensation is most effective rather than intense stimulation. Use the tip of your thumb pressed slowly rather than fingernails or sharp tools. The best times are immediately after waking in the morning and 30 minutes before bed in the evening.

    ⚠️ Medical Disclaimer: This article is written for informational health purposes and does not replace professional medical diagnosis or treatment. If symptoms persist or worsen, please consult a healthcare professional.
    🤰 Pregnancy Warning: Among the acupoints above, Hegu (LI4), Sanyinjiao (SP6), and Kunlun (BL60) may trigger uterine contractions in pregnant women. If you are pregnant or may be pregnant, consult a professional before practicing these points. Safer acupoints are Taichong (LR3) and Neiguan (PC6), and ideally seek guidance from a licensed acupuncturist.
  • 5 Acupoints for Cold Sensitivity — Perfect Self-Acupressure Guide

    5 Acupoints for Cold Sensitivity — Perfect Self-Acupressure Guide

    One-line summary: Cold sensitivity is a symptom caused by poor blood circulation, resulting in cold hands and feet and overall body fatigue. Acupressure on five key acupoints—Hegu (LI4), Sanyinjiao (SP6), Zusanli (ST36), Taichong (LR3), and Kunlun (BL60)—promotes the flow of qi and blood, restores the body’s temperature regulation function, and improves cold sensitivity.

    Introduction: Cold Sensitivity – Why Does Your Body Keep Sending These Signals?

    If your hands and feet feel cold even when it’s not winter, or if you feel chilled all over despite wearing warm clothes, you may be experiencing cold sensitivity. This condition, which occurs frequently in women, goes beyond mere discomfort—it’s a warning sign that can trigger fatigue, insomnia, digestive problems, and menstrual pain.

    In traditional Chinese medicine, cold sensitivity is diagnosed as “deficiency of qi and blood” or “poor blood circulation.” It occurs when the body lacks warming energy (yang qi) or when the flow through the meridians is blocked, preventing warmth from reaching the extremities. Acupoint acupressure works by unblocking these congested meridians, normalizing the flow of qi and blood, and awakening the body’s natural healing ability. It’s the simplest and most proven method you can start with just one finger, without any medication—acupoint acupressure.

    Five Core Acupoints for Improving Cold Sensitivity

    1. Hegu (LI4) – The Miracle Point on Your Hand for Pain Relief

    LI4 acupuncture point

    Location: The depression between the thumb and index finger. This is where you’ll feel slight tenderness when pressed with your index finger.

    WHO Code: LI4 (Large Intestine 4)

    Acupressure Technique: Using the thumb of the opposite hand, press slowly for 10-15 seconds. Apply pressure firm enough to produce a slight pricking sensation. Perform on both hands for 1 minute each.

    Benefits for Cold Sensitivity: Hegu is the master point of the Large Intestine meridian and promotes the flow of qi and blood throughout the body. It directly improves blood circulation to the hands and feet, restores the body’s immunity and autonomic nervous system balance, making it excellent for relieving cold sensitivity. Additional benefits include headache relief and stress reduction.

    ⚡ Tip: When your hands feel cold during work, stimulate Hegu point by point—you’ll feel warmth spreading to your fingertips almost immediately.

    2. Sanyinjiao (SP6) – The “Women’s Tonic” at the Ankle’s Three-Meridian Crossing

    SP6 acupuncture point

    Location: Four finger-widths above the inner ankle bone, on the inside of the tibia (shinbone).

    WHO Code: SP6 (Spleen 6)

    Acupressure Technique: Cross your legs so your ankle is in a comfortable position, then press firmly with your thumb for 30 seconds to 1 minute while exhaling. Medium pressure that produces noticeable sensation is most effective.

    Benefits for Cold Sensitivity: Sanyinjiao is where three meridians meet—the Spleen meridian (digestion), Liver meridian (detoxification and blood storage), and Kidney meridian (growth and reproductive function). Stimulating this point promotes blood circulation to the uterus and digestive organs, balances hormones, and improves not just cold sensitivity but also menstrual pain and irregular periods. It’s the key point for raising women’s basal body temperature.

    ⚡ Tip: Acupressure on this point in the evening (7:00 PM–9:00 PM) improves sleep quality that night and helps you feel more warmth throughout your body the next morning.

    3. Zusanli (ST36) – The “Acupoint for Health and Longevity” – The Energy Reservoir of the Leg

    ST36 acupuncture point

    Location: Below the outer side of the knee, three finger-widths below the kneecap, on the outer ridge of the tibia.

    WHO Code: ST36 (Stomach 36)

    Acupressure Technique: Sit with your knee extended and press with your thumb or index finger for 30 seconds to 1 minute. Alternatively, press and release repeatedly (about 5 times) for an equally effective approach.

    Benefits for Cold Sensitivity: Zusanli is the most powerful qi-tonifying point on the Stomach meridian. It restores overall vitality and dramatically improves leg blood circulation. It relieves fatigue caused by cold sensitivity and strengthens digestion to enhance nutrient absorption. In Chinese medicine, there’s a saying: “Press Zusanli and stay healthy until 100″—it’s the most trusted acupoint.

    ⚡ Tip: Zusanli is safe to stimulate year-round. Acupressure on this point 30 minutes after meals is particularly effective for promoting digestion and improving cold sensitivity simultaneously.

    4. Taichong (LR3) – The Key to Liver Function Recovery – The Harmony Point on the Foot

    Location: Between the bones of the first and second toes on the top of the foot, in the depression.

    WHO Code: LR3 (Liver 3)

    Acupressure Technique: With the top of the foot extended, press firmly with your thumb for 30 seconds to 1 minute, then release. Perform on both feet.

    Benefits for Cold Sensitivity: The Liver meridian governs blood storage and qi circulation. Stimulating Taichong restores the liver’s stress-relief function, reducing blood vessel constriction caused by tension. It’s especially effective for cold sensitivity triggered by stress and also improves sleep quality and alleviates premenstrual syndrome. Enhanced liver detoxification normalizes energy metabolism throughout the body.

    ⚡ Tip: When you feel angry or frustrated, pressing Taichong calms your emotions while simultaneously restoring warmth to your hands and feet.

    5. Kunlun (BL60) – The “Source of Body Heat” – The Energy Tunnel on the Outer Ankle

    BL60 acupuncture point

    Location: In the depression at the center between the outer ankle bone and the heel.

    WHO Code: BL60 (Bladder 60)

    Acupressure Technique: Sitting or lying down, press with your thumb for 30 seconds to 1 minute. You may feel some initial discomfort, so gradually increase pressure.

    Benefits for Cold Sensitivity: Kunlun is an important point on the Bladder meridian and is known as the “source of body heat.” It activates the Kidney’s yang qi, raising basal body temperature throughout the body. It’s particularly effective for lower body cold sensitivity and simultaneously improves lower back pain and leg numbness. By restoring the body’s foundational energy, it provides long-term relief from fatigue and lethargy caused by cold sensitivity.

    ⚡ Tip: Evening time (5:00 PM–7:00 PM) is when the Bladder meridian’s energy is most active. Stimulating Kunlun during this window yields enhanced results.

    5-Minute Self-Acupressure Routine – Make It a Daily Morning and Evening Habit

    Stimulating all acupoints together multiplies the benefits. Practice this routine both when you wake up in the morning and before bed at night.

    Order Acupoint Time Allocation Method
    1 Hegu (LI4) 1 minute (30 seconds each side) Press slowly with thumb
    2 Sanyinjiao (SP6) 1 minute (30 seconds each side) Acupressure with ankle in comfortable position
    3 Zusanli (ST36) 1 minute (30 seconds each side) Press with knee extended or press and release repeatedly
    4 Taichong (LR3) 1 minute (30 seconds each side) Press with foot extended using thumb
    5 Kunlun (BL60) 1 minute (30 seconds each side) Press outer ankle

    ⏱️ Total time required: About 5 minutes. When performed in the morning (within 5 minutes of waking) and evening (1 hour before sleep), you’ll notice noticeable improvement in warmth to your hands and feet after 2 weeks.

    🤰 Pregnancy Warning: Among the acupoints listed above, Hegu (LI4), Sanyinjiao (SP6), Taichong (LR3), and Kunlun (BL60) can trigger uterine contractions in pregnant women. If you are pregnant or may be pregnant, consult a healthcare professional before practicing acupressure. Zusanli (ST36) is safe for pregnant women to stimulate.
    ⚠️ Medical Disclaimer: This article is provided for informational purposes and does not replace professional medical diagnosis or treatment. If cold sensitivity persists or is severe, or if you have underlying conditions such as vascular disease, thyroid disease, or anemia, consult a healthcare professional. If you experience pain, swelling, or skin changes during acupressure, stop immediately and seek professional guidance.
  • 5 Best Acupoints for Dark Circles — Complete Self-Acupressure Guide

    5 Best Acupoints for Dark Circles — Complete Self-Acupressure Guide

    One-line Summary: Applying acupressure to five acupoints around the eyes—Zanzhu, Taiyang, Tongziliao, Jingming, and Geshu—twice daily effectively improves dark circles and relieves eye fatigue by promoting blood circulation.

    Introduction

    That frustrating moment when you see dark circles under your eyes in the mirror. Dark circles form when blood circulation around the eye area worsens due to accumulated sleep deprivation, stress, and eye fatigue. Dark circles—which cause bloodshot and dull-looking eyes and can even make you appear older—are a concern for many people.

    Traditional medicine has managed dark circles by stimulating acupoints around the eyes to improve local blood circulation and reduce puffiness. Since the eye area is the most sensitive part of the face, precise acupoint stimulation is effective, and you can see improvement within 2-3 weeks through consistent self-acupressure alone. Learn the secret to naturally restoring vitality without medication, starting now.

    Five Acupoints Each

    1. Zanzhu (BL11 · 攢竹)

    BL11 acupuncture point

    Location: Zanzhu is located at the inner end of both eyebrows (where the eyebrows gather toward the nose). As you trace along the inner eyebrow with your finger, you can feel a small indented area.

    WHO Code: BL11

    Acupressure Technique: Using the first knuckle of your thumb, press vertically or gently push upward to stimulate. Repeat 10 times, pressing for 3 seconds and resting for 1 second. You can apply acupressure to both sides simultaneously.

    Benefits: Zanzhu is a key acupoint for relieving eye fatigue. It relaxes muscle tension near the eyebrow and promotes blood circulation around the eyes. Regular stimulation makes it easier to open your eyes and reduces puffiness under the eyes, directly improving dark circles.

    2. Taiyang (EX-HN5 · 太陽)

    Location: This point is located at the temple, slightly behind (toward the ear) the midpoint of the line connecting the end of the eyebrow and the corner of the eye. Pressing with your finger creates a slightly indented sensation.

    WHO Code: EX-HN5

    Acupressure Technique: Using the first knuckle of your middle or ring finger, gently massage in a circular motion. Press and push from front to back for 5 seconds, repeating 10 times. Each side takes approximately 30 seconds.

    Benefits: Activates blood circulation in the temporal region, relieving tension around the temple and outer corner of the eye. Effective not only for dark circles but also for headaches caused by eye fatigue, and contributes to overall facial puffiness reduction.

    3. Tongziliao (GB1 · 瞳子髎)

    GB1 acupuncture point

    Location: Located at a point slightly beyond the outer corner of the eye, along a line extending toward the temple. Approximately 1 cm beyond the end of the cheekbone next to the eye.

    WHO Code: GB1

    Acupressure Technique: Using the tip of your ring finger, gently tap repeatedly, or press for 3 seconds and repeat 10 times. Since this area around the eyes is very sensitive, absolutely avoid strong stimulation and use a light touch.

    Benefits: Improves blood circulation on the outer side of the eye and relieves tension in the muscles around the eye. Excellent for removing eye dryness and puffiness under the eyes, and directly affects improving the dark tone of dark circles.

    4. Jingming (BL1 · 睛明)

    BL1 acupuncture point

    Location: Located at the inner corner of the eye, where the tear gland is on the nose side. Positioned approximately 0.3 cm away from the inner corner of the eye toward the nose. Since this is the most sensitive area, accurate location identification is important.

    WHO Code: BL1

    Acupressure Technique: This acupoint requires especially careful handling. Using the tip of your ring or middle finger, very gently press around the tear gland for 1-2 seconds and repeat only 5 times. Never press hard or rub.

    Benefits: Improves blood circulation around the eye, most quickly promoting eye fatigue recovery. Rapidly improves puffiness and dark discoloration on the inner side of the eye, and is also effective in relieving bloodshot eyes.

    5. Geshu (BL23 · 膈俞)

    BL23 acupuncture point

    Location: Located approximately 2 cm below the eye, in the indented area below the cheekbone. More precisely, it is the acupoint at the lowest part of the cheekbone when a vertical line is drawn from the center of the eyebrow.

    WHO Code: BL23

    Acupressure Technique: Using your middle or ring finger, press vertically on the skin for 3-4 seconds or gently massage in a circular motion. Repeat 10 times, taking approximately 30 seconds per side. Rather than pressing downward, apply stimulation with a slight upward lifting sensation.

    Benefits: The acupoint with the most direct effect on reducing puffiness under the eyes. Promotes blood circulation between the glabella and under the eyes, improving dark circle tone and effectively reducing swelling. With consistent stimulation, the skin tone under the eyes becomes noticeably brighter.

    5-Minute Self-Acupressure Routine

    Preparation: Soak your fingers in warm water for 1 minute to raise their temperature. Applying eye cream or essence thinly can reduce friction.

    Order and Time Distribution (Total 5 minutes):

    1. Zanzhu (1 minute) – Stimulate both sides simultaneously, 10 repetitions × 2 sets
    2. Taiyang (1 minute) – 30 seconds per side × 2 locations
    3. Tongziliao (1 minute) – 30 seconds per side × 2 locations (very gently)
    4. Jingming (30 seconds) – 15 seconds per side × 2 locations (minimal stimulation)
    5. Geshu (1 minute 30 seconds) – 45 seconds per side × 2 locations

    Additional Tips: Apply acupressure quickly and firmly in the morning, and slowly and gently in the evening. Resting with your eyes closed for 5 minutes after acupressure can double the blood circulation benefits. Adding 2-3 minutes of cold compress (frozen spoon or ice pack) maximizes the puffiness reduction effect.

    ⚠️ Medical Disclaimer: This article is written for informational purposes only and does not replace professional medical diagnosis or treatment. If dark circles suddenly worsen, or if accompanied by eye pain, vision changes, or skin abnormalities, be sure to consult a medical professional such as an ophthalmologist or traditional medicine practitioner. Individual reactions may vary depending on constitution, so begin with gentle stimulation and gradually adjust intensity.
  • 5 Best Acupoints for Breast Pain — Complete Self-Acupressure Guide

    5 Best Acupoints for Breast Pain — Complete Self-Acupressure Guide

    One-line Summary: Breast pain is effectively relieved by stimulating chest acupoints such as Danzhong, Zhuozhong, Yuruan, and improving liver function through Taichong. Start with 5 minutes of self-massage daily.

    Introduction

    Breast pain is a common symptom experienced by one in three women. It occurs when hormonal changes related to the menstrual cycle, stress, uncomfortable clothing, and poor posture combine. Recurring pain significantly diminishes quality of life.

    In traditional Chinese medicine, breast pain is called “breast qi stagnation,” occurring when qi becomes obstructed in the meridians passing through the chest or when liver function declines. Fortunately, stimulating key acupoints in the chest area can improve qi flow and relieve pain. Self-massage acupressure, which can be done anytime and anywhere without medication, has become the preferred choice for many people.

    5 Acupoints for Relieving Breast Pain

    1. Danzhong (REN17) — The “Master Acupoint” for Regulating Emotion and Qi

    Location: The midpoint between the two nipples, equidistant from both sides of the center of the chest. It can be found by descending along the center of the chest from below the collarbone.

    Massage Technique: Overlap the thumbs of both hands and gently press perpendicular to Danzhong, repeating the pressing and releasing motion. Press for about 3-5 seconds each time before slowly releasing. Be careful not to stimulate to the point of causing pain.

    Effects: Danzhong, known as the “heavenly balance,” is an acupoint that regulates emotion and qi. It can simultaneously address stress and qi stagnation that cause breast pain. It also has excellent effects on relieving anxiety and promoting mental and physical calm.

    2. Zhuozhong (ST16) — Direct Treatment Point for Breast Pain

    Location: The upper part of each breast, at the intersection of the collarbone and the first intercostal space (between the first ribs). There is one on each side.

    Massage Technique: Use the middle and ring fingers of both hands together to gently massage Zhuozhong with slow, circular motions. Stimulate each acupoint for about 2-3 minutes. Strong pressure can cause discomfort, so maintaining appropriate pressure intensity is important.

    Effects: This acupoint directly promotes qi and blood circulation in the breast area, showing the most immediate effect on relieving breast pain and hardness. As blood circulation improves, pain and discomfort decrease rapidly.

    3. Yuruan (ST18) — Acupoint for Relieving Lower Breast Pain

    Location: Directly below the breast, in the fifth intercostal space (between the fifth and sixth ribs). It is located below the lower boundary line of the breast.

    Massage Technique: Place the thumbs of both sides on Yuruan simultaneously and press slowly. It is recommended to use breathing-guided massage: increase pressure while inhaling and release while exhaling. Repeat 10 times, holding for 3-5 seconds each time.

    Effects: This acupoint effectively relieves breast pain, especially pain in the lower breast or extending to the sides. It is particularly helpful when intercostal neuralgia is involved.

    4. Qimen (GB22) — Specialized Acupoint for Stress-Related Breast Pain

    Location: Below the armpit, directly below the center of the axilla when the arm is raised, between the third rib. There is one on each side under the arms.

    Massage Technique: Lower your arm to your chest and use the middle finger of the opposite hand to locate Qimen and massage with circular motions. To stimulate both sides simultaneously, you can use both middle fingers. Massage each acupoint for 3-5 minutes.

    Effects: As a major acupoint of the gallbladder meridian, it is excellent for relieving breast pain caused by stress and tension. It is particularly effective for pain caused by nervous tension and pre-menstrual breast pain.

    5. Taichong (LR3) — Improving Liver Function to Address Root Causes

    Location: On the top of the foot, slightly above where the bones of the big toe and second toe meet. It can be found by following the raised area of the foot upward.

    Massage Technique: Sit and place one foot on your lap, then slowly press and massage Taichong with your thumb. Repeat by pressing for 5 seconds and resting for 5 seconds while breathing, massaging each foot for 2-3 minutes. Apply to both feet.

    Effects: A key acupoint for regulating liver function, it addresses the root causes of breast pain from hormonal imbalance and stress. It is also often accompanied by improvement in irregular menstruation, emotional fluctuations, and chronic fatigue.

    5-Minute Self-Massage Routine

    Here is a 5-minute routine that can be practiced even during a busy day. Perform once or twice daily, in the morning or evening.

    1. Preparation (30 seconds): Sit or lie comfortably and take 3-4 deep breaths to relax your body and mind.
    2. Danzhong Massage (1 minute): Overlap the thumbs of both hands and press Danzhong 30 times with gentle, rhythmic pressure.
    3. Zhuozhong & Yuruan Massage (2 minutes): Massage both sides of Zhuozhong with circular motions for 1 minute each. (Total: 1 minute) Then massage Yuruan on both sides for 30 seconds each. (Total: 1 minute)
    4. Qimen Massage (1 minute): Simultaneously massage both sides of Qimen with circular motions for 1 minute.
    5. Taichong Massage (30 seconds): As a finish, stimulate Taichong on both feet for 15 seconds each with quick, firm pressure.
    6. Cool Down (30 seconds): Take 3-4 deep breaths to allow energy to spread throughout your body.

    💡 Tip: Consistency is key. You can feel results if you continue for more than 3 weeks. Rather than doing this only when you have pain, practice regularly as a preventive measure.

    ⚠️ Medical Disclaimer: This article is written for informational health purposes and does not replace professional medical diagnosis or treatment. If symptoms persist or are severe, be sure to consult with a healthcare professional.
    🤰 Pregnancy Warning: Among the acupoints above, Taichong (LR3) may cause uterine contractions in pregnant women. If you are pregnant or may be pregnant, be sure to consult with a professional before practicing. The other acupoints—Danzhong, Zhuozhong, Yuruan, and Qimen—are generally safe, but it is recommended to consult with your doctor before trying any new procedures during pregnancy.